


CHAPTER 3: OPERATION – ADMINISTRATIVE FUNCTIONS 17
Network Configuration
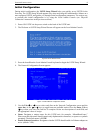
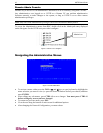
Use the TAB, Ç, or È key to highlight [C] Configure UST-IP on the Main Menu (or press C)
and press ENTER. At the Configuration Menu, select [N] Network Configuration and press
ENTER. Please note that after you have made changes to the Network Configuration, you must
press CTRL+S to save your changes. Reboot after all changes are saved to apply them to your
Network.
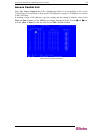
Figure 13 Configuration Menu
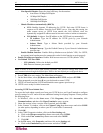
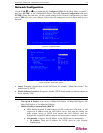
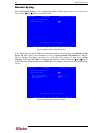
Figure 14 Network Configuration Screen
• Name: Designate a unique name for this USTIP unit, for example, “Miami Data Center.” The
default name is USTIP.
• Enable Ethernet Interface: Designates whether USTIP should enable its Ethernet adapter as
active (default: YES).
Note: Network connections must be 10BASE-T or 100BASE-TX Ethernet
− Line Speed & Duplex: Auto detect 10 Mbps/Full Duplex, 10 Mbps/Half Duplex, 100
Mbps/Full Duplex, or 100 Mbps/Half Duplex
− Obtain IP address automatically (DHCP):
♦ YES: Enables dynamic IP addressing for USTIP. Each time USTIP boots, it will
request an IP address from the local DHCP server. Note that this setting can
make remote access to USTIP from outside the LAN difficult, since the
dynamically assigned IP address must be known in order to initiate a connection.
♦ NO (default): Assigns a fixed IP address to the USTIP unit (recommended).
IP Address: Enter the IP address for USTIP given by your Network
Administrator.