


Chapter 2 21
Using On-Screen Menus
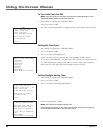
Adding or Removing Channels
You might want to add or remove channels after using Auto Channel Search, especially if there
are weak signals or channels with content you don’t care for.
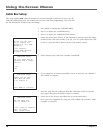
1. Press the MENU button to display the VCR MAIN MENU.
2. Press 4 to choose CHANNELS.
3. Press 2 to choose ADD/REMOVE CHANNELS. To go to the channel you want to add or
remove, use the remote control’s CHANNEL + or – buttons or enter a specific channel
number using the number buttons.
Once the desired channel is displayed, the on-screen menu will tell you if the channel is
currently in the VCR’s viewing list. Press the CLEAR button to remove a channel from the
available channels list or press the INFO button to add it.
4. Press the MENU button to exit out of the menus.
Note: To view active channels, use the remote control’s CHANNEL + and – buttons. You can
also access channels not available in the active channel list by using the remote control’s
number buttons to enter a specific channel number.
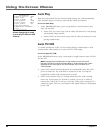
Time and Date
Your VCR gives you two ways to set the time and date; manually or by using the Auto Clock Set
feature. Using Auto Clock Set enables the time to be updated each time the VCR is turned off by
using time and date information carried in certain broadcast signals (not available in all areas).
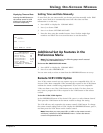
Auto Clock Set Feature
The Auto Clock Set feature is set to ON by default at the factory. In the ON setting, the VCR
looks for a channel carrying time data and updates the clock automatically. In order for Auto
Clock Set to work properly though, you should complete the interactive Setup (Number 5 in the
VCR Main Menu), including entering your Zip Code.
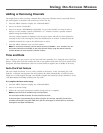
To Complete the Interactive Setup:
1. Press the MENU button to display the VCR MAIN MENU.
2. Press 5 to choose Setup.
3. Follow the on-screen instructions until the setup process is complete.
Notes: Auto Clock Set is available only in limited areas.
You must set available channels for Auto Clock Set to work.
If the time does not automatically set after trying for ten minutes, manually set the time
and date information using the TIME menu (see the next page for information on manually
setting time and date information).