15
Connecting
HD component video can be converted to HDV, and the HD video can be recorded onto HDV tape.
When recording HD component output from an HD video switcher, inexpensive HDV tape can be used.
Connection and Configuration
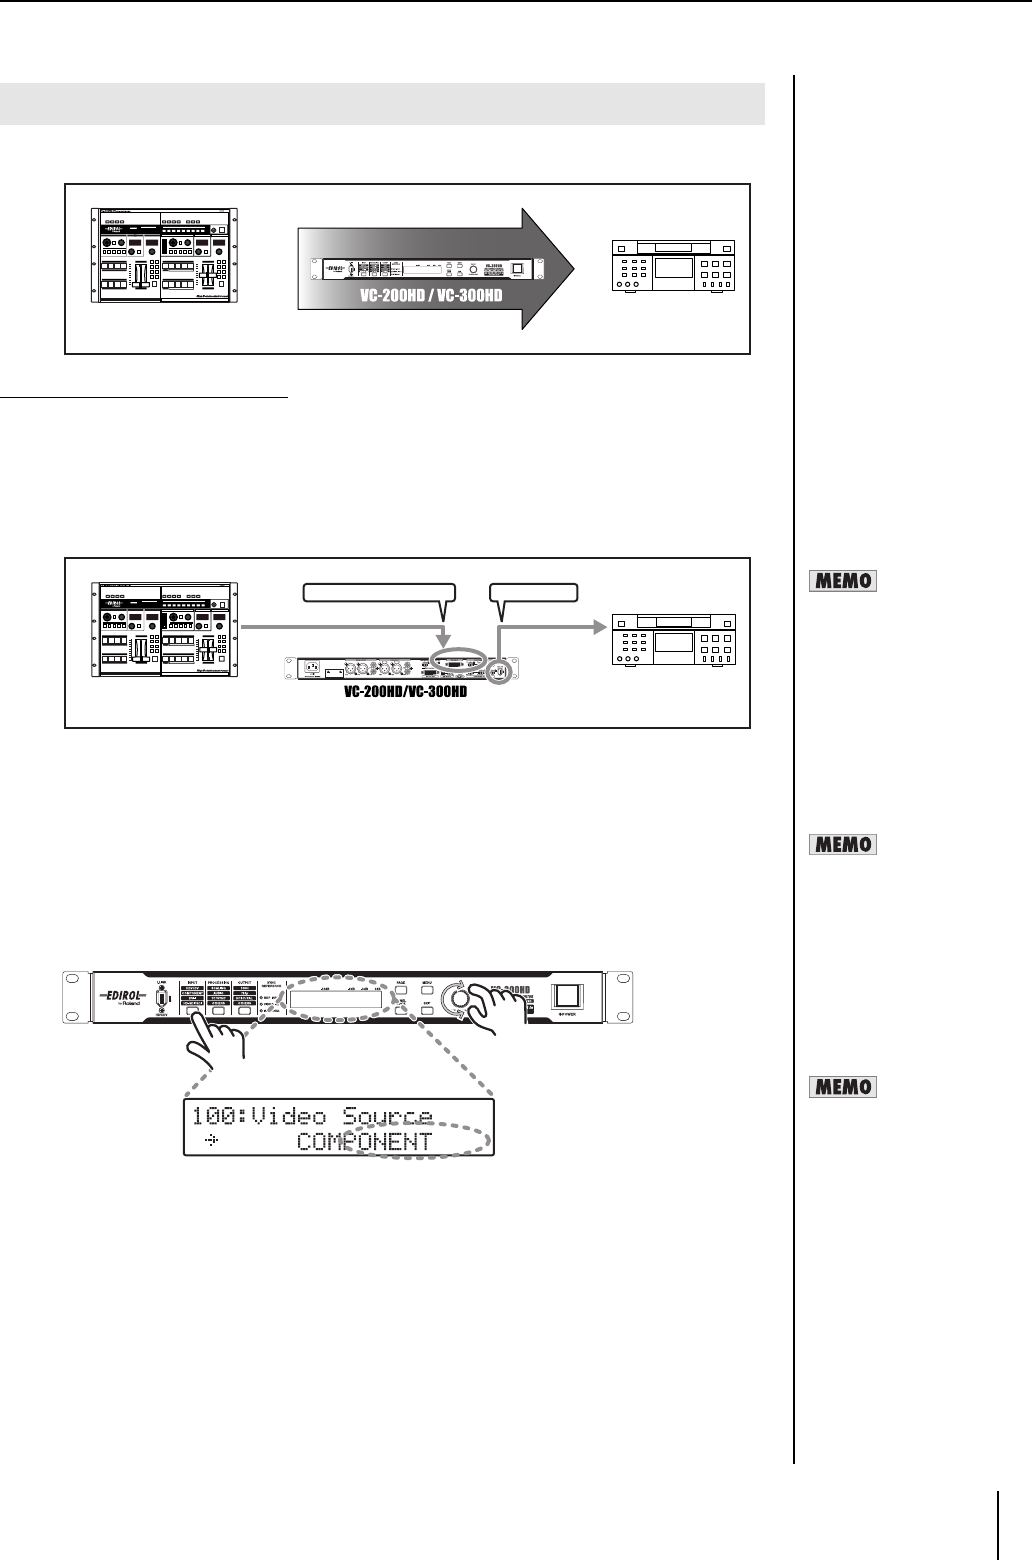
1 Connect the HD video device to the COMPONENT INPUT connector using a BNC
cable.
* Make sure to connect the BNC cable securely. If the connection is bad, the color of the output video
may be off or synchronization may be lost.
2 Connect the HDV device to the i.LINK connector using an i.LINK (IEEE1394) cable.
3 Connect the HD video device (or audio device) to the AUDIO INPUT connectors with
an audio cable.
4 Press the POWER switch to start the unit.
After the unit starts, turn on power to the HD video device and the HDV device.
5 Select the video input connector.
5-1. Press the INPUT button until "100: Video Source" is shown in the display.
5-2. Use the VALUE/ENTER knob to select "COMPONENT."
5-3. Press the VALUE/ENTER knob to confirm the selection.
Converting HD Component to HDV
HD video device
HDV device
HD video device
HDV device
VC-200HD / VC-300HD
COMPONENT INPUT iLink
BNC x3 IEEE1394
When the output from the
i.LINK connector on this unit is
not recognized by the HDV
device, turn off power to this
unit and then restart it.
At the factory default settings,
audio input to the Ch1 and Ch2
AUDIO INPUT connectors is
converted to HDV audio.
If you want to use audio input
to AUDIO INPUT connectors
Ch3 and Ch4, select "CH1-2:3-
4 CH3-4:1-2" or "CH1-2:3-4
CH3-4:3-4" in the "160:AUDIO
In Ch" menu (p. 32).
To adjust the nominal input
level of audio input to the
AUDIO INPUT connectors, use
the "161: In Ch1&2 NomLv"
menu (p. 33) and the "162: In
Ch3&4 NomLv" menu.


