


Operation
88 Q-1500d Series Installation/Operation Manual
PRE
L
IMINAR
Y
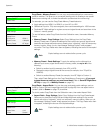
Network: The options in the Network menu allow you to configure the network
communication features.
• IP Configuration: Select IP Configuration from the Network menu to either set the IP
address, subnet mask and default gateway of the DHD Controller manually or obtain
these settings automatically, from a DHCP (Dynamic Host Configuration Protocol)
server. (Most broadband routers and gateways support DHCP.) You can also test the
network connection from this menu.
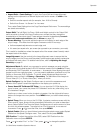
• DHCP: To enable the DHCP client in the DHD Controller, select DHCP from the IP
Configuration menu and set it to On. With this setting, the DHD Controller’s IP
address, subnet mask and default gateway are assigned by the local DHCP server.
To manually configure these values, set DHCP to Off.
• IP Address: Select IP Address from the IP Configuration menu to manually
configure the IP Address of the DHD Controller, as follows:
1. Press or to select the first, second, third or fourth byte of the address.
2. Press or to set the value of that byte. The range is from 0 to 255 inclusive.
3. Repeat Steps 1 and 2 for all four bytes of the address.
4. Press MENU when you have finished setting the address.
• Subnet Mask: Select Subnet Mask from the IP Configuration menu to manually
configure the IP subnet mask. The procedure is similar to that for setting the IP
address.
• Default Gateway: Select Default Gateway from the IP Configuration menu to
manually configure the default IP gateway. The procedure is similar to that for setting
the IP address.
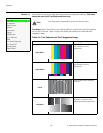
• Communication Test: Select Communication Test from the IP Configuration menu
to verify proper operation of the network communication link.
To start the test, select Start Test from the Communication Test menu. The DHD
Controller displays the message “Performing Communication Test.” When the test
completes, the DHD Controller displays either “Failed” (along with the error that
occurred) or “Succeeded.”
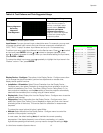
• Auto Firmware Upgrade: Select Auto Firmware Upgrade from the Network menu to
enable automatic detection of a newer version of the DHD Controller firmware. If one is
found, you can configure the DHD Controller to install it automatically. These features
make it easier to keep your DHD Controller firmware up-to-date.
• Auto Check For New Firmware: To have the DHD Controller automatically check
for firmware updates at periodic intervals, select Auto Check for New Firmware from
the Auto Firmware Upgrade menu and set it to On. If you prefer to do this manually,
set it to Off and use the Check For New Firmware sub-menu (described below).
• Auto Perform Upgrade: If the “Auto Check For New Firmware” process
determines that a newer firmware version than the one currently installed is available,
you can have the DHD Controller automatically download and install it. To do this,
select Auto Perform Upgrade from the Auto Firmware Upgrade menu and set it to
On. The upgrade will occur the next time the DHD Controller is “power-cycled”
(powered off, then on again).
The IP Address, Subnet Mask and Default Gateway items in the IP
Configuration menu are disabled (grayed out) when DHCP is
enabled.
Note