


Installation
Q-1500d Series Installation/Operation Manual 51
PRE
L
IMINAR
Y
3.8
Power-Up Sequence
and Optical Alignment
Procedure
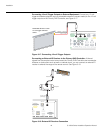
At this point you are ready to perform the initial power-up sequence and optical alignment
procedure, which is summarized in Table 3-6 and described in detail in the sections that
follow.
This procedure assumes the following:
• You are installing a projector equipped with anamorphic lenses. (If not, you can skip
those tasks relating to the anamorphic lenses.)
• You have already completed the physical installation of the projector, DHD Controllers
and Brightness Acceleration Engine as described in the previous sections. If you have
not, do so now.
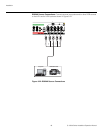
• You have connected the various system components to each other, to external
equipment and to AC power. If you have not, do so now.
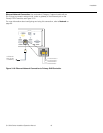
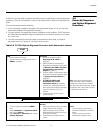
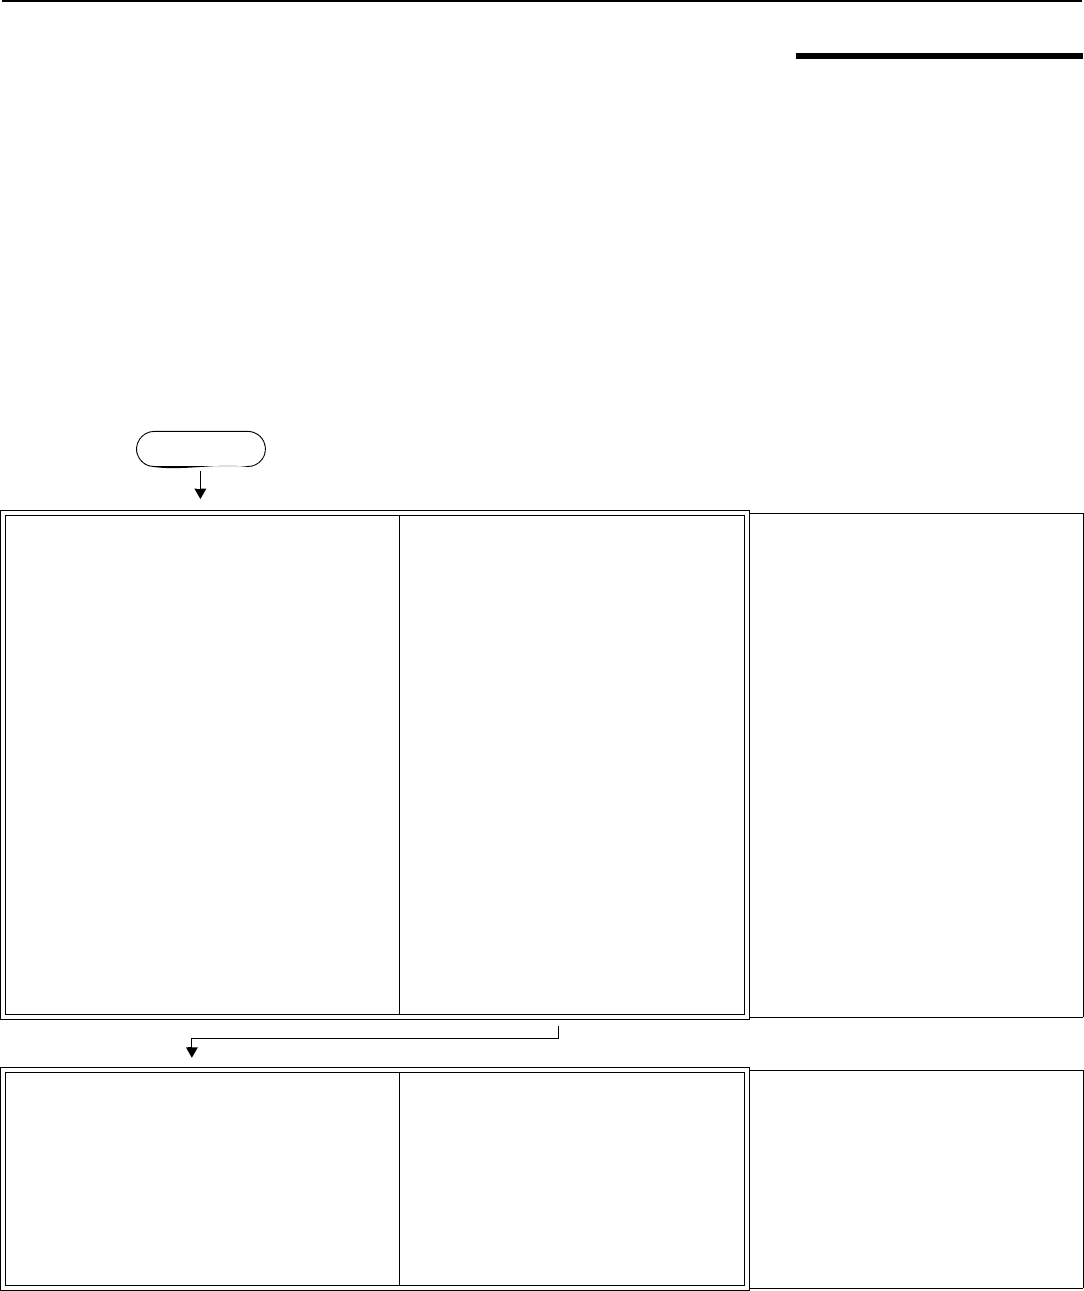
Table 3-6. Q-1500d Optical Alignment Procedure (with Anamorphic Lenses)
DHD
1. Leave system off for now.
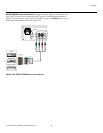
2. Connect an active 1080p source to the
HDMI 1 connector.
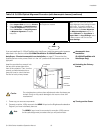
Projector
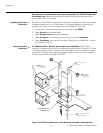
1. Mount the projector (refer to
Mounting the Q-1500d on
page 36).
2. Mount the DHD Controllers and
Brightness Acceleration Engine (refer
to Mounting the DHD Controllers
and Brightness Acceleration
Engine on page 37).
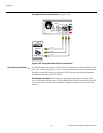
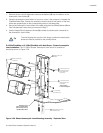
3. Connect system components to each
other and to external equipment (refer
to System Interconnections on
page 38).
4. Q-1500d/CineWide with
AutoScope only: Install
anamorphic lenses in retracted
position (out of the light path) and
ensure that the AutoScope transport
motor AC switch is in the “off”
position.
5. Loosen the lock screw for both
primary lenses.
Note: At this point the anamorphic
lenses are simply used as weight to
maintain the correct center of gravity
while you adjust the primary lens, so that
the projector won’t shift when you add
the anamorphic lenses later.
DHD
1. Turn on system and select the HDMI 1
input.
2. Select Calibration -> Adjustment Mode
and set it to Primary.
3. Select Service -> TestVideo and choose
Primary Alignment.
Projector (Align Primary Image with
Screen)
1. Adjust the ceiling mount to correct for
image keystone and clocking.
2. Align the image to the screen by
adjusting the top primary lens zoom,
focus and H/V offset.
3. Tighten the top primary lens lock
screw.
Notes:
1. You must enter a passcode to
access the Calibration or Service
menu.
2. The lock screw locks all lens
adjustments except for focus.
START