34
CHAPTER FOUR
Special Features
4
35
CHAPTER FOUR
Special Features
4
Setting the Local Time
You may set the local time zone for your Set-Top Box to synchronize programming times.
1
Press the MENU ( ) button on your remote control.
2
Use the
/
buttons to select the
Setup menu and press the
ENTER
( ) button. Use the
/
buttons
to select Local Time and press the
ENTER ( ) button.
3
Use the
/
buttons to select
Daylight Saving Time and press
the ENTER ( ) button to decide
whether or not to use the daylight
saving time.
4
Use the
/
buttons to select
Time Zone and press the
ENTER
( ) button to select your time
zone. When you move the cursor
using the
/
buttons, the position
of the highlighted time zone is
displayed on the map.
NOTE
You can see the current time when pressing the INFO ( ) button.
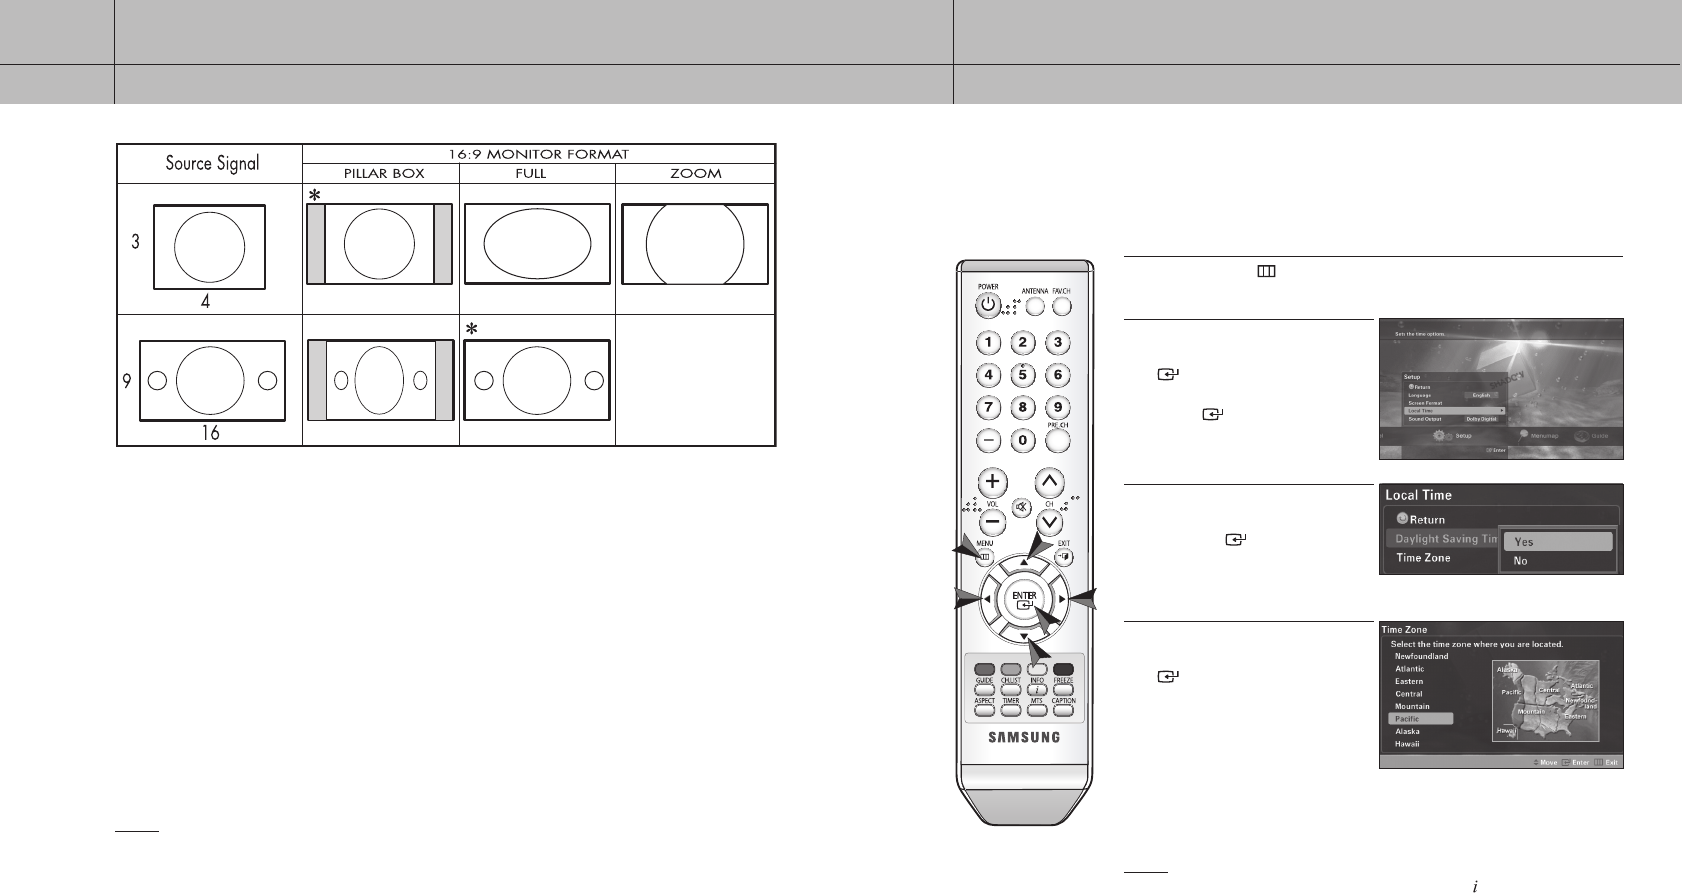
If you are using a 16:9 aspect ratio TV or monitor
and receiving an image with a 4:3 aspect ratio, the
image will be displayed at the 4:3 aspect ratio on your
monitor unless you specify otherwise. The Screen
Format menu allows you to adjust the image through
the following options:
Pillar box
Choose this when receiving a 4:3 image and you
want the on-screen appearance of the video to be a
centered picture with blank panels on the right and
left sides.
Full
Choose this when you want the television to adjust
the 4:3 image horizontally so it fills your 16:9 screen.
No blank panels will be added, and the image is
vertically unaltered. This setting is especially useful for
viewing 4:3 formatted DVDs.
Zoom
Choose this when receiving a 4:3 image and you want
to maintain the correct image proportion. Top and
bottom portions of the picture are cropped, or cut.
NOTE
: This indicates the default format in each condition, which may be modified by user’s choice. The
availability of changing the Screen Format feature depends on the RESOLUTION SELECT switch setting
and the current broadcasting signal format.
With a 16:9 Ratio TV
34-35 2006-10-12 ソタネト 1:13:54
