


English - 26
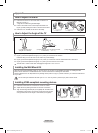
(1) Angle adjustment when
using the TV on its stand.
(2) Angle adjustment when converting from Stand
toWallmount(1→3,3→1)
(3) Angle adjustment when LCD TV is
wall-mounted
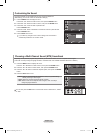
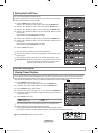
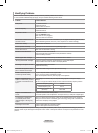
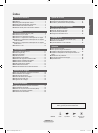
How to Adjust the Stand
1. Place the front of the TV onto a soft cloth or cushion on a
table as in Figure (1).
- Align the TV bottom along the table edge.
2. Press on the center of the TV back. Adjust the stand as in
Figure (2) while pressing the button on the back of the stand.
3. Place the TV on the table so that the TV sits safely.
Appendix
Button
(1) (2)
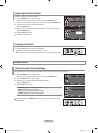
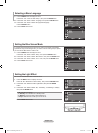
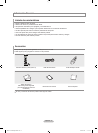
How to Adjust the Angle of the TV
When you adjust the stand, press the button on the back of the stand.
1. Figure (1) shows the adjustment angle (-2°~14°) when you use the LCD on its stand.
Excessive tilting can turn the LCD TV over which may cause damage.
2. Figure (2) shows the adjustment angle (14°~80°) when you convert the LCD from stand-based use to wall-mount.
3. Figure (3) shows the adjustment angle (0°~10°) when you mount the LCD TV to a wall.
You will hear a “Click” sound when changing the angle from 1 to 2 or 3 to 2.
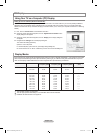
Installing the Wall Mount Kit
Wall mount items (sold separately) allow you to mount the TV on the wall. For the detailed information on installing the Wall
Mount, see the instruction in the Wall Mount items. Contact a technician for installing the wall bracket.
Samsung Electronics is not responsible for any damage to the product or injury to yourself or others if you choose to install the TV
on your own.
Do not install your Wall Mount Kit while your TV is on. This may result in personal injury due to electric shock.
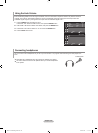
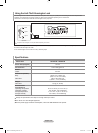
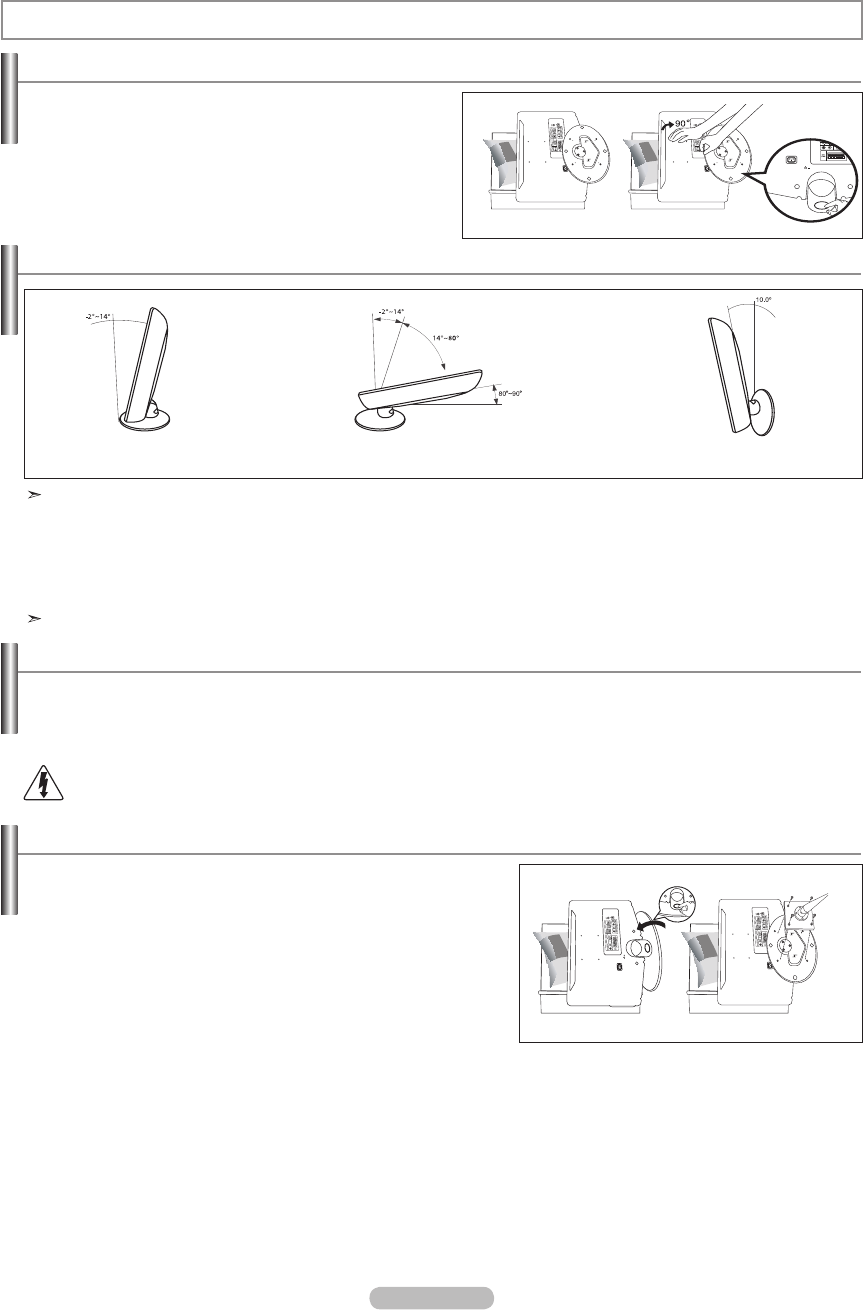
Installing VESA compliant mounting devices
1. Place the TV face down on a soft cloth or cushion on a table.
2. Adjust the stand, pressing the button on the back of the stand.
3. Align the mounting interface pad (not supplied) with the holes in the
stand bottom and secure it with the four screws that come with the
arm-type base, wall mount hanger or other bases (not supplied).
Button
Mounting pad
(sold separately)
(2) (3)
BN68-01184D-00Eng-0806.indd 26 2007-08-06 �� 3:31:48