English _69
WEB VIEWER
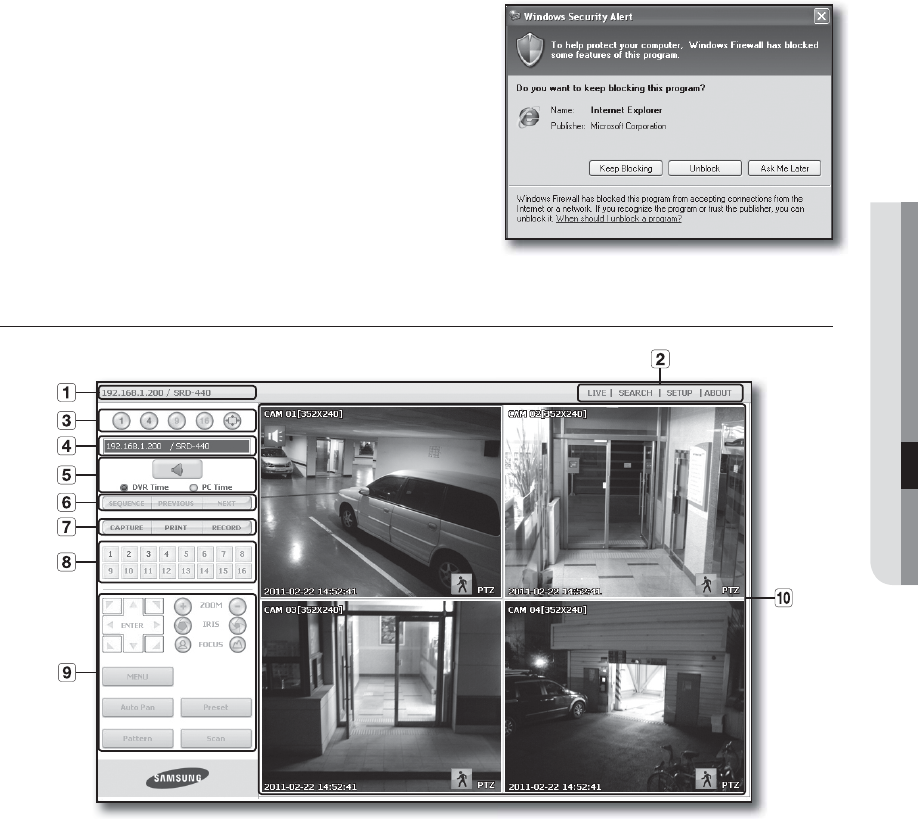
5. You may have “Windows Security Alert” that attempts to
block this with the Windows Firewall. In that case, click
<Unblock> to start Web Viewer.
6. Installation is complete.
Now you can see the main screen of Live Viewer.
USING LIVE VIEWER
The Live Viewer screen consists of following :
a This displays the IP address and the model name of the connected DVR.
b These menus consist of <LIVE>, <SEARCH>, <SETUP>, <ABOUT>.
c These buttons are used for the screen split and full screen mode.
d Shows the IP address and model name of the connected DVR.
e Select to turn the sound on/off.
Select <DVR Time> or <PC Time> for the OSD time information display setting of the Live Viewer.
f These buttons are used for sequence and changing the screen channel.
g These buttons are used for capture, print, and save the image.
h Shows the channel of the connected DVR.
i These buttons are used for PTZ related functions.
j
This displays the screen for connected camera with DVR.
M
The resolution is set to 1024X768 pixels.
The initial split-screen mode is set according to the number of channels connected to DVR. You can change the
split-screen mode by clicking buttons for split-screen modes.
