Install Manual
57
1. Turn DVR power OFF.
2. Connect external device and eSATA interface cable.
3. Turn external device power ON.
4. Turn DVR Power ON.
3.3.4.3 Supported HDD
Refer to the appendix in the back of the manual for information on supported HDDs.
3.3.4.4 Registering & formatting HDDs
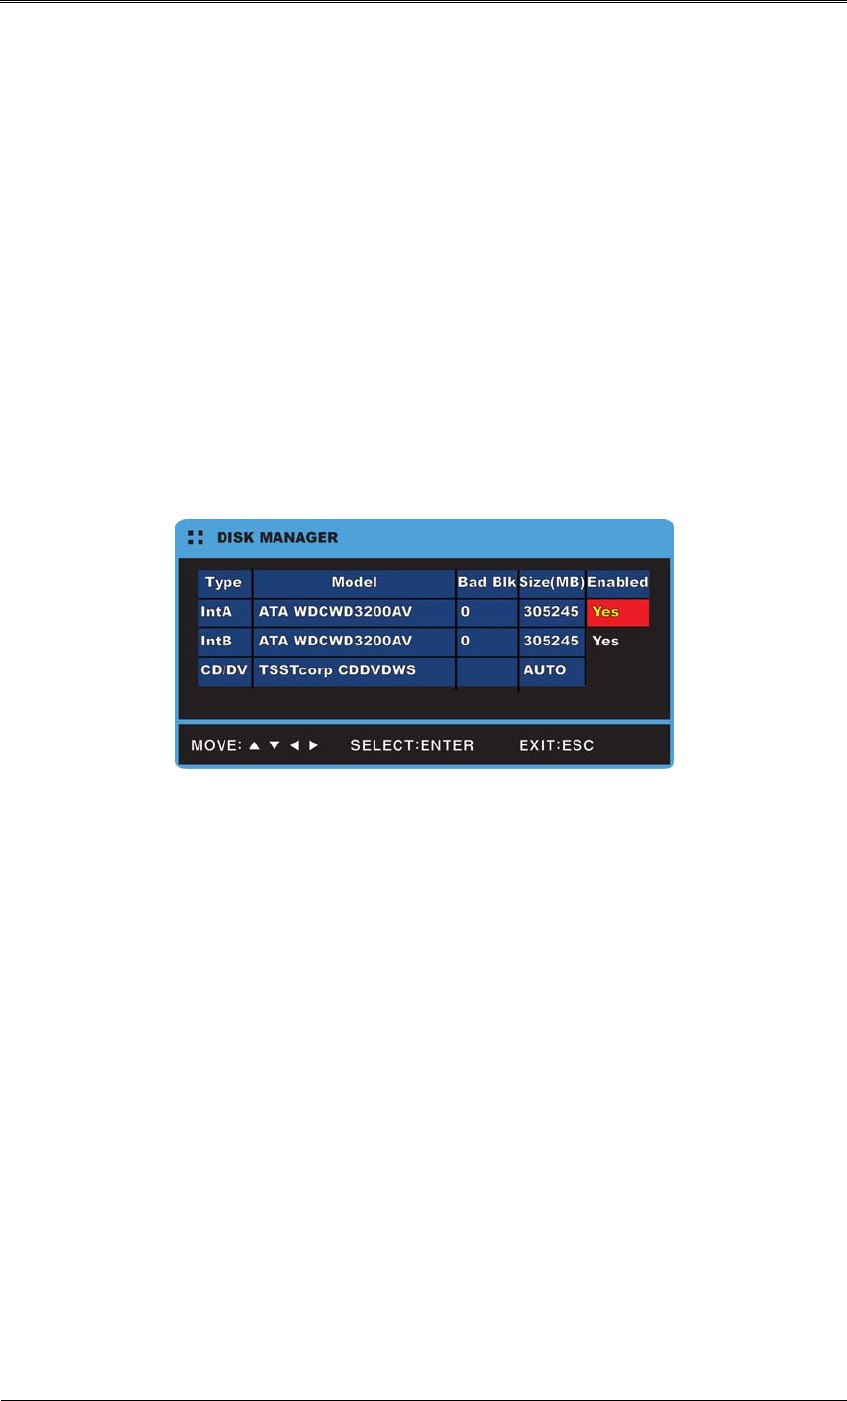
When the DVR is first booted after a new HDD is physically installed, the "Disk Manager"
automatically runs as shown in the following figure.
If the “Disk Manager” does not run, check that the HDD is properly installed.
(1) Press [Enter] with “Disk Manager” selected.
(2) Press [▲/▼] to select the new HDD (“No” under the “Enabled” column heading), and then
press [Enter].
(3) If prompted to format the disk, select “YES”.
(4) Close “Disk Manager” by pressing [ESC].
3.3.4.5 Attaching & Detaching HDD
Please follow the instructions below to add or replace an HDD.
Attaching an HDD
Attach the enclosed HDD fixture screws to both sides of the HDD.
With 2 fixture screws to a side, attach 4 screws to the HDD.
The following picture shows an HDD attached with 4 fixture screws.


