Install Manual
58
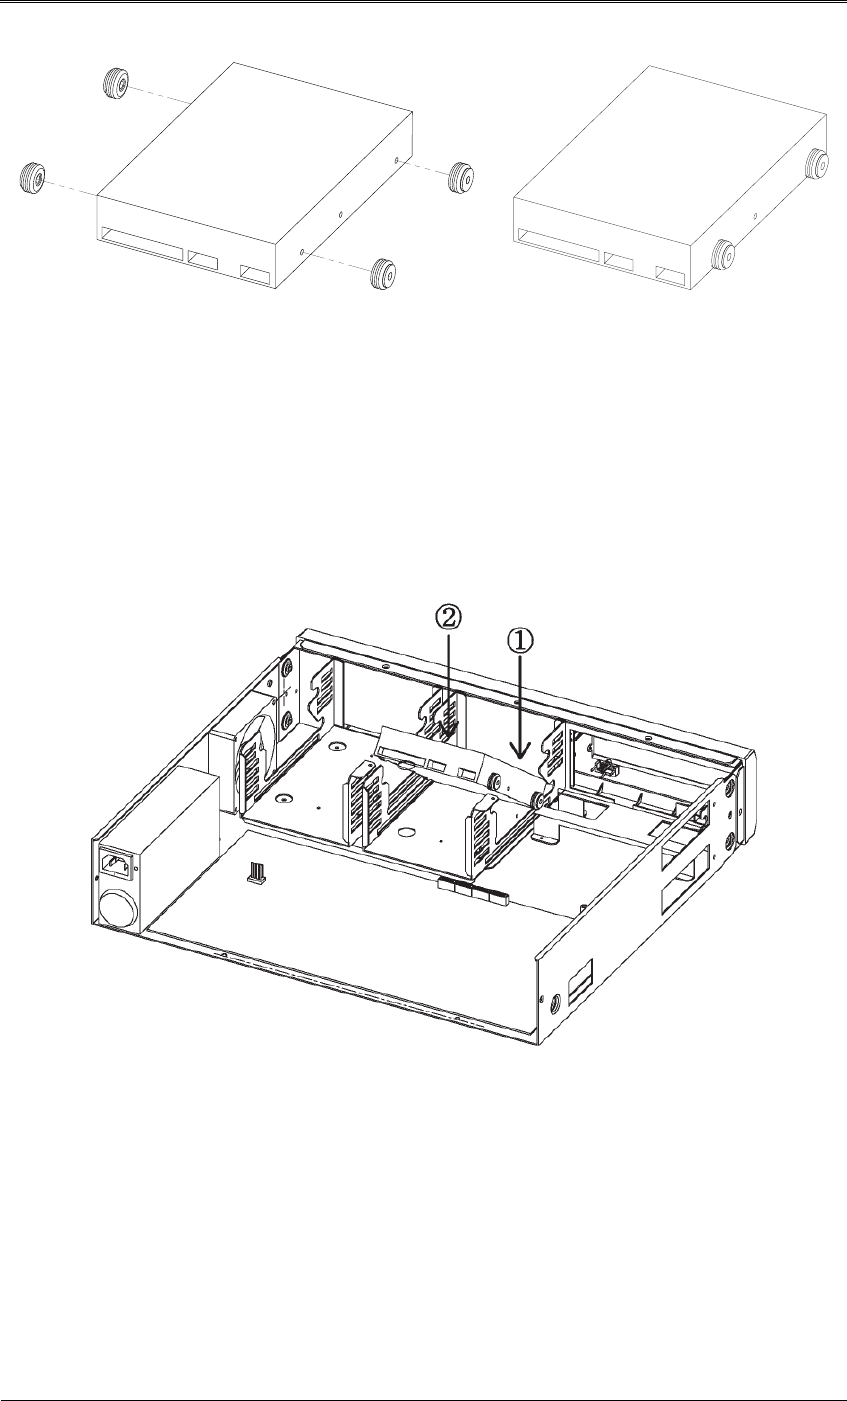
Once the HDD is attached with the screws, insert it into an HDD bracket.
For the location of HDDs, IntA is the bottom right, IntB is the upper right, IntC is the bottom left,
and IntD is the upper left.
The following picture shows an HDD being inserted to IntA.
When attaching an HDD, first insert the front part of the HDD to the bracket, and then press
down on the other side with the SATA port.
Once the HDD is inserted, connect the SATA and power cables.
As shown in the picture below, connect the enclosed SATA cable, and then an SMPS power
cable.
The following picture shows the product attached with the maximum 4 HDDs.


