


ENGLISH
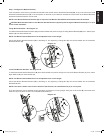
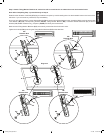
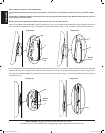
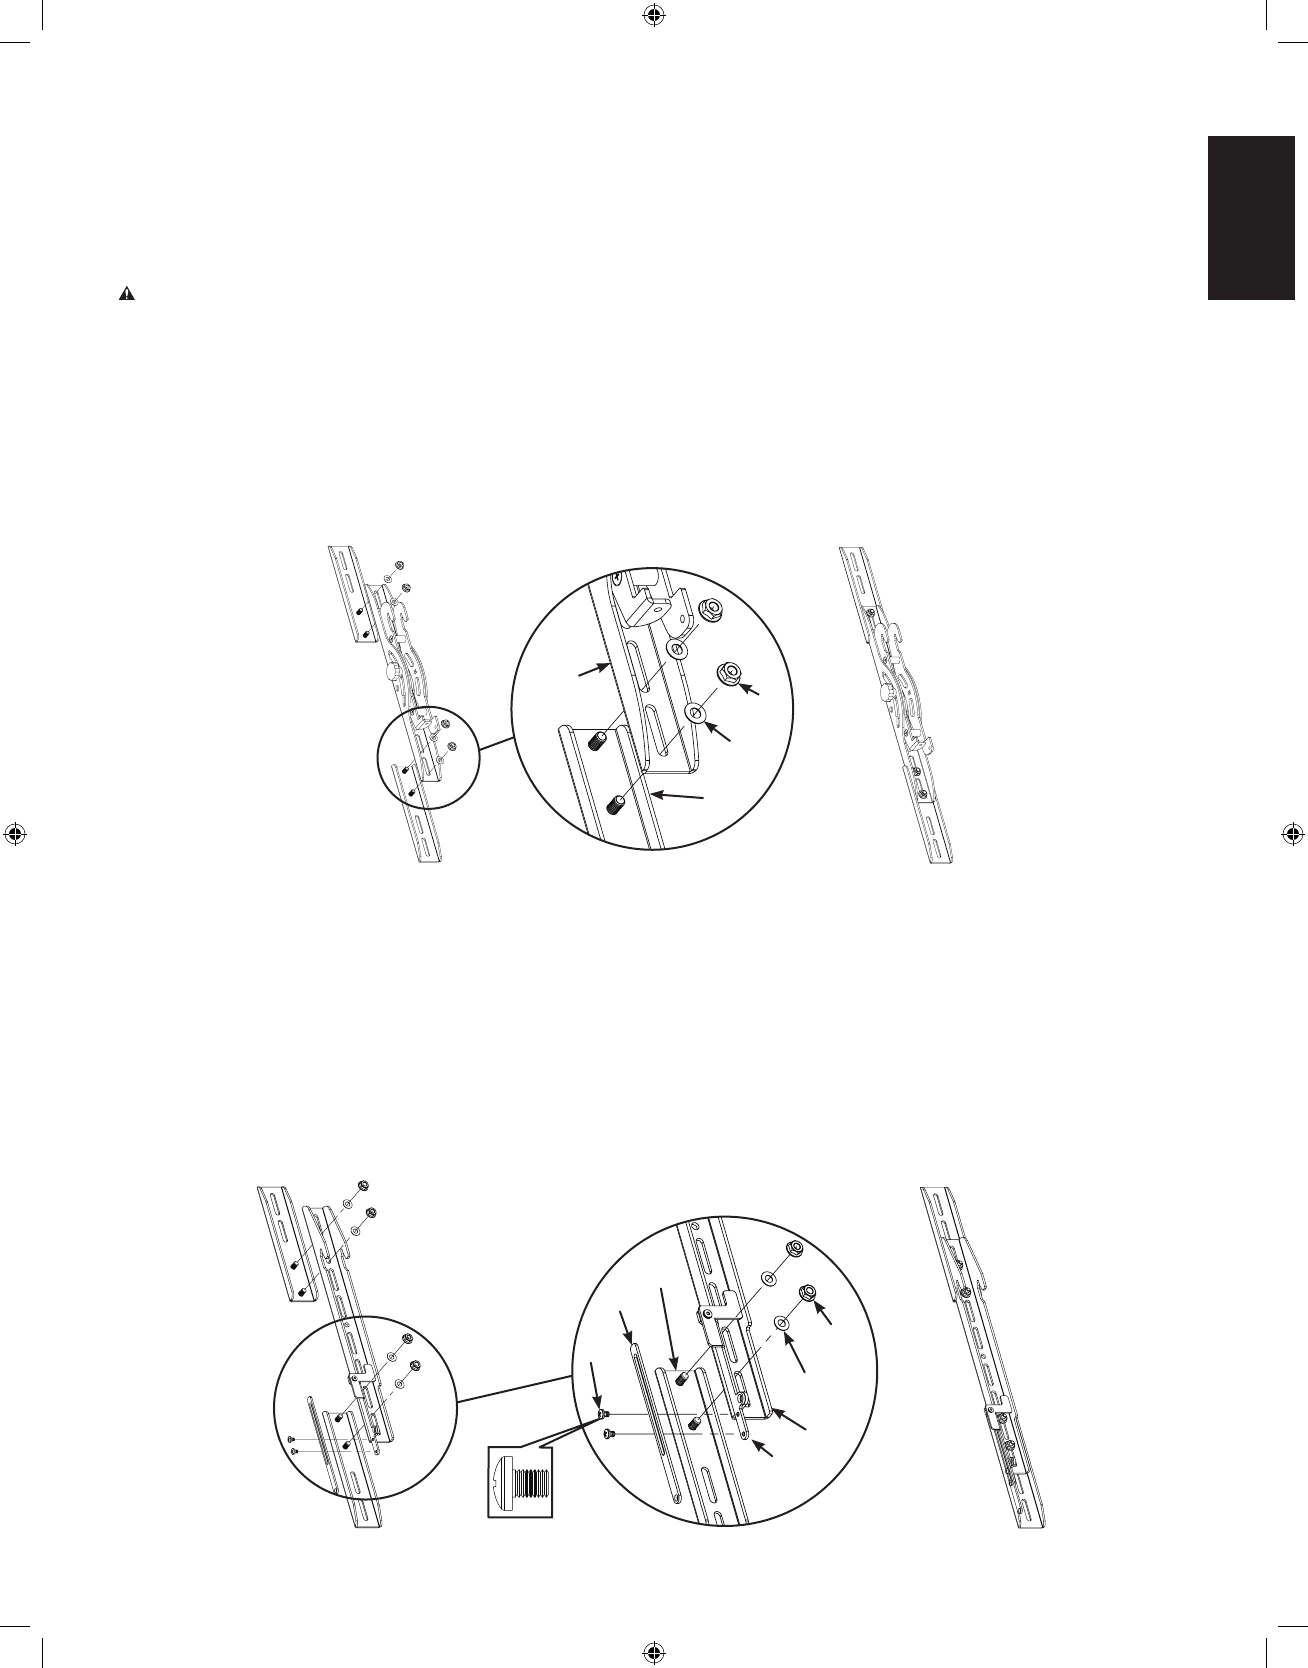
Low Prole Monitor Brackets - See Diagram 1B
To install the Monitor Bracket Extensions (B) place the threaded stud portion through the Low Prole Monitor Bracket (F); then, slide a
Nylon Washer (G) onto the threaded stud.
NOTE: The Monitor Bracket Extensions can be adjusted to the correct height.
Secure the Monitor Bracket Extension (B) by threading on, and tightening a Flange Nut (H) onto each threaded stud of the Monitor
Bracket Extension.
NOTE: If the latch is within reach from the bottom of the televison, the Latch Extension (C) is not required.
The Latch Extension may be adjusted for easy operation on televisions of varying height. Using the 10-32 Screws (N), secure the Latch
Extension (C) to the latch on both Low Prole Monitor Brackets (F).
Diagram 1B
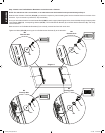
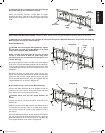
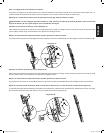
Step 1: Congure the Monitor Brackets
If the hole pattern on the back of your television falls within the vertical reach of the Monitor Brackets (D,E, or F) you do not have to install
the Monitor Bracket Extensions (B). If the hole pattern on the back of your television exceeds the vertical reach of the Monitor Brackets,
the Monitor Bracket Extension must be used.
NOTE: If the Monitor Extension Brackets (B) are required, both Monitor Bracket Extension Brackets must be installed.
CAUTION: Both threaded studs on each Monitor Bracket Extension (B) must pass through the Monitor Bracket (D, E, or F) to
ensure a safe installation.
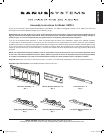
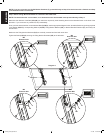
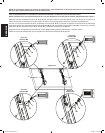
Tilting Monitor Brackets - See Diagram 1A
To install the Monitor Bracket Extensions (B) place the threaded stud portion through the Tilting Monitor Bracket (D,E); then, slide a Nylon
Washer (G) onto the threaded stud.
NOTE: The Monitor Bracket Extensions can be adjusted to the correct height.
Secure the Monitor Bracket Extension (B) by threading on, and tightening a Flange Nut (H) onto each threaded stud of the Monitor
Bracket Extension (B).
Diagram 1A
H
G
B
D & E
H
G
F
B
C
N
latch
VMPL3_051106_ML.indd 5 7/17/06 11:37:03 AM