


40
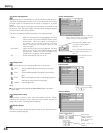
Computer Input
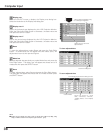
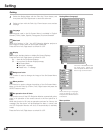
Image Level Adjustment
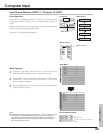
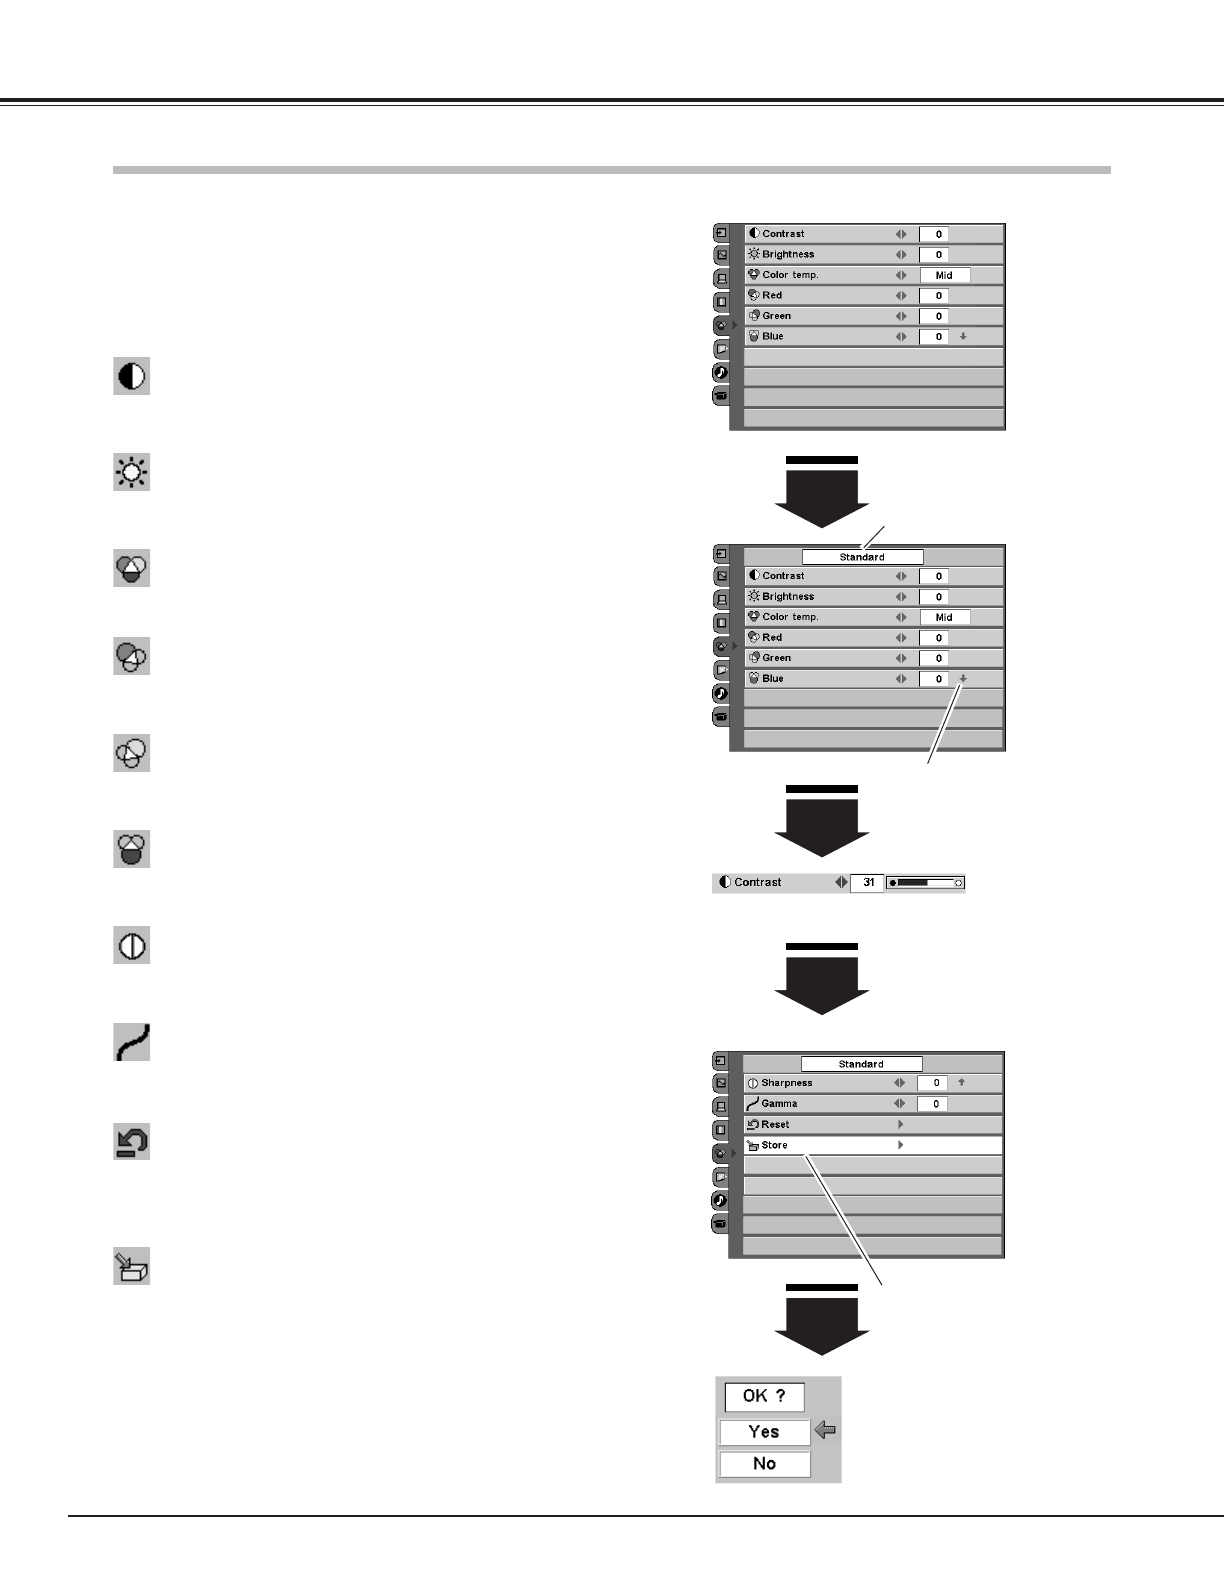
Select the Image Adjust Menu with the Point Up / Down button,
and then press the Point Right button to enter the sub-menu.
1
2
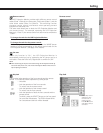
Select an item with the Point Up / Down button and press the
Point Left / Right button to adjust the item.
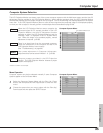
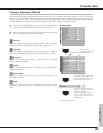
Press the Point Left button to decrease contrast and the Point Right
button to increase contrast. (From -31 to +31)
Press the Point Left button to adjust image darker and the Point Right
button to adjust image brighter. (From -31 to +31)
Contrast
Brightness
Press the Point Left / Right button to obtain better balance of
contrast. (From -7 to +7)
Gamma
Press the Point Left button to soften the image and the Point Right
button to sharpen the image. (From -7 to +7)
Sharpness
Press the Point Left button to lighten red tone and the Point Right
button to deepen red tone. (From -31 to +31)
White balance (Red)
Press the Point Left button to lighten green tone and the Point Right
button to deepen green tone. (From -31 to +31)
White balance (Green)
Press the Point Left button to lighten blue tone and the Point Right
button to deepen blue tone. (From -31 to +31)
White balance (Blue)
Press the Point Left / Right button for Color temperature level that
you want to select. (Low3, Low2, Low1 Mid, High)
Color temp.
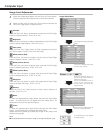
To store the adjusted data, select Store and press the Point Right
button. A confirmation box will appear and select [Yes].
Stored data can be called up by selecting "Image" in the Image Level
Selection on page 39.
To reset the adjusted data, select Reset and press the Point Right
button. A confirmation box will appear and then select [Yes]. All
adjustments return to their previous figures.
Reset
Store
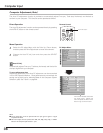
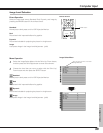
Image Adjust Menu
This arrow indicates that there
are other item menus.
Press the SELECT button or
the Point Up / Down button to
adjust the next item.
Press the MENU button to
return to the previous On-
Screen Menu and store the
adjusted value.
A confirmation box will appear
and select [Yes].
Press the Point Right button at
this icon to store the value.
NOTE:
● The adjusted parameters will be stored in "Image" on the Image Level Selection. (p39)
The Image level being selected
(p39)