SINGLE IMAGE RECORDING
The single image recording function of this VCR can be
used to create image data files or animations.
Single Image Recording Setup
1 In stop mode, press the REC/PLAY SPEED l
button, to set the recording speed to “000”.
2
Press the MENU button to display the MAIN MENU.
3
Press the l (or j) button to select the
“5.ALARM/SERIES REC SET” line, then press the
ENTER button.
ø The (ALARM/SERIES REC SET) menu
appears.
<ALARM/SERIES@REC@SET>
*ALARM@SET
@@MODE@@@@@@@@@@@Y1
@@SPEED@@@@@@@@@@8H
@@DURATION@@@@@@@20S
*1@SHOT@SET
@@FIELD@@@@@@@@@@1
@@INTERVAL@@@@@@@1M
*SERIES@REC@@@@@@N
*TAPE@END@OUT@@@@8:00
4
Press the l (or j) button until the “FIELD” setting is
highlighted, then press the ENTER button.
5
Press the l (or j) button to set the number of fields
(images) to record every time (1, 2, 3, 4, 5, 10, 30,
60), then press the ENTER button.
6
Press the ENTER button.
7
Press the l (or j) button to set the interval between
each image recording (1M, 2M, 3M), then press the
ENTER button.
8
Press the MENU EXIT button.
9
Press the REC button.
ø The single image recording mode will be
activated (the VCR will be in recording stand-by
mode).
F
Press the REC button one more time, or send a
trigger through the 1 SHOT IN terminal on the back
panel, to start the single image recording.
NOTE:
œ If a setting other than “1” is selected for “FIELD” at
step 5, recording will be done in 120-hour mode.
The recording speed cannot be modified.
G
When finished, press the STOP button.
NOTES:
œ The trigger at the 1 SHOT IN terminal should be on
for 0.1 sec. or more.
œ The trigger interval at the 1 SHOT IN terminal varies
according to the number of images to record, but
should be over 1 sec.
œ Alarm recording is not possible during single image
recording.
œ During the “INTERVAL” period set for single image
recording, the WARNING OUT terminal will not be 0 V
even if the “NON REC” on the (WARNING
OUT/CONTROL SET) menu is set to “Y”.
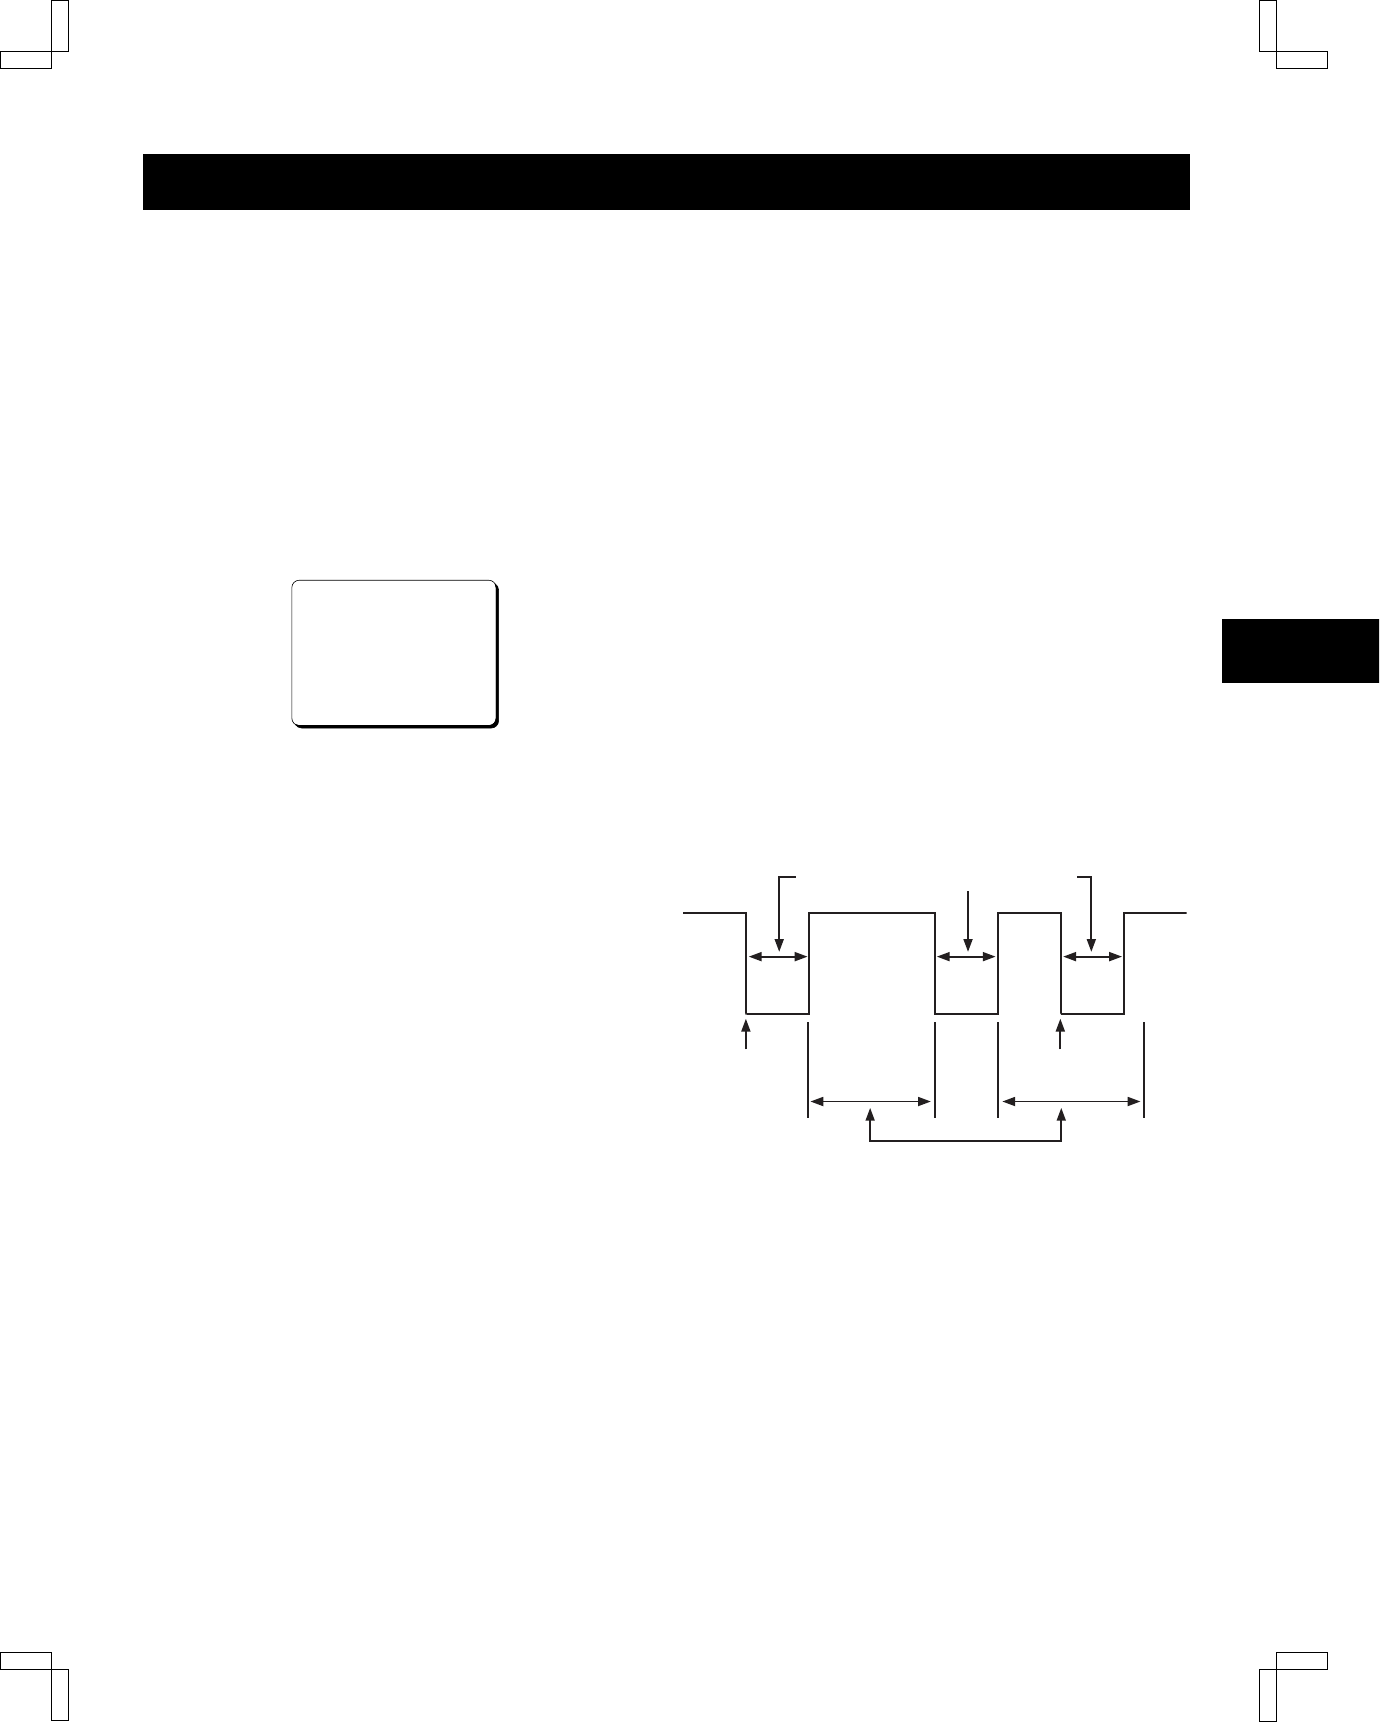
œ If a single image recording trigger is not received (or if
the REC button is not pressed) during the duration set
for “INTERVAL”, single image recording will be
conducted automatically after the set duration.
œ If a single image recording trigger is received (or if the
REC button is pressed) during the duration set for
“INTERVAL”, single image recording will be
conducted immediately.
œ When using the 1 SHOT IN terminal, connect a
make-contact switch (no voltage) between the 1
SHOT IN and COM terminals.
Recording of set number of images
“INTERVAL” setting (1, 2 or 3 minutes)
Input of single
image recording
trigger
Input of single image
recording trigger
NB4QR/NA (SRT-4040 GB) Tue. Sept., 10/2002
34
English


