7
1
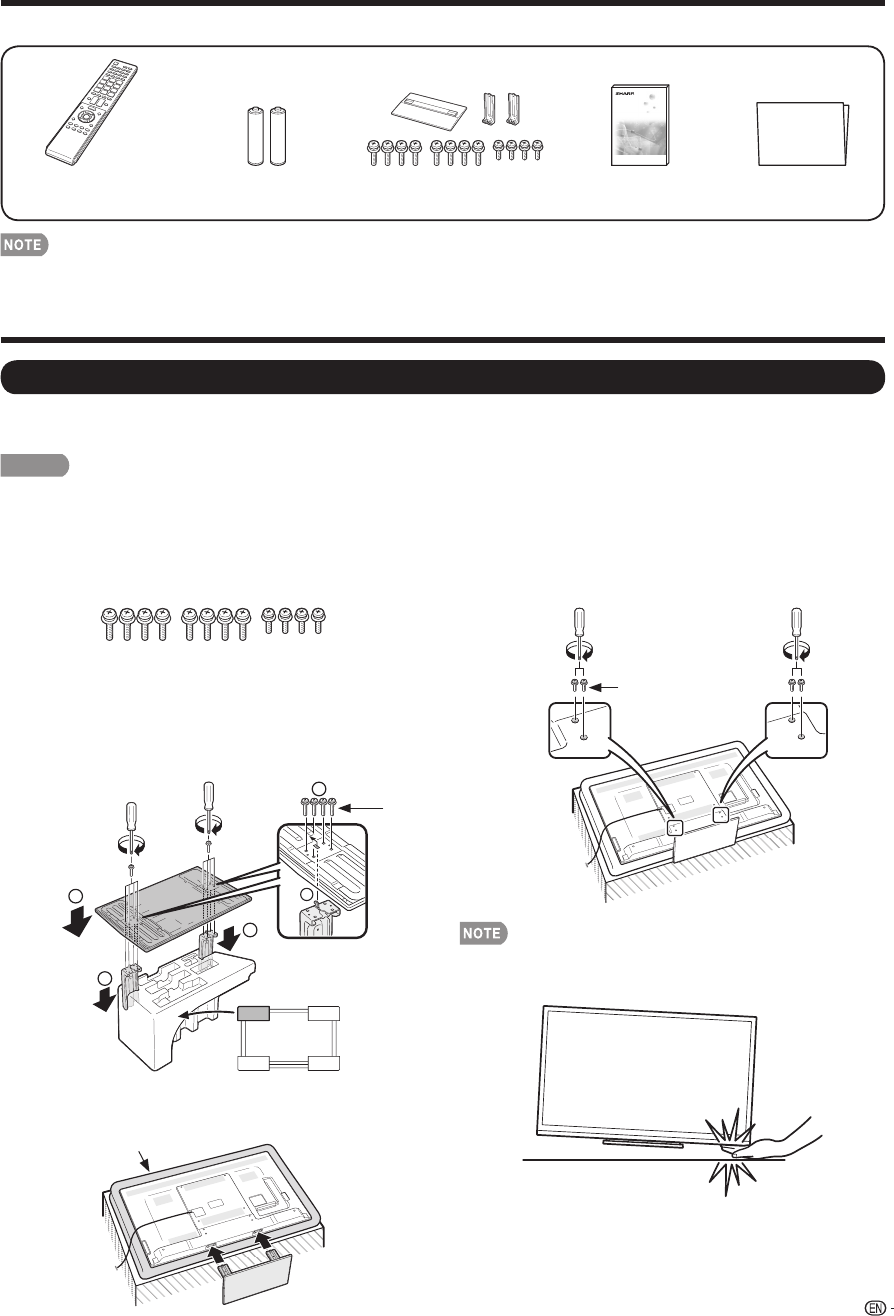
Confi rm that there are 12 screws (8 long screws
and 4 short screws) supplied with the stand unit.
2
1
Set the post for the stand unit onto the
polystyrene foam.
2
Attach the base to the post.
3
Insert and tighten the 8 screws into the 8 holes
on the bottom of the base.
• Hold the stand unit securely with one hand, and then
tighten the screws.
FRONT
2
2
1
1
1
Long
screws
3
Insert the stand into the openings on the bottom of the TV.
• Make sure that the stand is fi rmly inserted into the TV.
Improper installation may result in tilting of the TV set.
Soft cushion
4
Insert and tighten the 4 screws into the 4 holes on
the rear of the TV.
Short screws
• To detach the stand, perform the steps in reverse order.
• In the installation procedure, be careful not to catch your
fi ngers between the TV set and the fl oor.
Supplied Accessories
Make sure the following accessories are provided with the product.
Remote control unit
(
g
1) Page 8
“AAA” size battery
(
g
2) Page 9
Stand unit
(
g
1) Page 7
Operation manual
(
g
1)
Connection guide
(
g
1)
• Always use the AC cord supplied with the TV.
• The illustrations above are for explanation purposes and may vary slightly from the actual accessories.
QUICK REFERENCE
Attaching the Stand
• Before attaching (or detaching) the stand, unplug the AC cord.
• Before performing work spread cushioning over the base area to lay the TV on. This will prevent it from being damaged.
CAUTION
• Attach the stand in the correct direction.
• Do not remove the stand from the TV unless using an optional wall mount bracket to mount it.
• Be sure to follow the instructions. Incorrect installation of the stand may result in the TV falling over.
• After attaching the stand to the TV, do not hold the stand when you put up, set up, move or lay down the TV.


