8
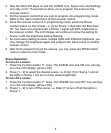
4. Now the Red LED stays on and the SCENE icon, Signal icon and Settings
icon stay on for 15 seconds to allow you to program this scene to the
receiver control.
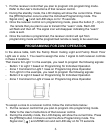
5. Put the receiver control that you plan to program into programming mode.
Refer to the User’s Instructions of that receiver control.
6. Once the receiver control is in programming mode, press the Scene
number button on the remote, i.e. [1] for Scene 1. Red LED will ash then
off. You have now programmed a Scene 1 signal with 60% brightness to
the receiver control. The LCD display will continue to show the setting for
Scene 1 with the brightness setting ashing.
7. As most scene setting involves multiple lights with different brightness, you
may change the brightness again and program the same scene to another
receiver control.
8. After nish programming all the scenes, you may press the PROG button
twice to return to clock mode.
Scene Operation:
To turn on a scene:
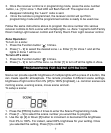
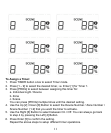
1. Press the Function button “F” once. The SCENE icon and ON icon will stay
on in the LCD display. [show LCD]
2. Press [1 – 9] to select the desired scene, i.e. Enter [1] for Scene 1 and all
the lights in Scene 1 will be on at the preset brightness.
To turn off a scene:
1. Press the Function button “F” twice. The SCENE icon and OFF icon will stay
on in the LCD display. [show LCD]
2. Press [1 – 9] to turn off the scene, i.e. Enter [1] to turn off all the lights in
Scene 1.


