


Connections
23
Expandable input capability
You can easily expand the input capability by installing
an optional board (not supplied) in the option slot on the
rear panel. Only one board for expanding the input
capability can be installed at a time. If you install two
boards, they do not function.
External sync input
Pressing the EXT SYNC button on the control panel
once enables the monitor to operate on a sync signal
supplied from an external sync generator.
Automatic termination (only for connectors
with a mark)
The input connector is terminated at 75 ohms internally
when nothing has been connected to the output
connector. If a cable is connected to the output
connector, the internal terminal is automatically released
and the signals input to the input connector are output to
the output connector (loop-through).
Functions
Auto chroma phase function
The chroma and phase are automatically adjusted.
Blue only mode
In the blue only mode, the blue component of an input
signal is displayed. This facilitates adjustments of the
color saturation and phase, and observation of VCR
noise.
Underscan mode
In the underscan mode, the lines usually scanned outside
the normal display area are visible so that you can
monitor the entire screen area.
Note
When the monitor is in the underscan mode, dark RGB
scanning lines appear on the top edge of the screen.
These are caused by an internal test signal.
16:9 mode
You can precisely monitor a signal whose aspect ratio is
16:9, in addition to a 4:3 signal.
Auto/manual degaussing
The monitor is automatically degaussed when the power
is turned on. You can manually degauss the monitor by
pressing the DEGAUSS button.
Using the menu, you can preset a time to degauss
automatically after the power has been turned on for a
while.
On-screen menus
You can set color temperature, perform a chroma set up,
and make other settings using the on-screen menus.
Options
EIA 19-inch rack mount bracket available
The monitor can be mounted on an EIA-standard
19-inch rack, using the following mounting brackets or
slide rails.
For the PVM-9L3/PVM-9L2: MB-520
For the PVM-14L2: MB-502B (In Europe, use the MB-
502C)
For the PVM-20L2: SLR-103A (In Europe, use the
SLR-103C)
For details on mounting the monitor on the rack, refer to
the user’s manual of the mounting bracket or slide rail.
Caption Vision (Closed Caption) Decoder
available
Installing certain optional parts enables the monitor to
decode Closed Caption signals. Using a menu, you can
choose whether or not to display captions (subtitles) and
can select the style of the caption displayed. For details
on these parts, consult your Sony dealer.
Connections
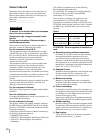
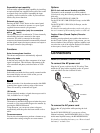
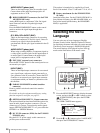
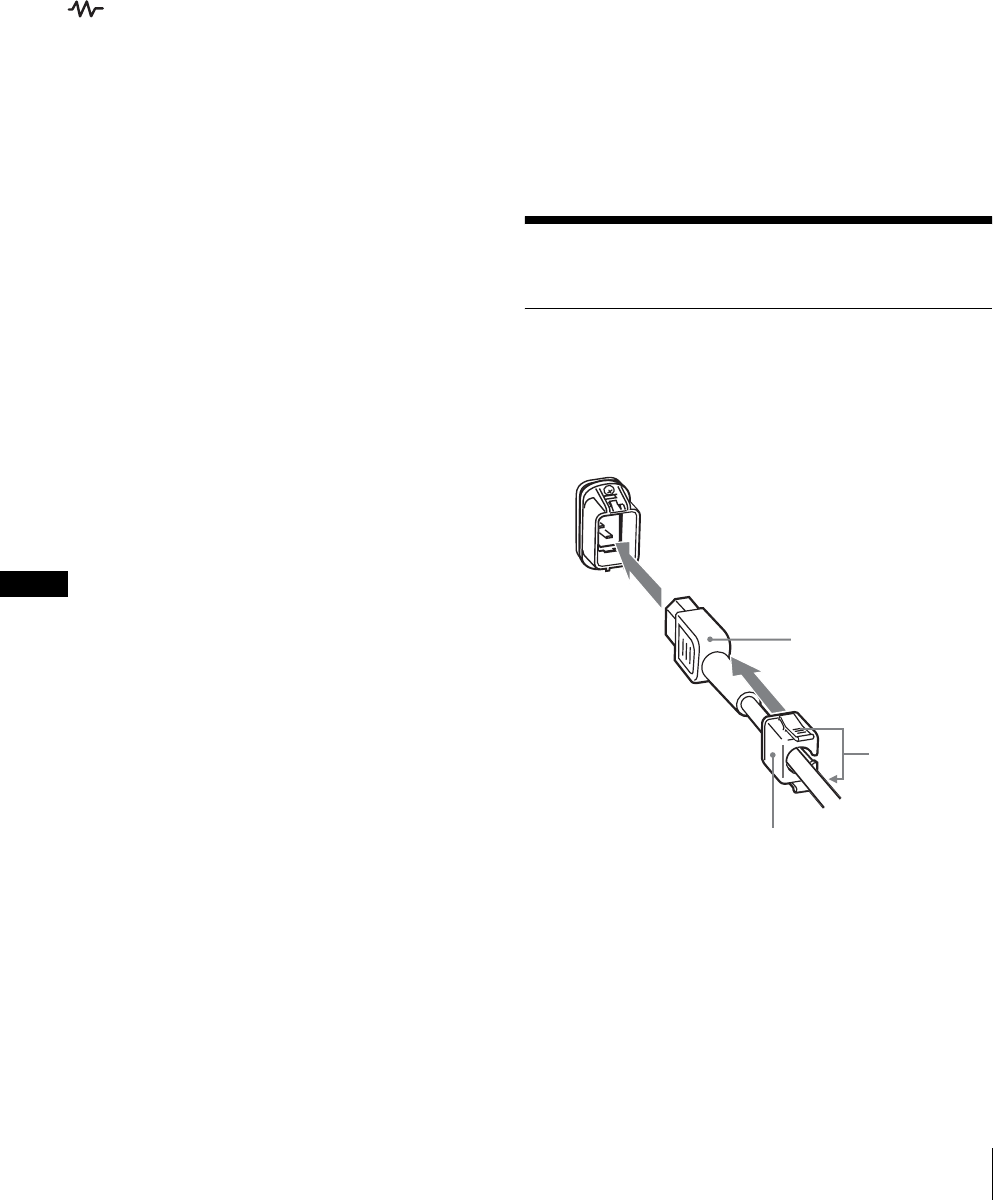
How to Connect the AC Power Cord
To connect the AC power cord
Plug the AC power cord into the AC IN socket. Then,
attach the AC plug holder (supplied) to the AC power
cord and slide it over the cord until it locks.
To remove the AC power cord
Pull out the AC plug holder while pressing the lock
levers.
For the PVM-9L3/PVM-9L2, you can use a Sony
lithium-ion battery, the BP-L60A/BP-L90A, or a Sony
nickel metal hydride battery, the BP-M50/BP-M100.
For details on installing the battery, see “How to install
the battery” on back cover.
AC power cord
lock levers
AC IN socket
AC plug holder