


Adjustment Using the Menus
29
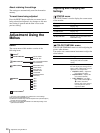
USER CONTROL menu
The USER CONTROL menu is used for adjusting the
picture.
Items that cannot be adjusted depending on the input
signal are displayed in blue.
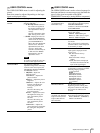
USER CONFIG menu
The USER CONFIG menu is used to select a language for
the menus and the on-screen messages or to determine the
type of video signal acceptable on the RGB/
COMPONENT connectors (Analog RGB or component).
Submenu Setting
AUTO CHROMA/
PHASE
Adjusts color intensity (CHROMA)
and tones (PHASE).
• AUTO ADJ VALUE: Chooses
the values to be applied to
the chroma and phase from
auto adjustment or factory
settings.
ON: auto adjustment values
OFF: factory preset values
• START: Displays the color bar
signals (Full/SMPTE/EIA)
on the screen. To select one,
press ENTER/SELECT
button. The auto adjustment
function starts. After the
adjustment has been done
correctly, AUTO ADJ
VALUE is automatically set
to ON. Press the MENU/
EXIT button to exit the
adjustment screen.
Note
If you have selected full color bars,
be sure to enter eight color bars.
SUB CONTROL You can finely adjust the
adjustment range of the following
controls on the control panel; the
CONTRAST, PHASE, CHROMA
and BRIGHT controls.
• ADJUST...: adjusts the
following items.
CONTRAST...: Adjusts the
picture contrast.
BRIGHT...: Adjusts the picture
brightness.
CHROMA...: Adjusts the color
intensity. The higher the
setting, the greater the
intensity.
The lower the setting, the
lower the intensity.
PHASE...: Adjusts color tones.
The higher the setting, the
more greenish the picture
becomes.
The lower the setting, the
more purplish the picture
becomes.
APERTURE...: Adjusts the
picture sharpness. The higher
the setting, the sharper the
picture.
Submenu Setting
RGB/COMP SEL
(for the PVM-14L2/
PVM-20L2 only)
According to the type of video
signal which you intend to input to
the RGB/COMPONENT
connectors, choose between RGB
and COMPONENT.
COMP LEVEL Select the component level from
among three modes.
SMPTE: 100/0/100/0 signal
BETA 7.5: 100/7.5/75/7.5 signal
BETA 0: 100/0/75/0 signal
NTSC SETUP Select the NTSC setup level from
two modes.
The 7.5 setup level is used mainly
in North America. The 0 setup level
is used mainly in Japan.
FORMAT DISP Determines whether the format of a
input signal is displayed on the
screen or not.
ON: The format is always
displayed.
OFF: The format is always
hidden.
AUTO: The format is displayed
for about 10 seconds when the
input of the signal begins.
LANGUAGE You can select the desired language
for the menus or messages from the
following language options.
: Japanese
ENGLISH: English
DEUTSCH: German
FRANÇAIS: French
ITALIANO: Italian
ESPAÑOL: Spanish
: Chinese
DEGAUSS DELAY Sets the delay time for auto
degaussing to start working after
the power is turned on. The delay
time can be set within 0 to 99
seconds.
CAPTION
(available only when the
Caption Vision (Closed
Caption) Decoder has
been installed.)
Selects the caption display mode
from among the following options:
OFF, CAPTION 1, CAPTION 2,
TEXT 1 and TEXT 2.