


Selecting the Menu Language
26
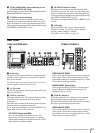
AUDIO IN/OUT (phono jack)
These are the input/output jacks for an audio signal.
Connect them to the audio input/output jacks on
equipment such as a VCR.
e RGB/COMPONENT connectors (for the PVM-
14L2/PVM-20L2 only)
Analog RGB signal or component (Y, P
B
, P
R
) signal
input connectors and their loop-through output
connectors.
Press the RGB/COMPONENT button on the control
panel to monitor the signal input through these
connectors.
G/Y, B/P
B
, R/P
R
IN/OUT (BNC)
These are the input/output connectors for an analog
RGB and a component (Y, P
B
, P
R
) signal. Unless an
external sync signal is input, the monitor is
synchronized with the sync signal contained in the G/
Y signal.
AUDIO IN/OUT (phono jack)
When using an analog RGB or a component signal as
a video signal, use these jacks for the input/output of
an audio signal. Connect them to the audio input/
output jacks on equipment such as a VCR.
f EXT SYNC (external sync) connectors
Press the EXT SYNC button on the control panel to use
an external sync signal.
IN/OUT (BNC)
These are the input/output connectors for an external
sync signal. Input a reference signal generated by a
sync generator to the IN connector. Connect the OUT
connector to an external sync signal input connector
on equipment which you intend to synchronize with
this monitor.
g PARALLEL REMOTE terminal (modular
connector)
Forms a parallel switch and controls the monitor
externally.
For details on the pin assignment and factory setting
function assigned to each pin, see page 33.
h OPTION AUDIO INPUT 1, 2 input connectors
If an optional board has been installed in the option slot,
input an audio signal into these connectors. You can
connect up to 2 systems. To monitor the audio signals
input to OPTION AUDIO INPUT 1 or 2, press either the
OPTION A or OPTION B button.
i DC 12V IN connector (XLR) (for the PVM-9L3/
PVM-9L2 only)
Plug the DC 12V power supply to this connector to
provide power to the monitor.
This product is intended to be supplied by a Listed
Power Unit marked “Class 2” and rated 12 V dc, 4.2 A.
j Battery attachment (for the PVM-9L3/PVM-
9L2 only)
Install the battery here. For the PVM-9L3/PVM-9L2, a
Sony lithium-ion battery, the BP-L60A/BP-L90A, or a
Sony nickel metal hydride battery, the BP-M50/BP-
M100, is applicable.
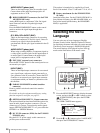
Selecting the Menu
Language
You can select one of seven languages (English,
German, French, Italian, Spanish, Japanese, Chinese)
for displaying the menus and other on-screen messages.
The factory preset language is ENGLISH (English).
The current settings are displayed in place of the
marks on the illustrations of the menu screen.
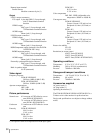
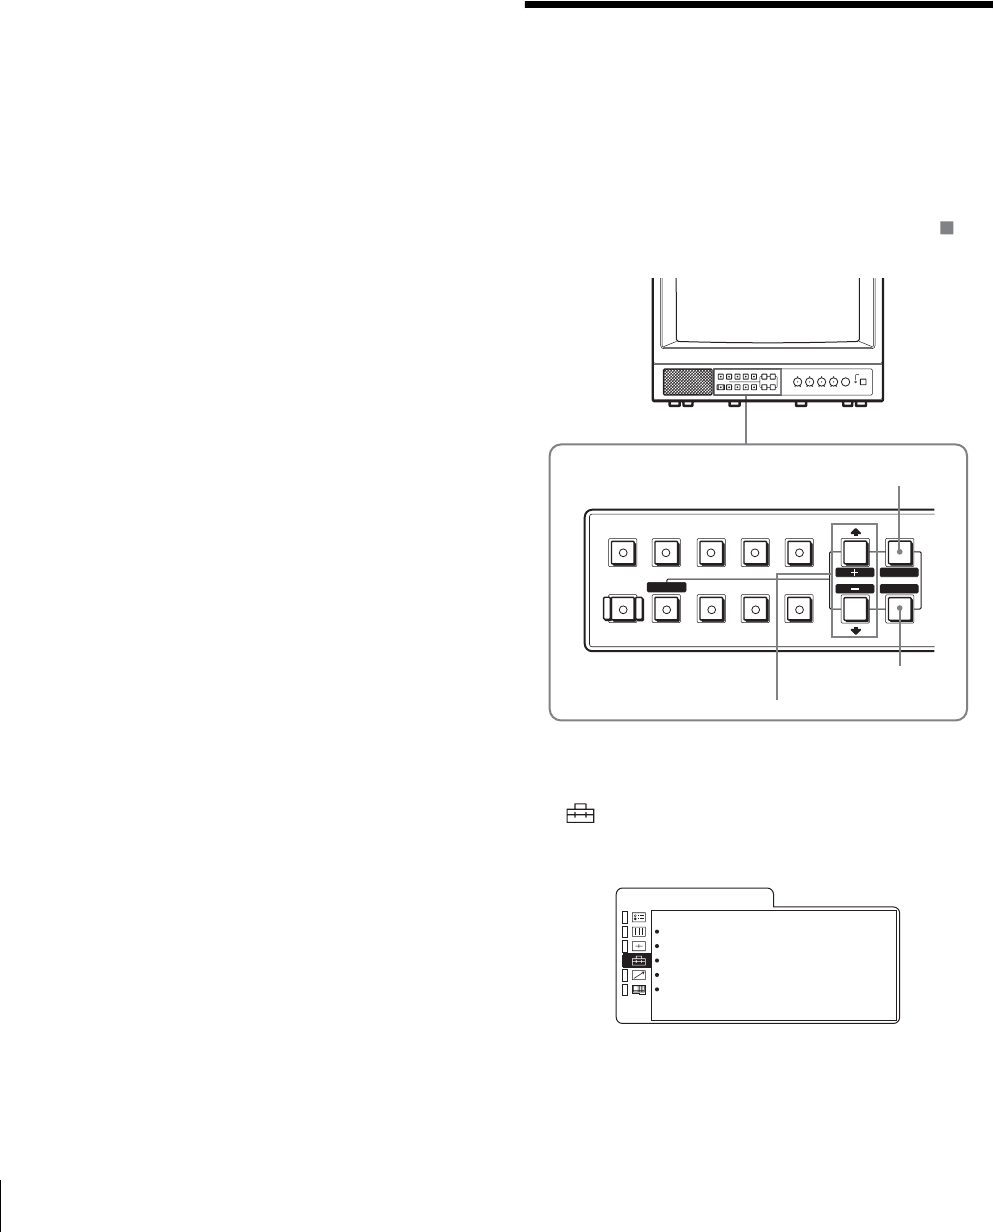
1
Press the MENU/EXIT button to display the menu
screen, and press the M/+ or m/– button to select
(USER CONFIG), then press the ENTER/
SELECT button.
The USER CONFIG menu appears.
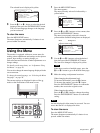
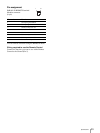
2
Press the
M
/+ or
m
/– button to select “LANGUAGE,”
then press the ENTER/SELECT button.
MENU
ENTER
16 : 9
EXIT
SELECT
RESET
OPTION
B
UNDER
SCAN
BLUE
ONLY
DEGAUSS EXT
SYNC
RGB/
COMPONENT
OPTION
A
LINE
A
LINE
B
MENU/EXIT
button
M/+, m/– button
ENTER/SELECT
button
x R G B / C O M P S E L x x x x
C O M P L E V E L x x x x x
N T S C S E T U P x
F O R M A T D I S P x x x x
L A N G U A G E E N G L I S H
D E G A U S S D E L A Y x
U S E R C O N F I G