


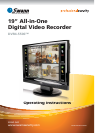


DVR4-5500™ Operating Instructions
6
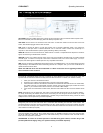
Part 2: Configuring the DVR Software
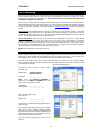
Before we can start recording video, we need to take a moment to configure some of the settings on the DVR. We
need to set the DATE & TIME, and then assign a PASSWORD for you. To do this, we need to use the infrared
remote control which came with the DVR – here’s a quick overview of the remote and what the assortment of buttons
on it do. Don’t be intimidated by the mass of buttons – most of them operate in a very similar way to the remote
control on a DVD player or VCR, and many of them you’ll probably never need to touch.
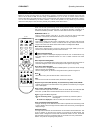
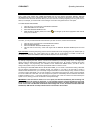
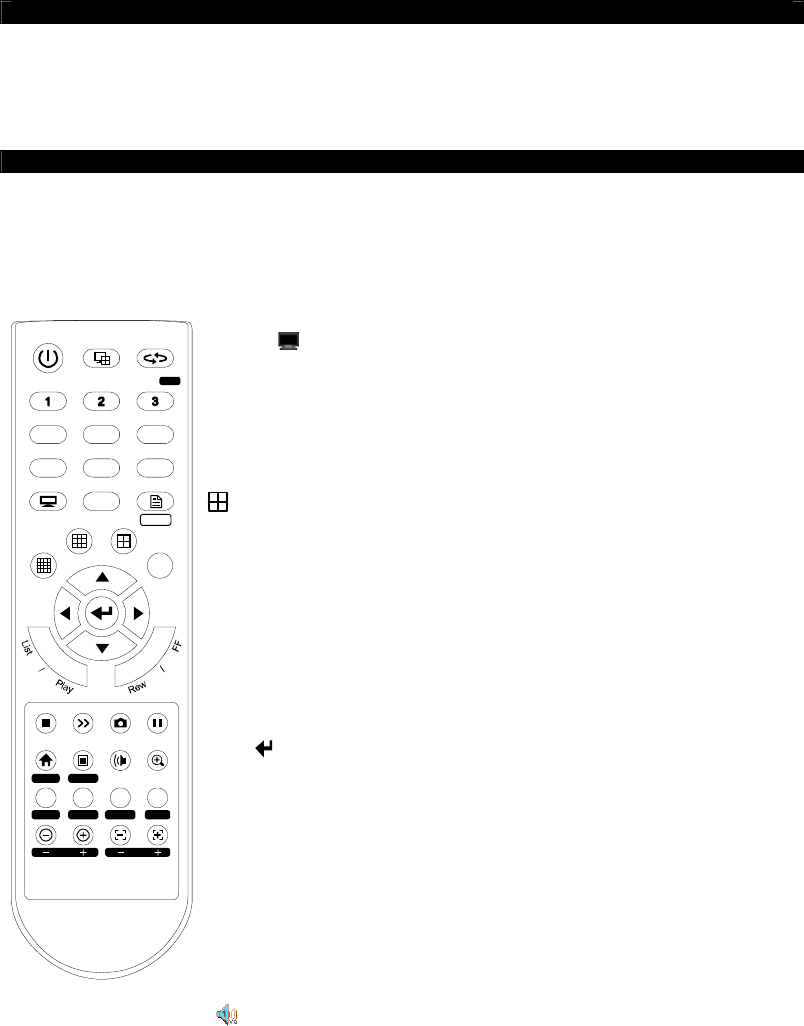
2.1 Layout of the Infrared Remote Control
IR LED
POWER: Turns the DVR and screen on and off.
Press once to enter “power-saving” mode, turning OFF the monitor, leaving the DVR
ON. Press and hold to turn OFF the DVR. If the DVR is recording, it will ask you to
confirm the shutdown procedure. Press once when DVR is OFF to turn it ON again.
NUMERICAL PAD: 0 – 9
Press to switch channel, much like a TV. They can also be used to enter DVR
password. In PTZ mode, used with the Goto key to access pre-set options.
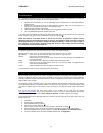
LDC adj.:
Adjust Screen Settings
Press once to enter the LCD screen configuration menu. Changes made here will
affect viewing conditions on screen, but will not alter the way that the DVR records
images. The screen icon above will be shown whilst in LCD Adjustment Mode.
Menu: Enter the main menu
Press once to enter the menu, and once to exit the menu again. Whilst you are in a
submenu, this button will take you back to the main menu.
: Multi-camera Monitoring
Toggles the number of video inputs displayed onscreen at once. As this DVR has only
four video inputs, the additional buttons for nine or sixteen cameras have been
disabled.
SEQ: Sequential Viewing Mode
Press once to cycle between active video inputs. Video channels which are inactive or
have been assigned “covert” will not be displayed. Press again to stop cycling.
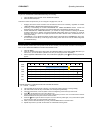
Arrow Keys: Basic Navigation
When in the menu, navigates between available options. Up and down arrows change
settings once they are highlighted.
When in viewing mode, up and down change the channel, just like a regular TV.
Enter:
When in the menu, press to select an item or enter a sub-menu.
LIST:
Press once to see a list of recorded events, divided into categories.
Playback Keys: PLAY, REW (Rewind), FF (Fast-Forward), STOP, SLOW, PAUSE
Controls the playback of recorded videos. They operate in the same way as a regular
VCR or DVD player.
Snap: Capture a Still Image (Snapshot)
Used to take still images from the video, which are saved directly to an attached USB
flash drive. (A USB device must be attached for this function to work correctly.)
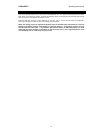
Audio: Toggle Audio Monitoring Mode
Live monitoring mode: You will be able to overhear any audio the system is
recording live.
No audio icon displayed: Audio is recorded, but not heard in the live window.
Zoom: Increase/Decrease Digital Zoom
Enlarges the image on the selected channel. Will not operate when the viewing mode
is set to “default”. Will not change what the camera sees and records, just enlarges the
displayed image.
Additional Buttons:
You might notice that there are several buttons on the remote not discussed here. This
is not an omission on the part of the manual, but a function of the DVR remote. The
remote control is designed to function with several DVR models. As such, the remote
does have buttons which do not directly relate to your DVR. Don’t worry about these\
buttons – they will not do anything when pressed.
SEQ
6
9
Menu
POWER
LCD adj.
4
7
5
8
0
DVR / PC
Audio
Snap
Zoom
Pause Slow Stop
Home
Auto
Zoom Focus
Preset Speed Goto
Stop
DVR / PTZ