English - 12 -
RECORDINGS LIBRARY
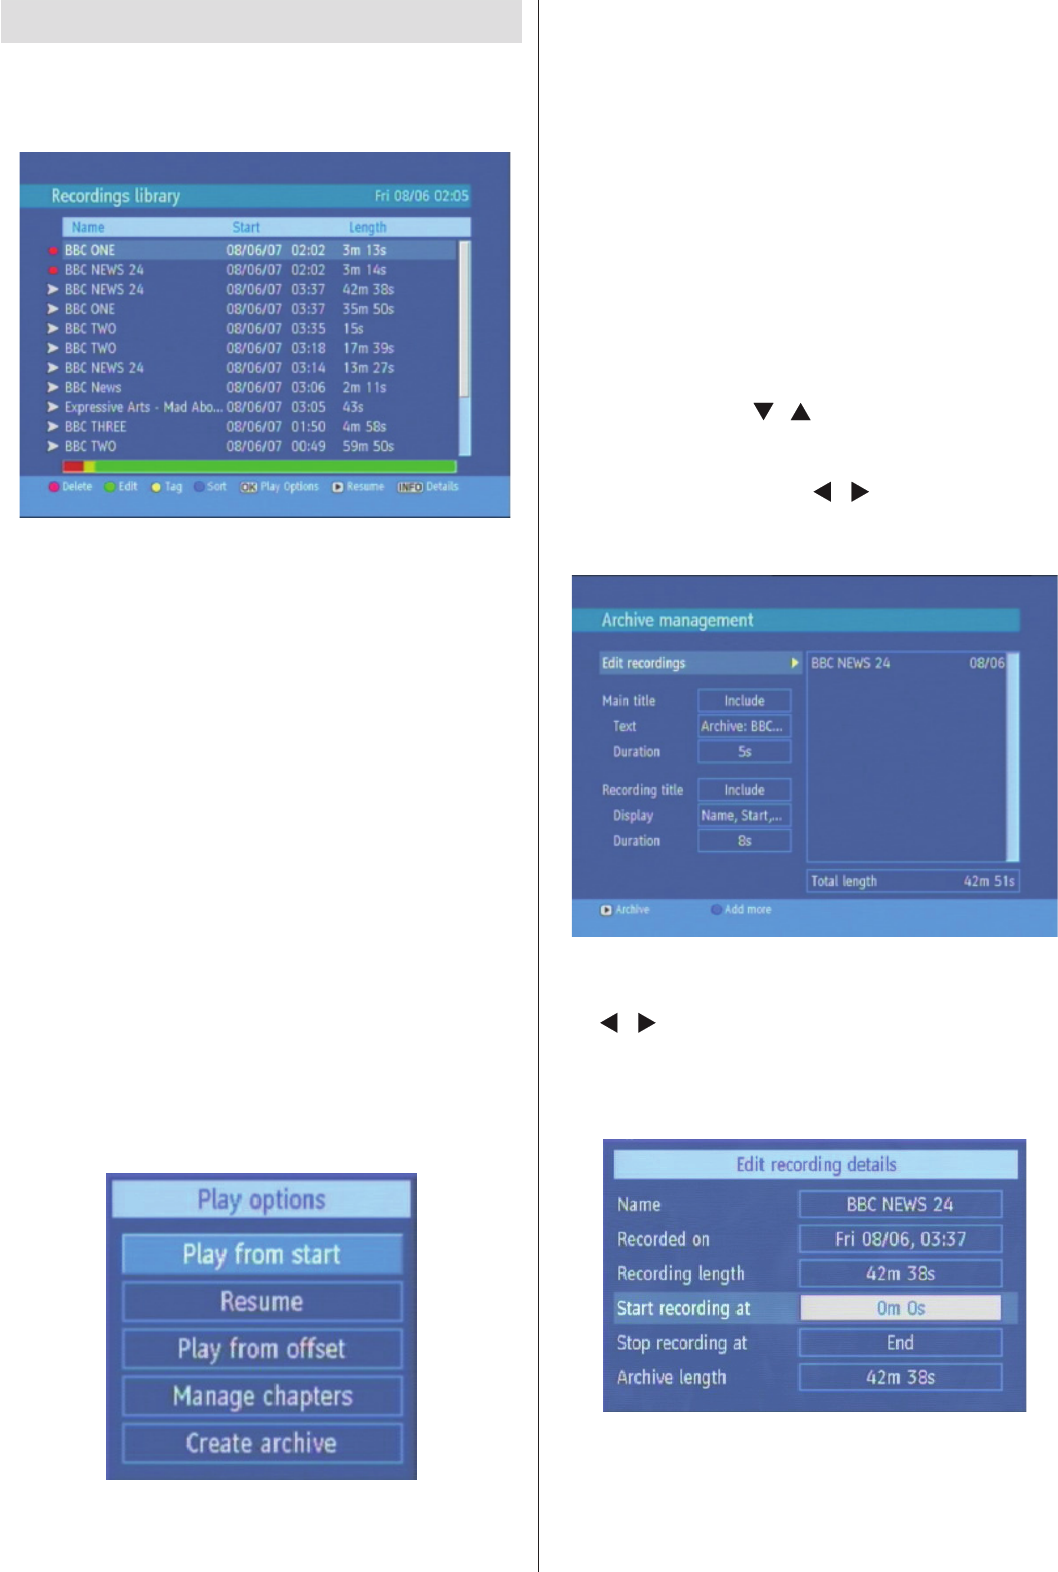
All the recordings are kept in list. To show the list of
recordings press either LIB button on the remote or
access it from the main menu.
RED BUTTON (DELETE) : Erase the recordings
GREEN BUTTON (EDIT) : make changes to the
recordings
YELLOW BUTTON (TAG) : marks the recordings
for archiving
BLUE BUTTON (SORT) : change the order of the
recordings
INFO (DETAILS) : displays the short extended
programmes in detail
OK BUTTON : opens the play options menu
X (RESUME): recommence the recordings
Red bar: indicates the used space of the recordings
on the hard disk.
Yellow bar: displays the approximate capacity
required for the timers currently set.
Green bar: shows the free space on the hard disk.
Play Options:
Play from start: Plays the recording from the
beginning.
Resume: Begins with playing from the last stopped
position.
Play from offset: Begins with playing, from the time
which is entered.
Manage chapters : It will display any marked chapters
(To set chapter marks, press the Menu button during
playback and enter the “Chapter Options” menu) and
begin with playback from the selected chapter.
Create archive (Archive management): Using this
option, you will be able to archive your recordings to
an external device like a DVD player. Press the LIB.
Button and come to the “Recordings Library”. In this
library, the saved recordings are listed. To select a
recording which should be archieved, highlight one
of them using the “
”/“ ” buttons and select the
TAG option, by pressing the yellow button. After then,
press the OK button to open the “Play Options” menu.
In this menu, using the “
”/“ ” buttons, select the
“Create Archive” option and enter it by pressing the
OK button. You will see the menu below:
Edit Recordings
While the “Edit recordings” option is highlighted, using
the “
”/“ ” buttons come to the list of recordings on
the right of this menu. Select one of them, which
should be archived and press the OK button. You will
come to the following menu:
Here, only the “Start recording at” and “ Stop recording
at” options are active. If you have already separated
recording, you could select any chapter to begin
with the archiving and stop it. If it is not separated
in chapters, the beginning and ending time of the
