


English - 75
Recording
74 - English
Recording
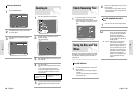
If you wish to correct the programme displayed or modify certain elements, such as the recording speed,
refer to following instruction before pressing RETURN button.
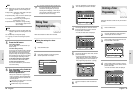
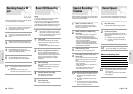
If you wish to... Then...
Select an input source other
•
Press the
¥
or
buttons, until the PR selection mode.
than the tuner (AV1, AV2 or AUX)
•
Press the INPUT SEL. button one or more times to change the
input source selection.
Result
: The programme number is replaced by:
• The AV1, AV2 or AUX source using the INPUT SEL.
button for a satellite tuner or external video source
•
The input source must be selected before changing any other value.
Record a programme every day
•
Press the
¥
or
buttons, until the Day selection mode.
(Monday to Sunday) at the same time
•
Press the
or
buttons, until the Daily value is displayed.
Record a programme every week
•
Press the
¥
or
buttons, until the Day selection mode.
on the same day and at the same time
•
Press the
or
buttons, until the W- (Week) value is
displayed, followed by the required day.
Example: W-SA(Weekly Saturday)
Extend the recording time
•
Press the
¥
or
buttons, until the End selection mode.
•
Press the
or
buttons to increase or decrease the stop
time.
Select the recording speed
•
Press the
¥
or
buttons, until the recording speed selection
mode.
•
Press the
or
buttons until the correct indication is
displayed:
• AUTO (Auto tape speed select) VCR • AUTO
• XP (high quality) • SP
• SP (Standard Play) • LP
• LP (Long Play)
• EP (extended mode)
Select the PDC recording
•
Press the
¥
or
buttons, until the VPS/PDC off mode.
•
Press the
or
buttons until the “On” indication is displayed.
•
Do not select PDC unless you are sure the programme you
wish to record is broadcast with PDC. If you do set PDC On
(by selecting “On” in the right - hand column on the screen),
then you must set up the start-time EXACTLY according to
the published TV schedule. Otherwise the timer recording
won’t take place.
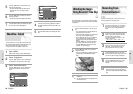
Modifying ShowView Programming
Using the Timer
Programming Feature
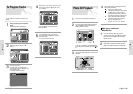
1. Check the antenna cable is connected.
2. Check the remaining time of the disc.
3. Check the date and time are correct.
Make sure the Clock has been set (Setup - Clock Set)
before you proceed with a timer recording.
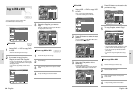
Press the SHOW VIEW button.
• Programme menu is displayed.
Using the MENU button:
! Press the MENU button.
@ Press the buttons to select Programme
and then press the
or OK button.
# Select Standard Timer.
• If the current time is not set. Set the current
time first.
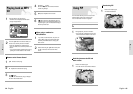
1
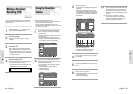
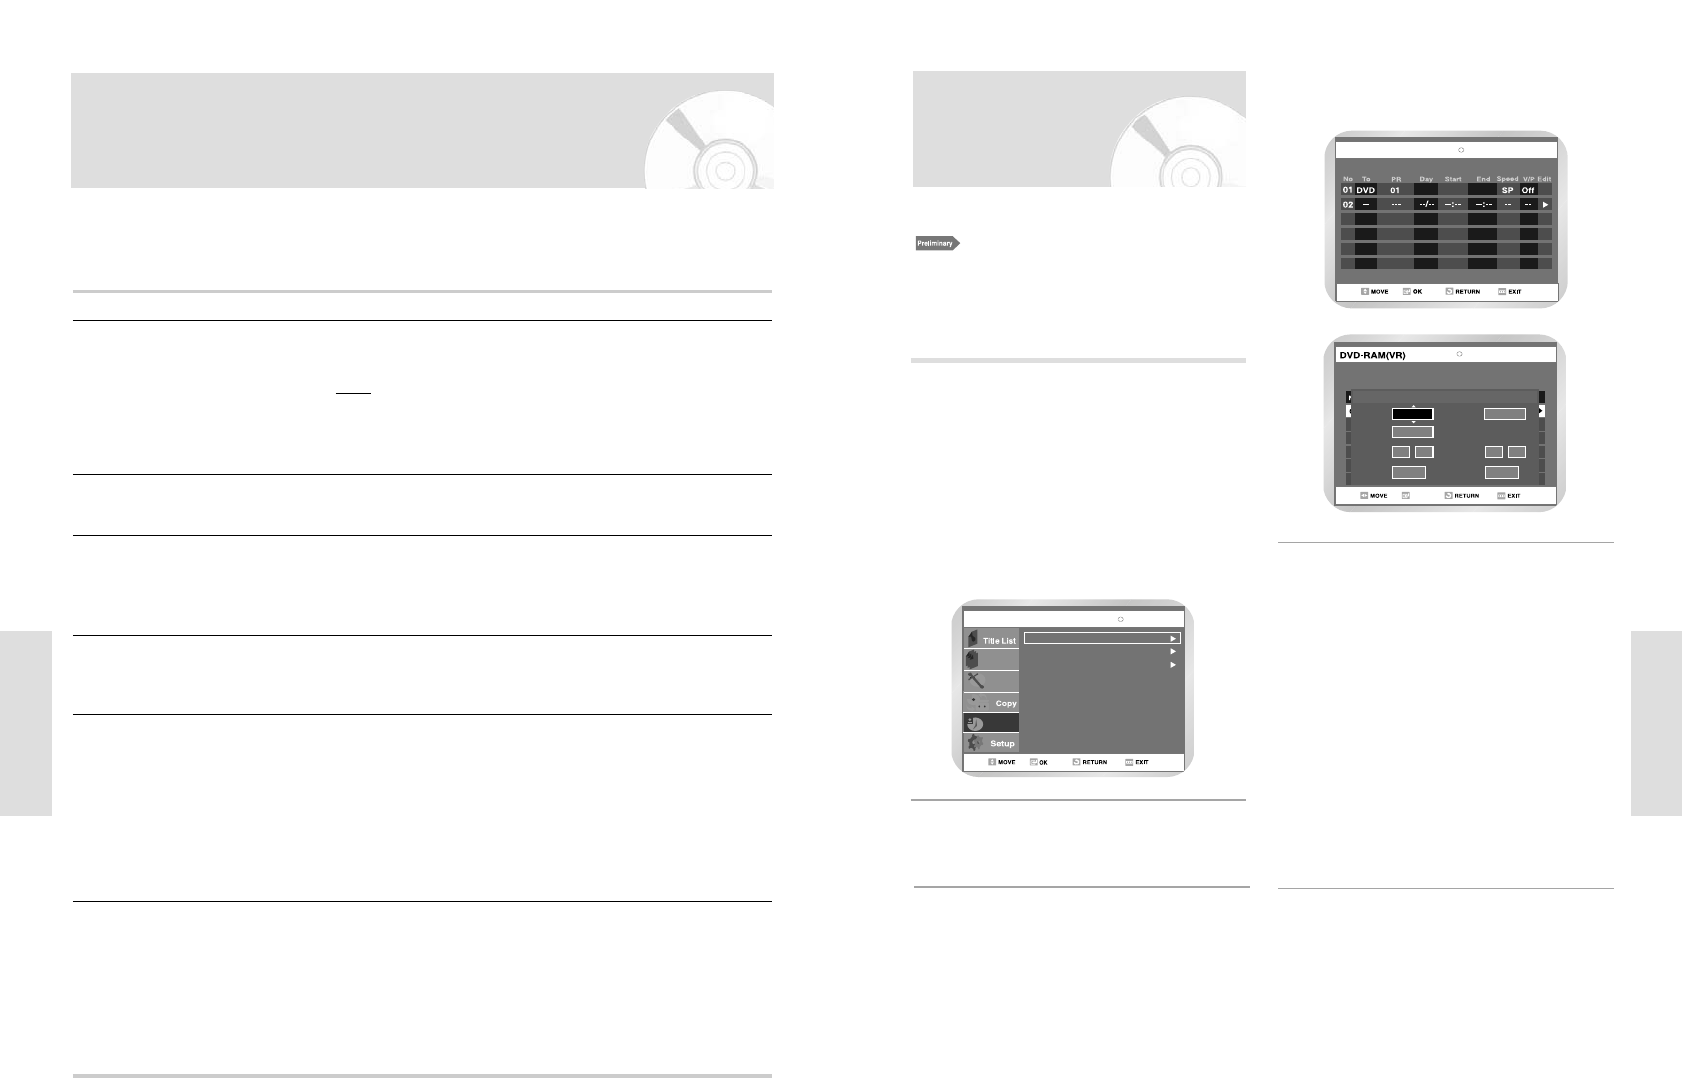
Disc Manager
Playlist
Programme
ShowView
Programme
DVD-RAM(VR)
Standard Timer
ShowView Extended :Off
DVD-RAM(VR)
Scheduled Record List
TUE 13
10:2008:20
Press the buttons to select “ Standard
Timer” and then press the
or OK button.
2
Press the button to select scheduled
Record List, and then press the
or OK button
3
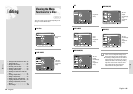
OK
To
PR
Start
End
Speed
V/P
No.02
To
PR
Day
Start
End
Speed
VPS/PDC
: :
01
OffSP
DVD
TUE 13
10 2008 20
Scheduled Record List
Set timer recording option.
• The Timer Recording screen is displayed. Fill
the input items using the arrow buttons.
¥: Moves to the previous/next item,
: Sets a value.
• TO : Select the media to record DVD or VCR.
• PR : The video input source (AV1 or AV2), or
the broadcasting channel you want to
make a timer recording from.
• Day : Set the recording day.
• Start/End Time : Start and End time of the
timer recording.
•Speed : See page 76
•VPS : Video Programme System
•PDC : Programme Delivery Control
4