


English - 81
Recording
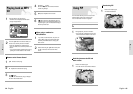
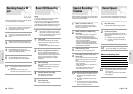
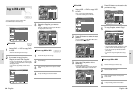
Watch a Different Channel
Press the TV/VCR button on the remote to
switch to your TV tuner, then select a different
channel on your television.
1
Watch a different media during
recording
You can watch DVD during VCR recording or
watch Video tape during DVD recording.
• During VCR recording, insert a DVD in the
DVD deck. The output will automatically change
to the DVD and start playback.
• During DVD recording, insert a Video tape in
the VCR deck. The output will automatically
change to the VCR and start playback. (Only if
tape is missing the safety tab)
2
Add Recording Time
Refer to the One-Touch Recording (OTR).
3
Recording DVD and VCR at the
same time
You can record DVD and VCR at the same time,
but both modes must be set up to record sepa-
rately.
• Press the DVD/VCR button to set the unit to
DVD or VCR mode.
• Choose input mode (PR, AV1, AV2 AUX, DV).
for DVD or VCR.
• Choose REC SPEED for DVD or VCR.
• Press REC button for DVD or VCR.
4
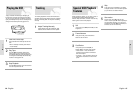
Special Recording
Features
While a recording is in progress, you can watch a differ-
ent Programme, watch a different media, or add record-
ing time in 30-minute increments.
When you watch or record on the VCR
during DVD Recording, some function buttons
may not operate.
The message “This function is not available.”
will be displayed.
Note
When DVD Recorder-VCR is connected to TV
using S-Video cable, the playback screen on
the video tape will not display during DVD
recording.
You cannot record different channel at the
same time.
The DVD and VCR cannot start recording at
the exact same time. You must set one mode
to start recording, then the other.
Note
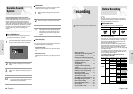
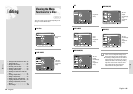
Start Recording
Follow the Basic VCR Recording on page 80.
1
Maximum Recording Time
Type Recording Time (in SP)
E-180 180 mins. or 3 hours
E-240 240 mins. or 4 hours
E-280 280 mins. or 4 hours and 40 mins.
E-300 300 mins. or 5 hours
Record Speed
You can slow down the recording speed from SP to LP
in order to fit 3 hours of programming on a E-180 tape.
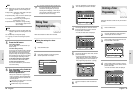
Set Record Speed
Press the REC SPEED button on the remote
control to set the Record Speed to one of the fol-
lowing options:
• SP – Standard Play, for best picture quality.
• LP – Long Play, for maximum recording time
(3 times SP).
2
The selected Record Speed will appear on
the front panel display and on-screen display.
Note
80 - English
Recording
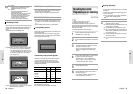
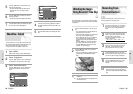
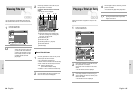
Recording through a DV
jack
Connect the DV output jack of your camcorder to
the DV input jack on the front of your DVD
Recorder-VCR using a DV cable.
1
Power on your DVD Recorder-VCR and switch
to DV mode by pressing the INPUT SEL. on the
remote.
2
With your DVD Recorder-VCR stopped, set the
operation mode of your camcorder to play mode.
3
Press the z(REC) button on your DVD
Recorder-VCR when the image from which you
want to start recording is displayed.
4
Press the (STOP) button on your DVD
Recorder-VCR when the recording is finished.
5
Follow these directions to record onto a disc the outputs
of a camcorder that has a DV output jack.
DVD-RAM
DVD-RW
DVD-R
Some camcorders may not work with your
DVD Recorder-VCR even if they have a DV
output jack.
Also refer to the user manual for your
camcorder when recording through a DV jack.
Note
Start Recording
Press the REC button on the remote control or
front panel.
For options while recording is in progress, see
“Special Recording Features”.
3
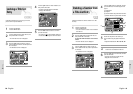
Basic VCR Recording
Insert Tape
Insert a blank Video tape into the VCR deck.
• Make sure the tape is long enough to record
the entire program.
To change the Recording Speed, see page 71.
1
Select a Programme to Record
Use the 0–9 buttons or the PROG/TRK /
buttons to select the desired Programme, or
press the INPUT SEL. button to select AV1, AV2
or AUX or DV if recording from an external
device connected to the front or rear inputs,
respectively.
2
1. Check TV Programme and Antenna connections.
2. Check the remaining time on the tape.
You can record a TV show in progress by inserting a
blank tape and pressing the
z(REC) button. You can
even add time in 30-minute increments up to 9 hours by
pressing the
z(REC)button repeatedly; see page 72.
Be sure your videotape has a Record Safety
Tab. If the tab is missing, you can cover the
opening with a small piece of tape. Warning:
Do not cover this opening unless you are sure
you want to record over the tape.
Note
Pause/Resume Recording
Press the
II
(REC PAUSE) button.
Press
z(REC) again to resume.
4
Stop Recording
Press the (STOP) button.
5