


74
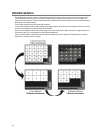
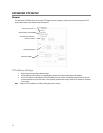
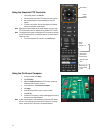
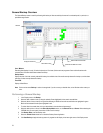
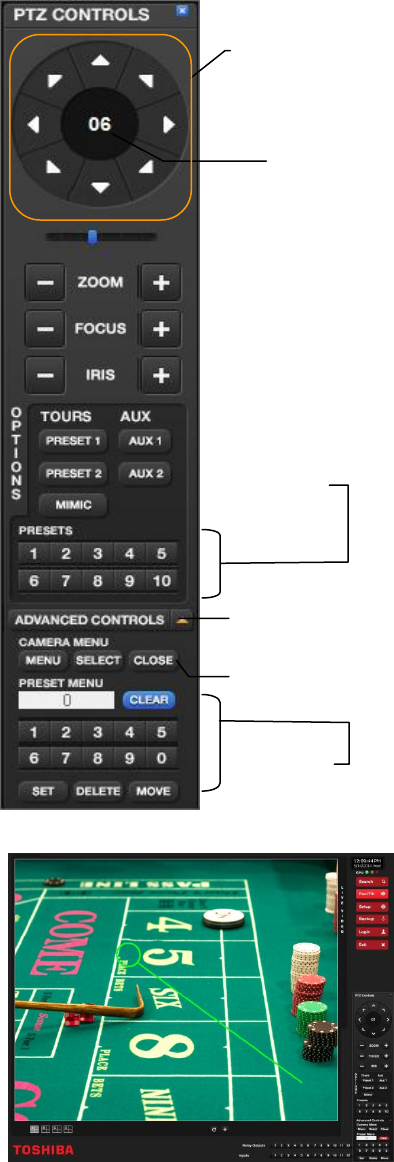
Using the Graphical PTZ Controller
1. In the Display screen, click Pan/Tilt.
2. Click the viewing area of the PTZ camera you want to control.
3. Use the Arrow buttons to control the direction of the PTZ
camera.
4. To select a new camera, click the video display of a different
camera on the Display screen display.
Note Eight directions are available only for select cameras. Only four of the
PTZ Control buttons work for all protocols (UP, DOWN, LEFT, RIGHT).
Note The Advanced menu panel on the graphical PTZ controller can be used
to set PTZ preset positions (on supported cameras), as well as move to
presets up to 254.
5. To exit the Graphical PTZ Controller, click Pan/Tilt again.
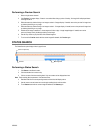
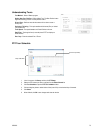
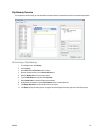
Using the On-Screen Compass
1. On the Live screen, click Setup.
2. Click PTZ Setup.
3. Select the Camera Channel of the PTZ camera you want to
enable Onscreen Compass control for.
4. In the General tab, select Onscreen Compass.
5. Click Apply.
6. Close the Setup window to return to the Live screen.
7. Click Pan Tilt.
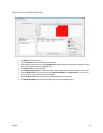
8. Control the PTZ camera by clicking and dragging the mouse on
the screen in the desired direction.
Note A green line will appear to show the direction in which the PTZ camera
will move. The shorter the line, the less the PTZ will move. The longer
the line, the more the PTZ will travel in the specified direction.
Open & close
the Advanced
Controls panel
Current
camera
channel
Arrow buttons
Move to
preset
positions 1-10
Set presets, and
move to presets
11-254
Open the camera
menu