• Satellite Receiver
• Amplifier
• Digital Amplifier
1.5 Connecting and Installation
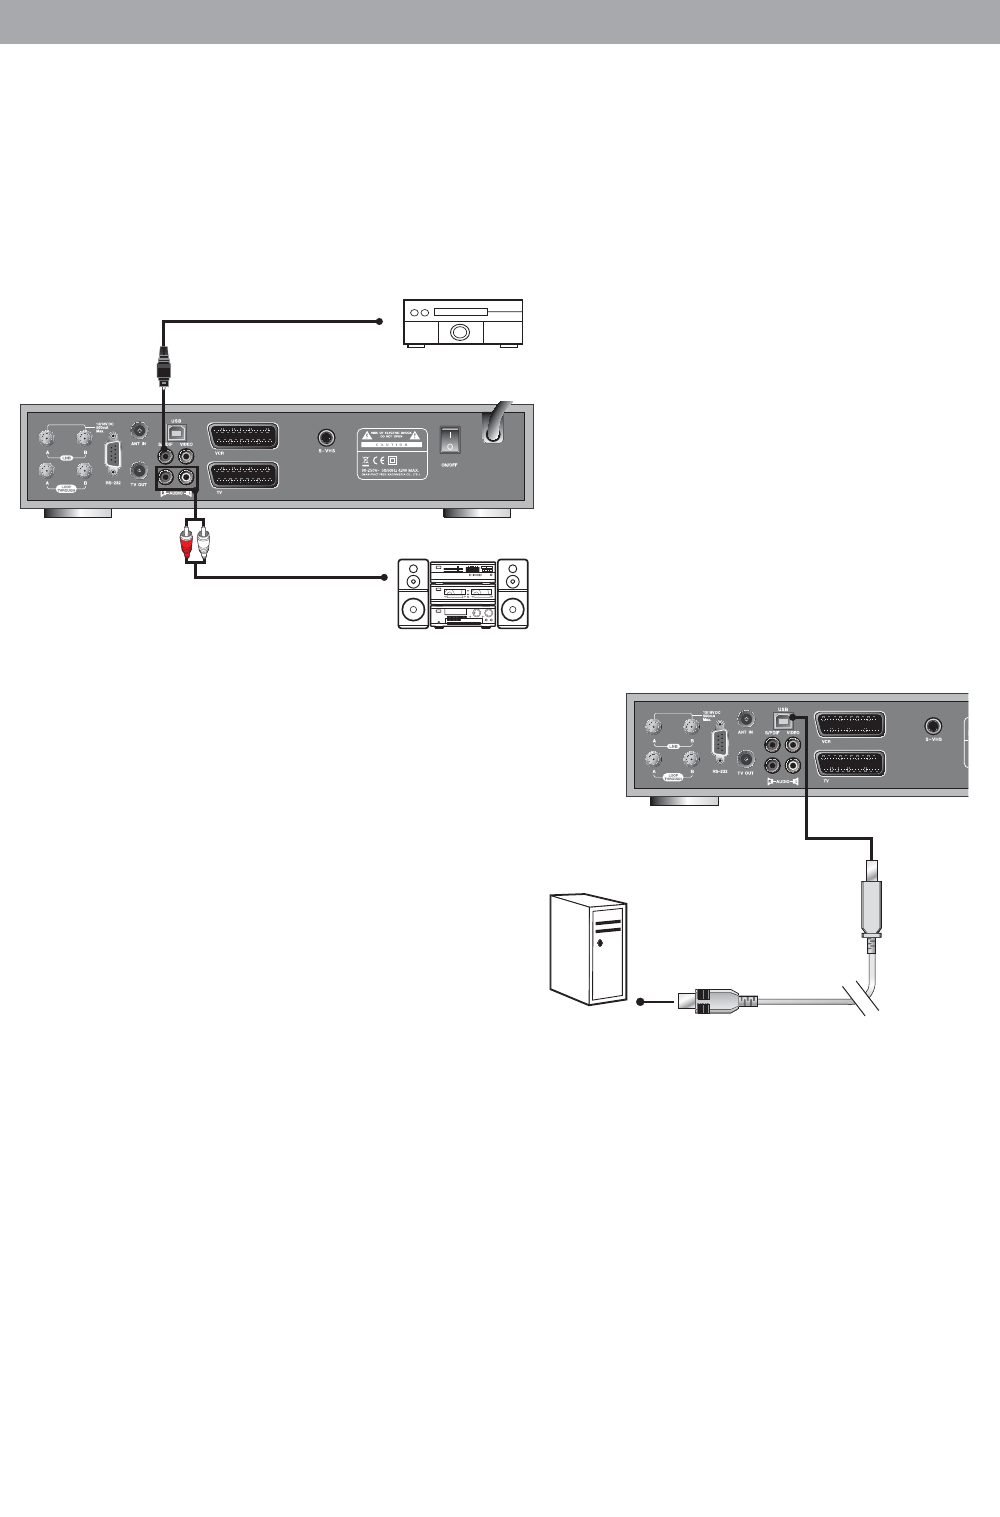
1.5.6 Connect the receiver to a Hi-Fi System
• Connect a RCA stereo cable from the AUDIO L/R jacks, S/PDIF on the receiver to the LINE, AUX, SPARE
or EXTRA input jacks on your Hi-Fi System.
1.5.7 Connect the receiver to a Digital Audio System
• If you have a DAC with S/PDIF coaxial cable input, you can connect the receiver with it to enjoy higher
quality sound. Connect S/PDIF coaxial cable to a digital amplifier.
1.5.9 Loop Through
• If you have another analogue or digital receiver and you wish to use the same LNB then you can connect
it via the loop through. Connect one end of the coaxial cable to the Loop Through on the receiver and connect
the other end to the LNB IN on your second receiver.
• Satellite Receiver
• PC
1.5.8 Connecting to the PC
• Turn the receiver and your PC on.
• Connect the receiver to your PC with the enclosed
USB cable.
• Open the PVR menu and select CONNECT USB.
• To confirm, click the start button and then click
Program
ĺ Accessories ĺWindows Explorer.
• You can check that the new drive is installed in
your computer.
The factory drive name is PVR HDD.
Note
• Connect the cable with input jack on STB properly shown in the picture.
• Please be careful when you upload or download files while the receiver is connected to a PC with the USB cable.
The data recorded in the HDD may be lost if the PC’s power is turned off, or if the USB cable is unplugged while
uploading or downloading files.
9


