8
URC-2
CLONING
When you have finished programming and have checked all commands
for proper operation, you are now able to copy (clone) the contents to
other URC-2's, if desired. This will save you the tedium of repeated
programming when you want identical commands in additional URC-2's.
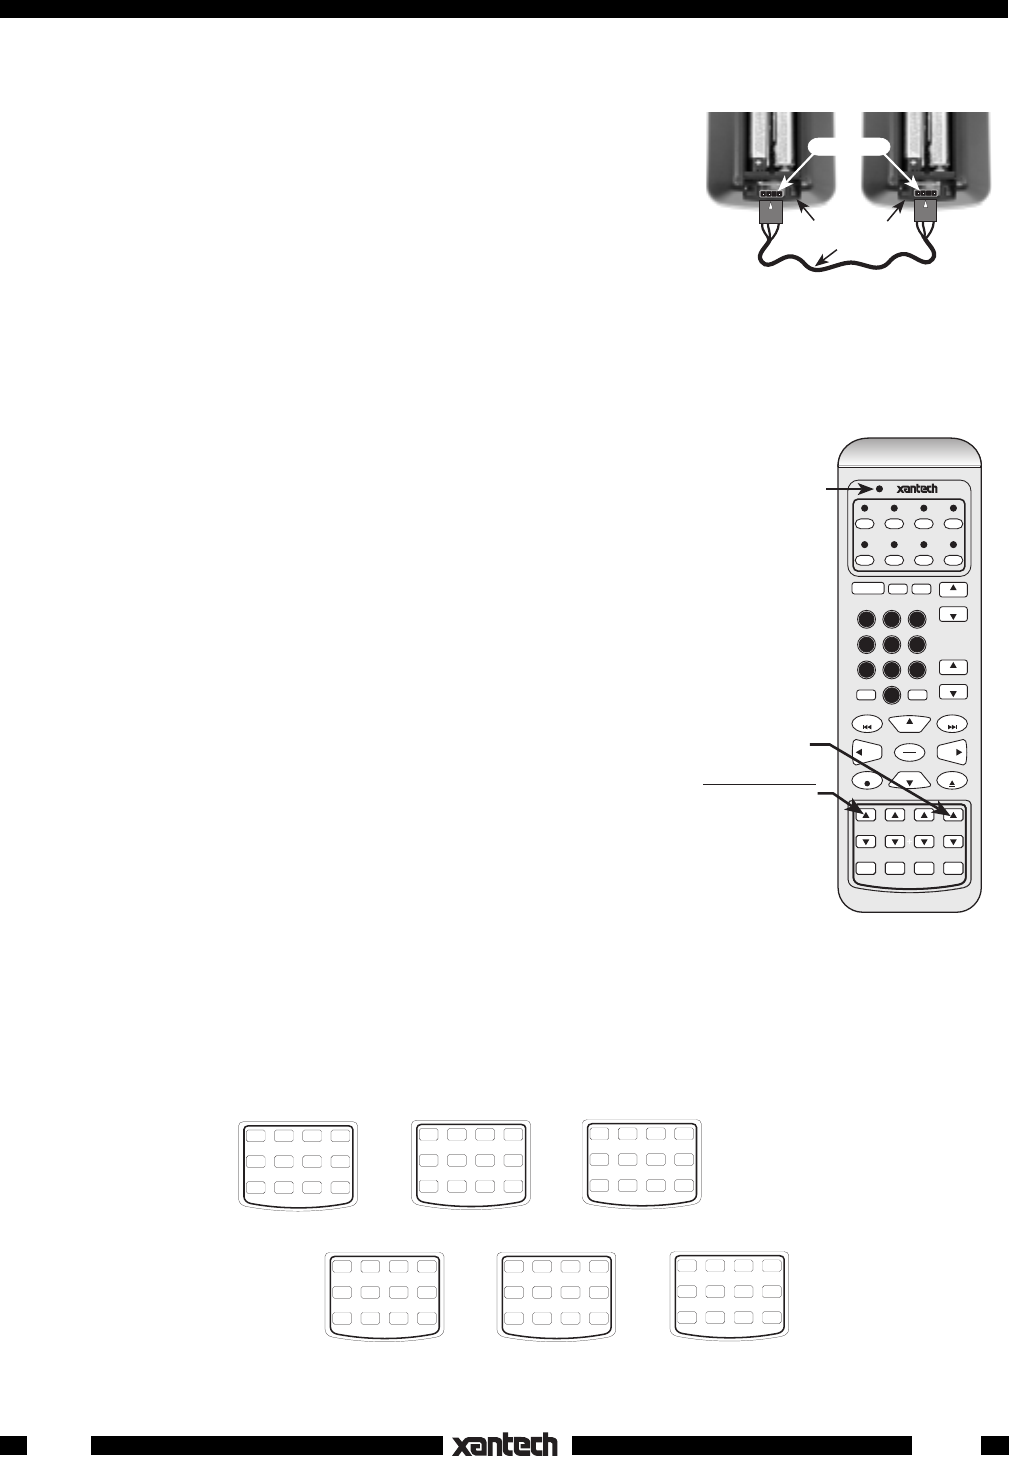
Refer to Fig. 13 and proceed as follows:
1. Using a 3' COM Port cable (optional, see your dealer) , simply plug
it into the COM Port of each unit as shown in Fig. 13.
2. On the programmed unit, press both the PGM and the XFER keys
simultaneously, then release. Refer to Fig. 14.
The Status LED will flash Green and Amber alternately on both units while a copy of the memory
contents is transferring to the unprogrammed unit. You may "clone" as many URC-2's as desired by
repeating this process.
NOTE: If transfer does not complete or the Status and Source
LED's blink Red, remove a battery from each unit, reinsert and try
again.
USING THE SUPPLIED OVERLAYS
There are six overlays supplied that fit over the twelve lower "Custom
Use" keys on the URC-2 (Fig. 15).
• Overlay #1 is used specifically when programming, as explained
previously (Figs. 2 & 6).
• Overlays #2, #3, #4, & #5 may be used to identify IR commands
needed for advanced custom installation applications, or simply a few
keys you can use for extra commands you may want that cannot be
placed logically on other keys.
• When you have picked the overlay you want to use, peel off the
protective adhesive cover and press it into place over the 12 keys.
CAUTION: The Programming Overlay (#1) would not normally be
permanently attached, unless you have no intention of using the other
overlays at a later time. Also, be sure to keep the Programming
Overlay (#1) for future programming needs.
• Be careful to align the overlay accurately, so that it does not interfere with the operation of the keys.
COM Ports
3' cable (optional)
Programmed Unit
URC-2's
(Battery Covers Removed)
Un-programmed Unit
UP
UP
1
2
3
URC-2
TV VCR SAT CBL
DVD TNR CD AUX
POWER
T/V
ENTER
VOL
VOL
CH
CH
PR.CH
MUTE
456
7
89
0
PAUSE
STOP
REW FF
INFOEXIT
SEL
PLAY
MENUGUIDE
ABCD
The Status LED
will blink Green &
Amber on both
units during the
Cloning process.
PGM CANCEL DEL XFER
SEQ DELAY EDIT STEP
CLONING
Press
PGM and XFER
simultaneously,
then release
Fig. 14
Fig. 13
#6
Blank
Overlay
#2
Surround Sound
Overlay
SURR MODE SLEEP TEST
REAR CENTER DELAY SUB
#4
Audio Functions
Overlay
OFF GLOBAL OFF ON
TREB BASS BAL
MUTE MUTE
PGM CANCEL DEL XFER
SEQ DELAY EDIT STEP
Programming
Overlay
#1
#5
TV Functions
Overlay
DISP SWAP SLEEP MODE
PIP CH FREEZE
OFF
#3
Scene Control
Overlay
OFF OFF
DRAPE
2
DRAPE
1
LIGHTS
1
LIGHTS
2
ON ON
Fig. 15
