69
Using Autofocus (AF)
3
Registrating and Switching AF Point
Switching to the Registered AF Point
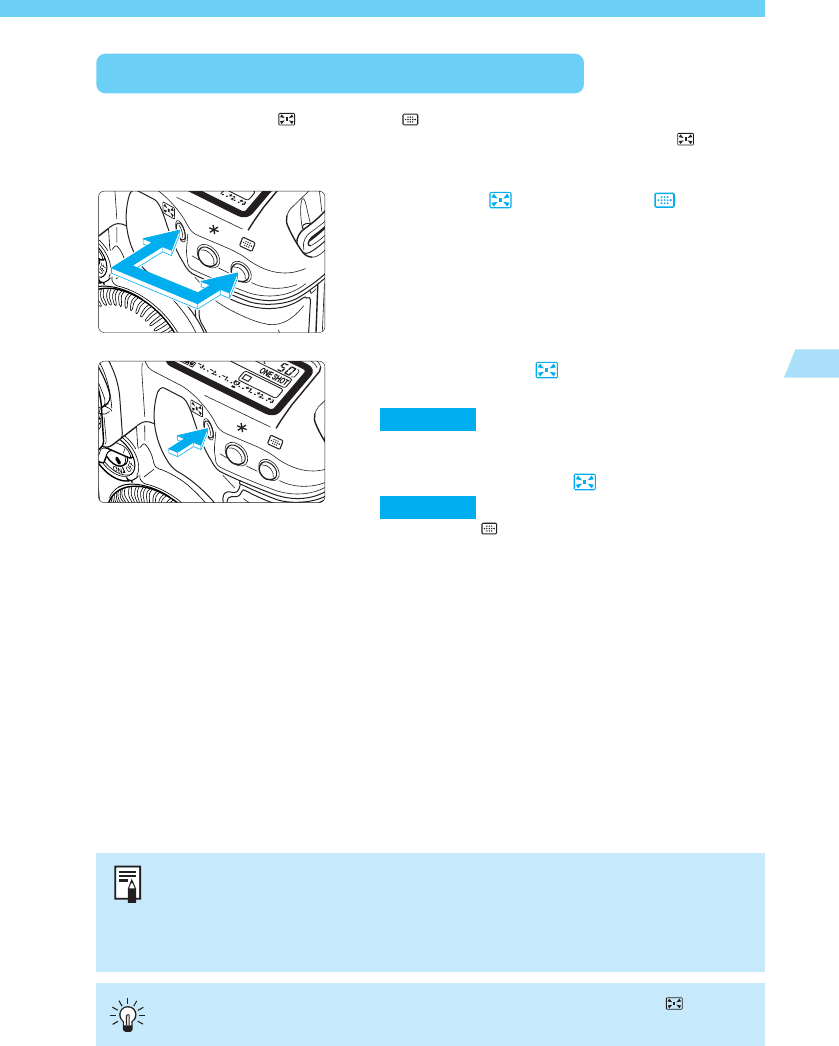
Normally, you press the < > button and < > button simultaneously to switch to the
registered AF point. However, with C.Fn-18-1/2 (→p.138), you can just press the <
> button
to switch to the registered AF point. See “Setting a Custom Function” on page 132.
Press the < > button and < > button
simultaneously.
•
This is the default method with C.Fn-18-0.
(1)
Press only the <
> button to switch to
the registered AF point.
(→138)
(2)
C.Fn-18-1
Switch to the registered AF point only
while pressing the < > button.
(→138)
•
When the < > button is released, it will return to
the original AF point.
(3)
C.Fn-18-2
•
If no AF point has been registered, the above steps will switch it to the center AF
point.
•
If you set or cancel C.Fn-13, the center AF point will become the registered AF
point. This does not apply if you change C.Fn-13-1 to C.Fn-13-2 (or vice versa).
The registered AF point will not change in this case.
If C.Fn-18-1/2 and C.Fn-04-1/3 have been set, you can press only the < > button
to switch to the registered AF point and start autofocusing at the same time.


