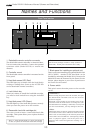
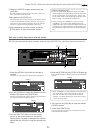
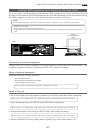
Model D2424 Reference Manual (Saving and Loading Song Data)
100
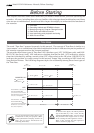
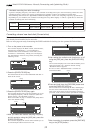
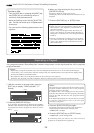
Saving of “WAV” files
A WAV file is saved by the following procedure. Before proceeding to save, make sure a DOS
formatted disk in FAT 16 is set in the SCSI ID6 equipment. The following explains the procedures
for using a backup disk after it had been formatted.
The E-IDE hard disk (or optional DVD-RAM drive) for backup can be used by the same procedures
at saving in the DOS formatted disk.
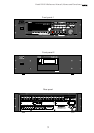
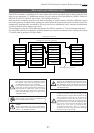
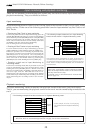
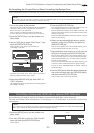
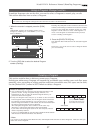
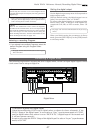
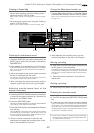
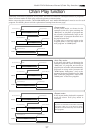
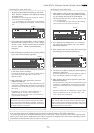
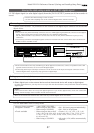
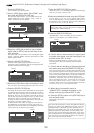
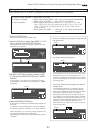
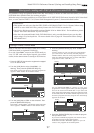
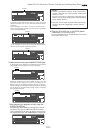
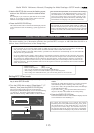
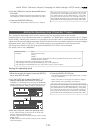
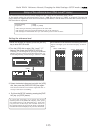
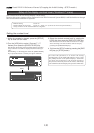
1.The SETUP mode is entered by pressing the
[SETUP] key.
2.Select “Save PGM?” (“?” blinks) with the [JOG]
dial and press the [EXECUTE/YES] key.
The currently setup content will flash in the display.
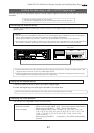
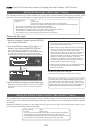
3.Select the flashing “SCSI6” with the [JOG] dial and
press the [EXECUTE/YES] key. (Select "IDE2"
when saving in the E-IDE hard disk or optional
DVD-RAM disk.)
After displaying "drive name", the display will change to
"Bkup Mode?" for selecting the backup mode ("WAVE"
will flashes).
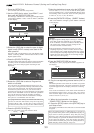
4.Select the backup mode "WAVE" with the [JOG]
dial and press the [EXECUTE/YES] key.
The display will change to "CB Export? OFF" ("OFF"
flashes) and ON-OFF of the clip board export can be
setup.
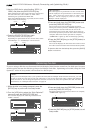
< Please remember! >
When clip board export is set to ON, save is to be
executed only on data within a desired range.
In such a case, the desired range must be registered by
the CLIPBOARD IN and CLIPBOARD OUT points previous
to executing save. For explanation on registering of
CLIPBOARD IN/OUT points, refer to [Registering of the
locate point (=editing point) on page 54.
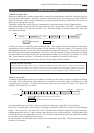
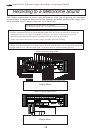
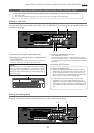
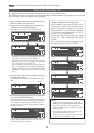
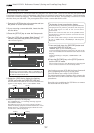
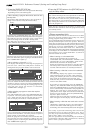
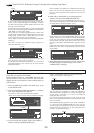
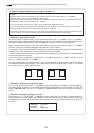
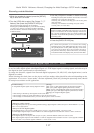
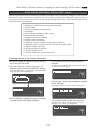
5.Select "OFF" and press the [EXECUTE/YES] key.
The display will change to selecting the program for
saving.
6.Select the desired program with the [JOG] dial and
press the [EXECUTE/YES] key.
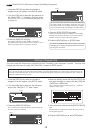
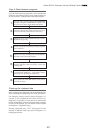
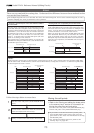
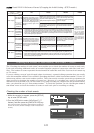
The display will change to selecting the track to be saved.
In the initial state, "All Trk" will flashes.
If the [JOG] dial is rotated at this stage, in addition to
"All Trk" (flashing), "01 01" (flashing)-"56 56" (flashing)
can be selected. This function is used when specifying
any desired track and saving it.
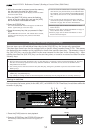
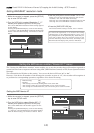
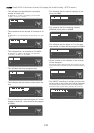
7.After selecting the track, press the [EXECUTE/YES]
key.
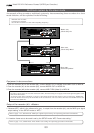
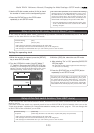
If "All Trk" or any desired track was selected, the display
will change to the following.
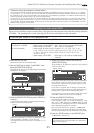
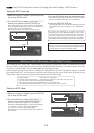
When "All Trk" is selected:
The display will change to making a new WAV file on
the disk and "SURE?" will flashes.
Normally, when saving ABS 0-REC END data, proceed to
the next step while the setup is OFF.
But, under the following condition, save is executed with
the setup ON.
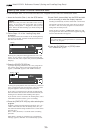
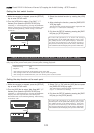
When the [JOG] dial is rotated, "Eject" can be selected.
To eject the disk, select "Eject" and press the [EXECUTE/
YES] key.
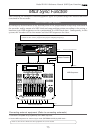
∞
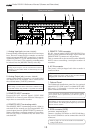
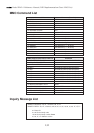
42
OL
0
30
24
18
12
9
6
3
kHz
24
FS
BIT
SETUP
24
∞
42
OL
0
30
24
18
12
9
6
3
2322
21
20
19
18
17
1615141312
11
10
98765
4
3
2
1
CLOCK
INT
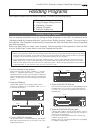
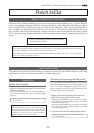
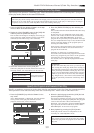
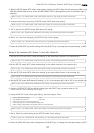
For example, if tracks 5-24 must be saved, "05 05" is
selected. Then proceed to the following.
Flashing
Flashing
Flashing
Flashing
Flashing
Flashing
Flashing
∞
42
OL
0
30
24
18
12
9
6
3
kHz
24
FS
BIT
SETUP
24
∞
42
OL
0
30
24
18
12
9
6
3
2322
21
20
19
18
17
1615141312
11
10
98765
4
3
2
1
CLOCK
INT
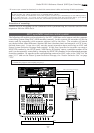
∞
42
OL
0
30
24
18
12
9
6
3
kHz
24
FS
BIT
SETUP
24
∞
42
OL
0
30
24
18
12
9
6
3
2322
21
20
19
18
17
1615141312
11
10
98765
4
3
2
1
CLOCK
INT
∞
42
OL
0
30
24
18
12
9
6
3
kHz
24
FS
BIT
SETUP
24
∞
42
OL
0
30
24
18
12
9
6
3
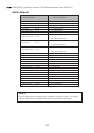
SURE?
2322
21
20
19
18
17
1615141312
11
10
98765
4
3
2
1
CLOCK
INT
∞
42
OL
0
30
24
18
12
9
6
3
kHz
24
FS
BIT
SETUP
24
∞
42
OL
0
30
24
18
12
9
6
3
2322
21
20
19
18
17
1615141312
11
10
98765
4
3
2
1
CLOCK
INT
∞
42
OL
0
30
24
18
12
9
6
3
kHz
24
FS
BIT
SETUP
24
∞
42
OL
0
30
24
18
12
9
6
3
2322
21
20
19
18
17
1615141312
11
10
98765
4
3
2
1
CLOCK
INT
∞
42
OL
0
30
24
18
12
9
6
3
kHz
24
FS
BIT
SETUP
24
∞
42
OL
0
30
24
18
12
9
6
3
SURE?
2322
21
20
19
18
17
1615141312
11
10
98765
4
3
2
1
CLOCK
INT