Setting Paper on the Bypass Tray
15
1
B
BB
B
Adjust the paper guides to the pa-
per size.
Important
❒ If the paper guides are not flush
against the paper, skewing and
misfeeds might occur.
C
CC
C
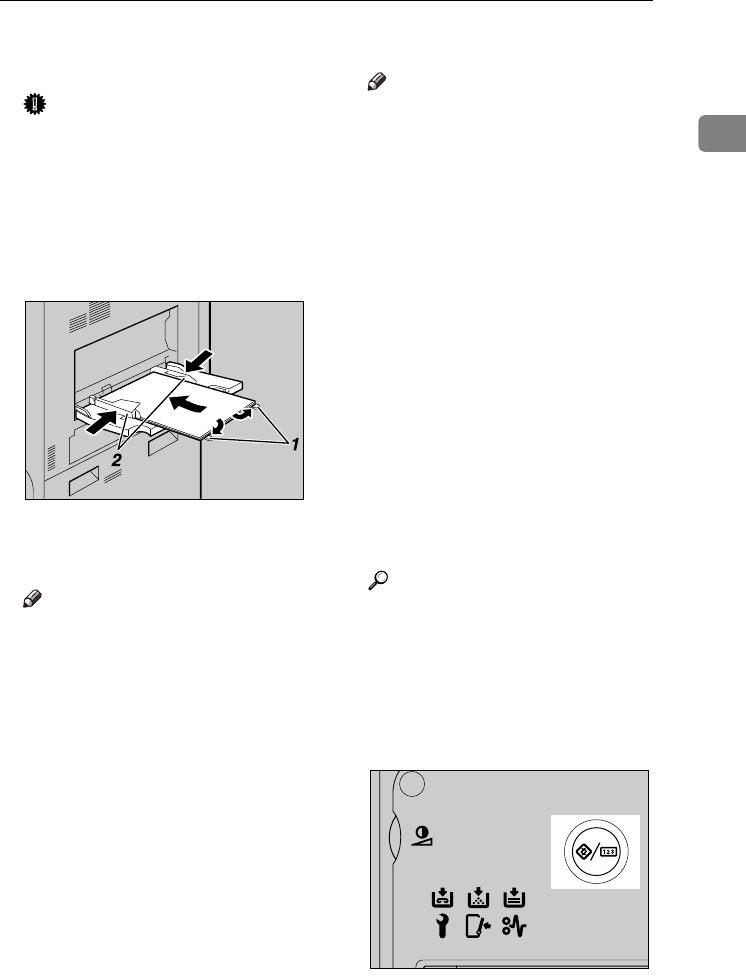
Gently insert paper face up into
the bypass tray until the beeper
sounds.
1.
Extender
2.
Paper guides
Note
❒ The beeper will not sound if it is
turned off. Gently insert paper
until it stops.
❒ Do not stack paper over the lim-
it mark, otherwise a skewed im-
age or misfeeds might occur.
❒ Open out the extender to support
paper sizes larger than A4 L,
8
1
/
2
"×11" L.
❒ Fan the paper to get air between
the sheets to avoid a multi-sheet
feed.
❒ When setting an OHP transpar-
ency, make sure that its front
and back sides are properly po-
sitioned.
❒ Select paper type when printing
onto OHP transparencies or
thick paper (over 127.9 g/m
2
).
For details, see p.17 “Setting
thick paper”.
D
DD
D
Select the paper size.
Note
❒ You can set paper size using the
printer driver. The following
procedures are not necessary
when setting paper size using
the printer driver.
❒ The paper size set using the
printer driver has priority over
that set using the display panel.
❒ When the printer driver is not
used, make settings using the
display panel.
❒ Thick paper and OHP transpar-
encies are delivered face up on
the top of the preceding page;
therefore, the prints need to be
rearranged into the correct or-
der. To avoid this, select [Re-
verse order print] in the RPCS
printer driver settings to deliver
the prints in the correct page or-
der.
Reference
For printer driver settings, see
the printer driver Help.
For details about setting custom
sizes, see p.16 “Setting custom
size paper”.
A Press the {
{{
{User Tools/Counter}
}}
}
key on the control panel.
B Press [System Settings].
AEV005S
AEV028S
VenusC1GB-Printer-F8_FM.book Page 15 Tuesday, March 29, 2005 4:51 PM


