SETUP AND OVERVIEW
1-3
Tab Down Tab Up Enter Back Read On/Off
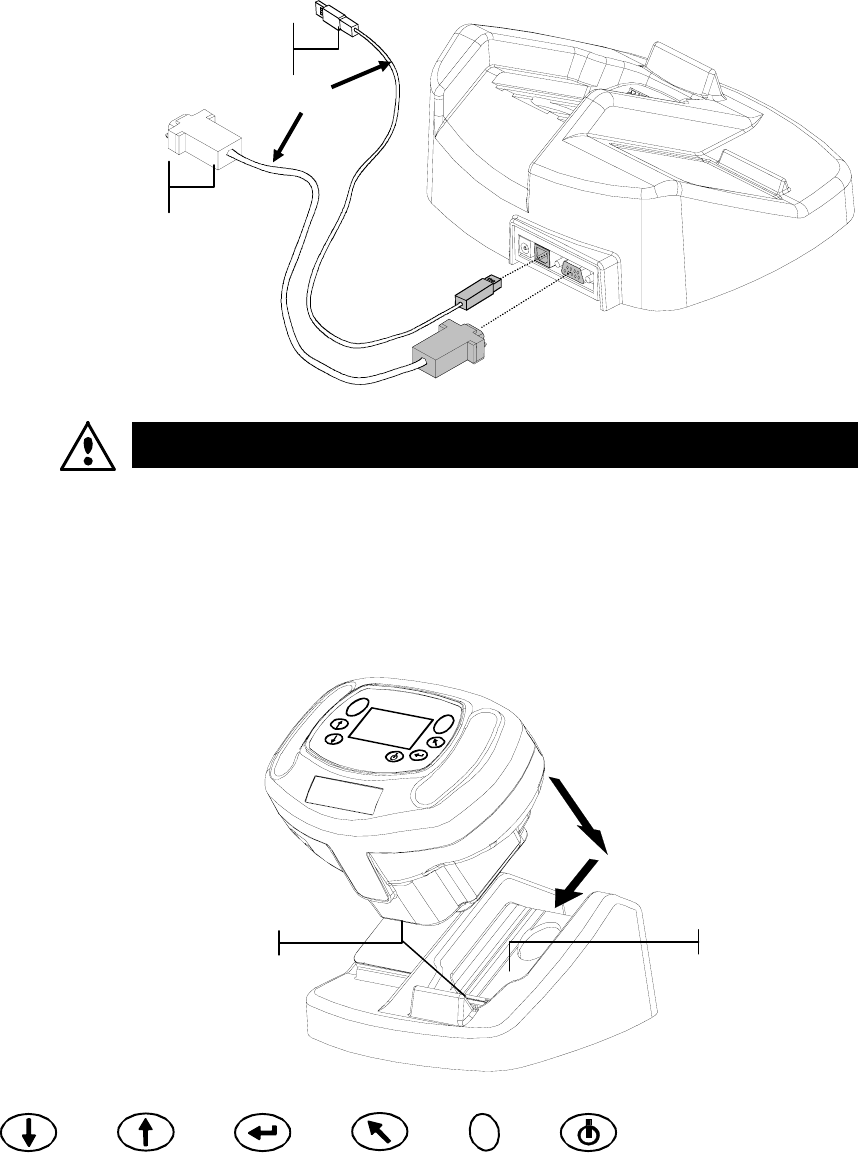
USB Cable Interface (optional)
Plug the square end of the USB cable into the back of the docking station. Connect
the other end of the USB cable to an available USB port on back of the computer.
After connecting the USB cable to your computer, a “Found New Hardware”
message appears on the screen. You must install the USB driver for the instrument to
communicate with your computer. Insert the Manuals and Utilities CD that came
with your instrument into the CD drive and follow the instructions on the screen.
The USB driver is located in the “Driver” folder on the CD.
The instrument automatically goes into “charge mode” when it is placed on the
docking station.
5. Place the instrument onto the powered docking station by positioning the sensor nose
in the recessed area and sliding downward. Make sure the connector on the
instrument is properly seated to the connector on the docking station. A “two-beep”
conformation signal is heard and a “lighting bolt” icon appears in the lower right
portion of the main screen when properly seated. The instrument must initially remain
on the docking station for a minimum of four hours to allow the internal batteries to
fully charge.
Connectors
Recessed Area
OR
DB9 Serial Cable
(standard)
USB Cable
(optional)


