


56
6.2 Hard Disk Installation
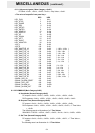
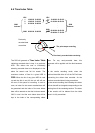
Usually, the unit comes with one hard-disk
drive installed in compartment HD 1, which is
default-configured as a master. The jumper
settings configuration of the installed
hard-disk drives for the unit and compatible
drives which can be used with this unit are
listed in the table below. To install two hard
disk drives in the compartments for HD 1 and
HD 2, please take the following steps.
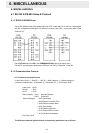
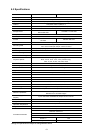
The jumper settings of hard-disk drives for the
system
Location Jumper
IDE 1 Compartment HD 1 Master
IDE 2 Compartment HD 2 Master
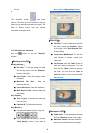
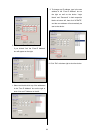
6.2.1 Built-in hard disk
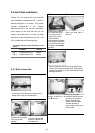
1.
Unscrew all the
4 mounting screws on the
mobile rack of the unit and detach it.
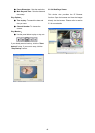
2.
Carefully lift the mobile
rack to a vertical
position.
3.
Unscrew the secured
screws to detach the
hard disk rack.
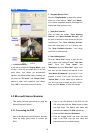
4.
Setting the jumper of
your hard disk driver.
The way to set the
jumper of the drive
varies between
manufacturers; please
refer to the instructions
on the driver to set the
jumpers in the master
position.
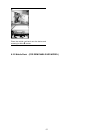
5.
Place the hard disk in
the rack.
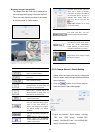
6.
Secure the driver in the rack using
4 mounting
screws in the side-mounting holes. Please don’t
tighten the screws too much, otherwise that may
damage the driver.
7.
Screw the rack into the
device, screwing in all
the
4 screws.
8.
Attach the interface
connector and the power
connector to the drive.
Please note the red
lining of the IDE cable
and the red wire of
power cable must line up
side by side.