


9
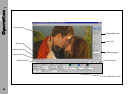
Projectable Area
• By choosing an output format in the ‘projectable area‘
photo, internally the corresponding ‘projector
mask’ is selected. The ‘projector mask‘, the ‘save title
area’ or both together can be activated. Additionally
the reserved region for the soundtrack and the frame
line can be displayed.
Note: The areas are only seen in the film view and
have no effect on the processed images!
Pixel Info
• With the mouse pointer you can pinpoint the RGB
code values (CV). The x/y position is shown in the
upper left corner of the ‘pixel info‘ photo section.
Note: In the ‘original’ view the original CVs from the
input images (8, 10, 12 or 16 bit) are displayed.
In the ‘processed’ view 16 bit RGB values are
shown, because internally all image processing
is done in 16 bit. The ‘film’ view shows the 10 bit
cineon CV as they are sent to the recorder.
Those values will change by changing the
loader LUT.
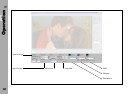
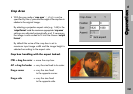
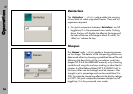
Display Settings
• Choose a zoom factor from the drop down list in the
‘display settings‘ area photo to zoom in/out
(25% - 200%) or use the right mouse button or
keyboard shortcuts.
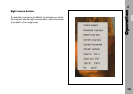
Right mouse button:
zoom in/out, fit, 100% (the mouse pointer must be
positioned in the viewer window!)
Keyboard shortcuts:
ctrl –/+ (numerical keypad), ctrl F (Fit), ctrl 0 (100%)
Beneath the zoom factor drop down list the information
about the position of the upper left image corner (X,Y)
and the size (width, height) of the displayed image
part is shown photo .
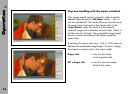
While the image is usually displayed as a linear
image (exception: Cineon files), the ´view cineon´
button will display the image in cineon logarithmic
space, as they will be transferred to the recorder. In
that mode the influence of changing the loader LUTs
can be seen. The ´view cineon´ button is only
activated in the film view.
To judge the influence of the Color Management, use
the ‘proof‘ and the ´gamut´ button (see chapter 5).
Operation
2.1