


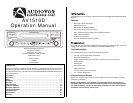
AV1510D
3
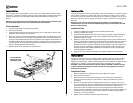
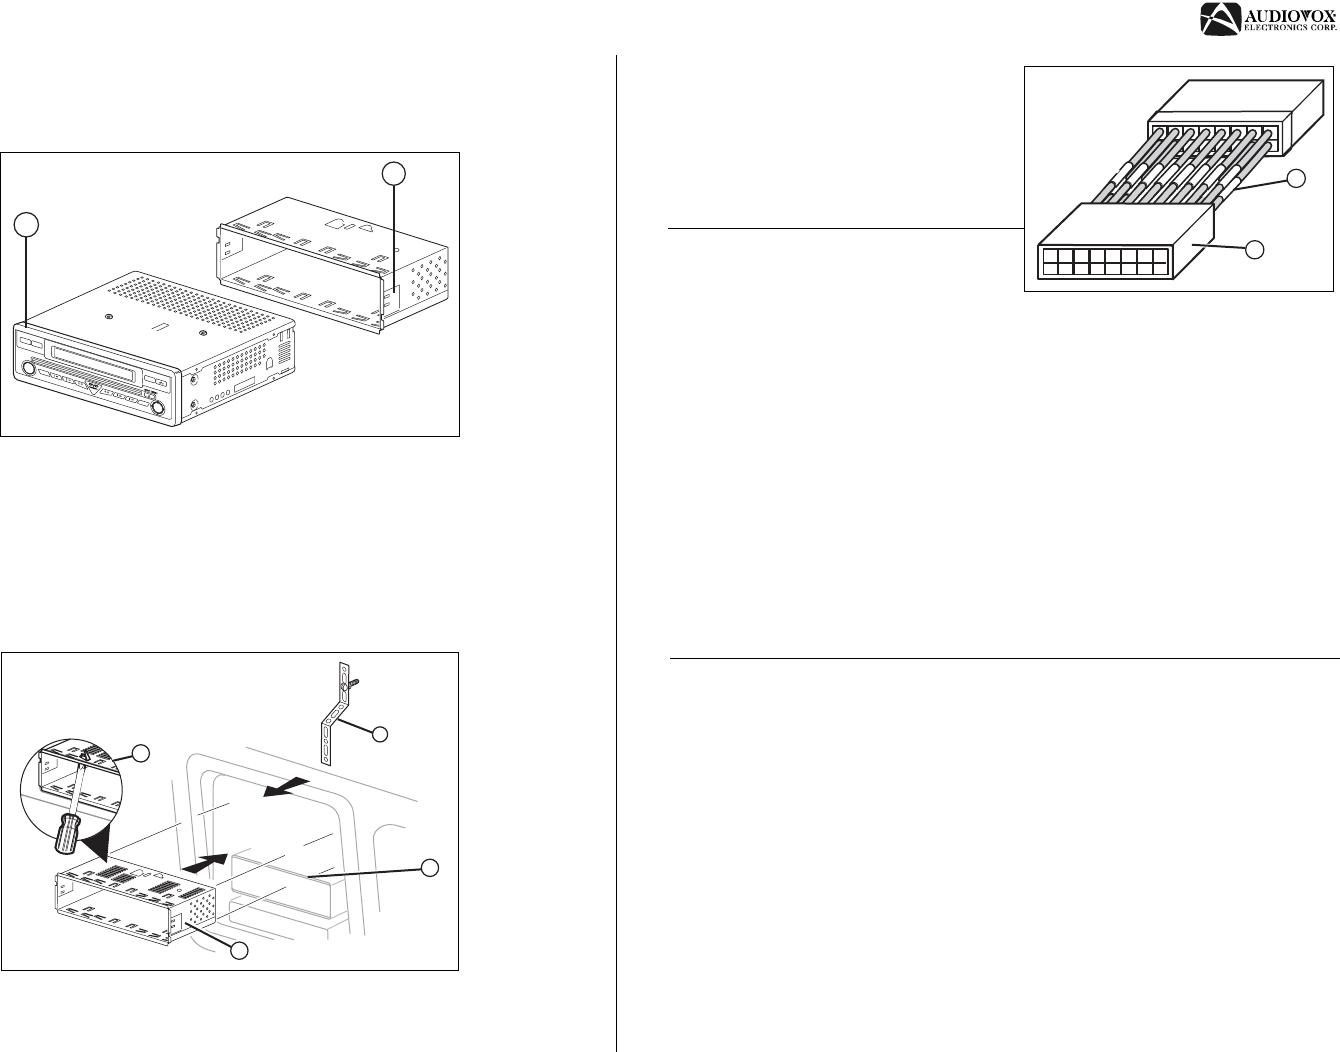
Pre-installation
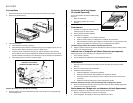
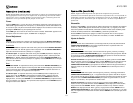
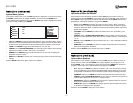
1. Press the metal levers on both sides to remove the half-sleeve from the radio.
2. Remove the plastic trim ring.
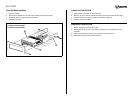
3. Install the half-sleeve.
a. Install adapter if necessary (optional).
b. Install half-sleeve into adapter or dashboard (only use the supplied screws). Do not
force the sleeve into the opening or cause it to bend or bow.
c. Locate the series of bend tabs along the top, bottom and sides of the mounting
sleeve. With the sleeve fully inserted into the dashboard opening, bend as many of
the tabs outward as necessary so that the sleeve is firmly secured to the dashboard.
d. Install support strap to make the unit more stable.
Caution! Be careful not to damage the car wiring.
4. Place the radio in front of the dashboard opening so the wiring can be brought through
the mounting sleeve.
1
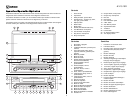
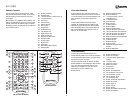
7-INCH
T
FT
7-INCH
TFT
MODE
VM9510
MUTE
AS/PS
BAND
DISP
PWR
ENTER
AM/FM/DVD/MP3
R
ECEIVER
7-INCH
D
IGITAL
T
FT
OPEN
Push
Push
AV AUX IN
2
3d
3a
3b
3c
Install Half-Sleeve
Instalación de la Camisa
Installation du Demi-manch
on
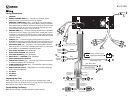
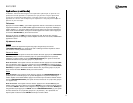
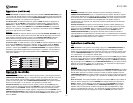
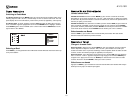
Connecting the Wiring Adapter
(Purchased Separately)
You can make these connections without being
in the car.
1. Splice or crimp wires.
2. Attach wiring adapter to car wiring
harness.
Preinstalación
1. Presione los cerrojos de ambos lados del
radio para quitar la media camisa.
2. Quite el pedazo decorativo plástico.
3. Instalación de la Camisa.
a. Instale el adaptador, si es necesario (opcional).
b. Instale la media camisa en el adaptador o en tablero de instrumentos.
c. Hale las aletas hacia afuera para asegurar la media camisa en al apertura del radio.
d. Instale la abrazadera de soporte para que la unidad quede más estable.
¡Cuidado! Tenga cuidado de no dañar el cableado del automóvil.
4. Ubique el radio en frente de la apertura del tablero de manera tal que los cables puedan
pasar por la manga de montaje.
Cableado con un Adaptador de Cables (Cómprelos por separado)
Usted puede hacer estas conexiones sin ni siquiera estar en el carro.
1. Una o conecte a presión.
2. Una el adaptador de cableado al arnés del cableado del carro.
Préinstallation
1. Appuyez sur les verrous placés de chaque côté de l’autoradio pour enlever le demi-
fourreau.
2. Enlevez le morceau décoratif en plastique.
3. Installation du Demi-manchon.
a. Installez l’adaptateur si nécessaire (facultatif).
b. Installez le demi-fourreau dans l’adaptateur de la planche de bord.
c. Poussez les pattes vers l’extérieur pour fixer le demi-fourreau dans l’ouverture de
l’autoradio.
d. Installez la bande de fixation pour rendre l’appareil plus stable.
Attention ! Rassurez-vous que vous n'endommagé pas le câblage de la voiture.
4. Placez la radio devant l'ouverture dans la planche à bord, afin que le câblage puisse être
fait à travers le manchon du montage.
Raccordement au Câblage avec un Adaptateur (Achetér Séparément)
Vous pouvez effectuer ces branchements même sans être dans la voiture.
1. Effectuez les branchements par raccord ou sertissage.
2. Fixez l’adaptateur de câblage au faisceau de câbles de la voiture.
1
2