AVerMedia
®
AVerTV Box
12
To memorize channels using
scan all frequency, choose
SCAN ALL FREQ from Menu-2
and select YES to start scanning
the new frequencies.
As the AVerTV Box finds an active channel, it will assign the frequency to
a new channel. You can interrupt and cancel the process anytime by
pressing the Left or Right buttons on the remote.
Scan all frequency can also search for channels with xx.75 MHz or xx.50
MHz frequency, but such channels will still be memorized as having xx.25
MHz frequency. Use the CH FINE TUNE function to adjust a channel to
its exact frequency and get a clear TV picture. (Refer to the section, Fine
Tuning, for details.)
If you want to restore the default frequency table, execute the RESET
function. All the frequencies that were memorized using Scan All
Frequency will then be erased from the channel memory. FINE TUNE
adjustments will also be restored to their default settings.
NOTE: Scan All Frequency is a very time consuming process. If the
default frequency table already includes all active TV
channels in your area, then avoid using Scan All Frequency.
Channel Remapping
If your broadcast area contains channels covering diverse numbers, you can
reprogram these channel numbers in AVerTV Box. For example, if your viewing
area contains channels 7, 13, 21 and 28, you can reprogram these numbers in
the AverTV Box channel record as channels 1, 2, 3 and 4.
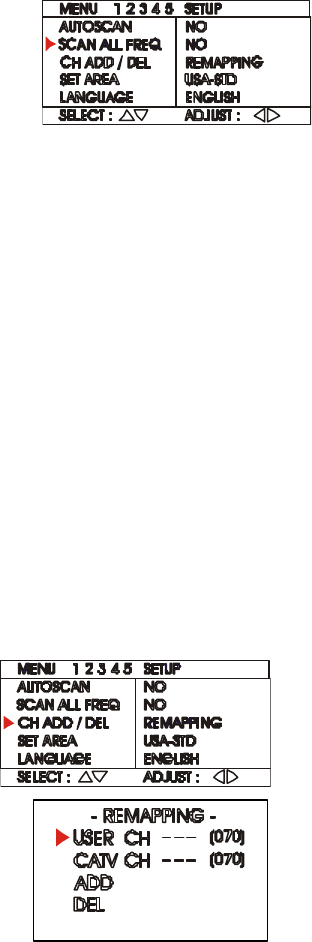
1. Select CH ADD/DEL from Menu-2
then Press the left or right button to
access this feature.
2. In the selected USER CH, enter in
the new channel number you want to
assign or the channel number you
want to remove/add in to the channel
line up.
3. In the CATV CH, enter in the channel
number you want to remap or the
channel number you want to
remove/add.


