


18
PGXG-61B/PGWX-61B/PGWU-61B - - 2015/04/01
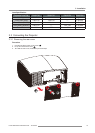
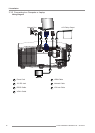
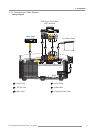
3. Installation
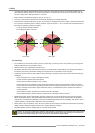
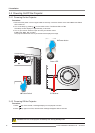
3.2 Installing the lens
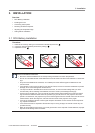
Turn the projector off and unplug the power cord. 1.
Allow the projector to cool down for at least 1 minute then start the lens replacement.2.
Remove the lens ring cover. 3.
1
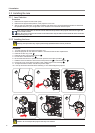
Remove the lens cap counterclockwise. 4.
2
Pull the bar to release the lock. 5.
3
Be sure the label of lens is upward and then push the lens into the position. 6.
4
Rotate the lens clockwise to lock the lens while pull the bar 7.
3
to release the lock.
5
Put the lens ring cover back to its place. Push rubber ngers over lens edge.8.
6
To replace the lens module, reverse the previous steps.9.
Lens cap should be removed before installing. If not it will damage the projector.10.
Procedure:
1
5 6
2 3
4
Warning: This procedure may only be performed by qualied technical service personnel.
Caution: Do not transport the projector with any lens installed.
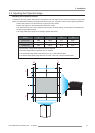
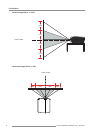
3.2.1 Lens Selection
Procedure
Determine the required screen width (SW).1.
Determine the approximate position of the projector in the room.2.
Start up the Lens Calculator on the Barco website: http://www.barco.com/en/tools/lenscalculator to determine 3.
the possible lenses for your conguration. As a result the Lens Calculator window opens.
Note: The Lens Calculator can also be used to determine the position of the projector when the lens type and
screen width is known.
Note: Due to lens tolerances the results of calculated values may be different from measured values. These dif-
ference may vary +/- 5%.
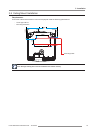
3.2.2 Installing the Lens