Introduction10
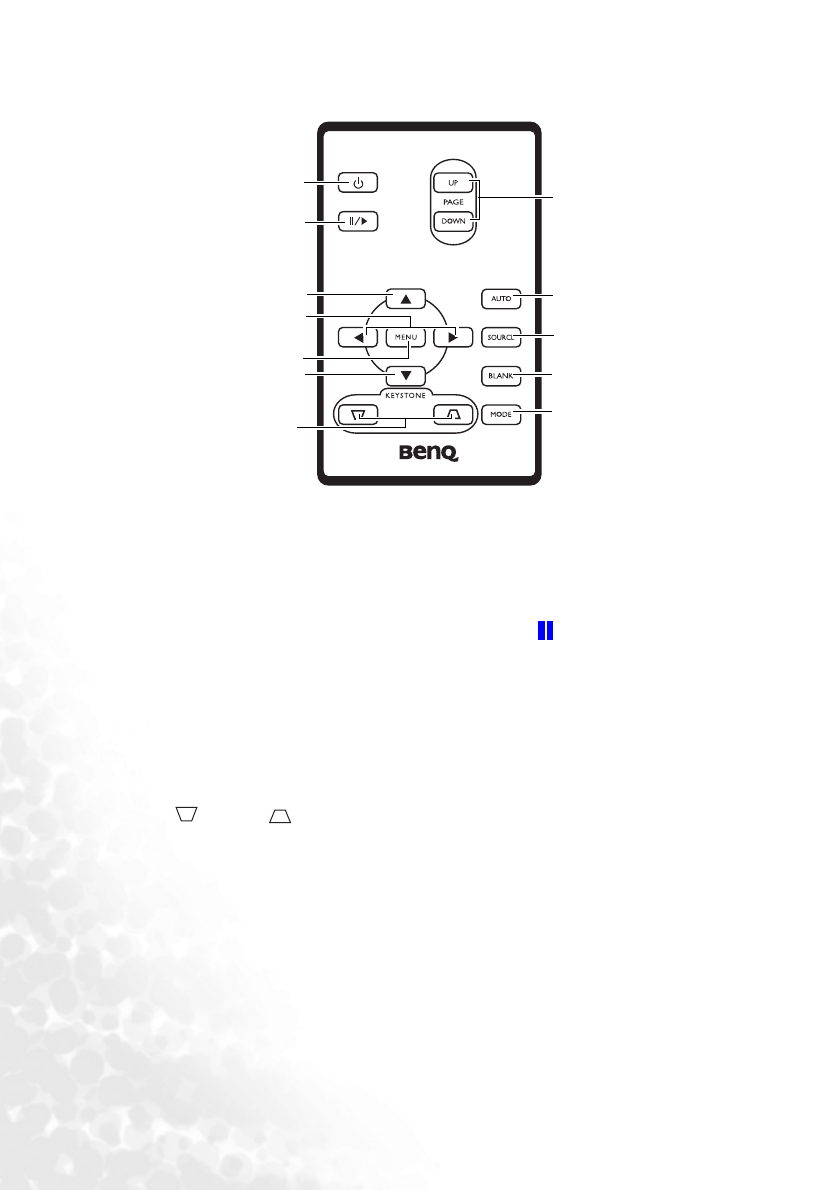
Remote control description
1. Power button (Refer to "Start up" on page 21 and "Shutdown" on page 27 for more
information)
Turns the projector on or off.
When the projector is in standby, press once to turn the projector on.
When the projector is on, press twice to switch the projector to standby.
2. Freeze button
The image is frozen when Freeze is pressed. An icon " " will display in the lower
right corner of the screen. To release the function, press Freeze again or the Source
button.
3. 5Up,6Down buttons
4. 3Left, 4Right buttons
When the on-screen menu is activated, the Up/Down/Left/Right buttons are used as
directional arrows to select the desired menu items and to make adjustments.
5. MENU button (Refer to "Using the menus" on page 29 for more information.)
Turns on the On-Screen Display (OSD) menu.
6. Keystone buttons (Refer to "Correcting keystone" on page 24 for more
information.)
Manually corrects distorted images resulting from an angled projection.
7. Page Up and Down buttons
You can operate your display software program (on a connected PC) which responds to
page up/down commands (like Microsoft PowerPoint) by p
ressing these buttons.
8. AUTO button (Refer to "Auto-adjusting the image" on page 24 for more information.)
Automatically determines the best picture settings for the displayed image.
9. SOURCE button (Refer to "Switching input signal" on page 26 for more information)
Sequentially selects input sources. (RGB/YPbPr-> Video-> S-Video)
10. BLANK button (Refer to "Switching input signal" on page 26 for more information.)
Used to hide the screen image. Press Blank again to restore the image.
11. MODE button (Refer to "Application Mode" on page 30 for more information.)
Depending upon which input signal is selected, there are several picture setup options
available.
1
2
3
4
5
3
6
7
8
9
10
11


