18-9
Cisco IOS Software Configuration Guide for Cisco Aironet Access Points
OL-29225-01
Chapter 18 Configuring SNMP
Configuring SNMP
Some notification types cannot be controlled with the snmp-server enable global configuration
command, such as udp-port. These notification types are always enabled. You can use the snmp-server
host global configuration command to a specific host to receive the notification types listed in
Table 18-4.
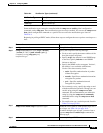
Beginning in privileged EXEC mode, follow these steps to configure the access point to send traps to a
host:
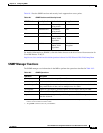
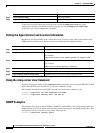
syslog Enable syslog traps.
wlan-wep Enable WEP traps.
Table 18-4 Notification Types (continued)
Notification Type Description
Command Purpose
Step 1
configure terminal Enter global configuration mode.
Step 2
snmp-server host host-addr {traps | informs}
{version {1 | 2c | 3 {auth | noauth | priv}}}
community-string [udp-port port]
notification-type
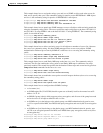
Specify the recipient of the trap message.
• For host-addr, specify the name or address of the
host (the targeted recipient).
• Specify traps (the default) to send SNMP traps
to the host. Specify informs to send SNMP
informs to the host.
• Specify the SNMP version to support. Version 1,
the default, is not available with informs.
Version 3 has three security levels:
–
auth—Specifies authentication of packets
without encryption
–
noauth—Specifies no authentication and no
encryption for packets
–
priv—Specifies authentication and
encryption for packets
• For community-string, specify the string to send
with the notification operation. Though you can
set this string using the snmp-server host
command, We recommend that you define this
string by using the snmp-server community
command before using the snmp-server host
command.
• For notification-type, use the keywords listed in
Table 18-4 on page 18-8.
Step 3
snmp-server enable traps notification-types Enable the access point to send specific traps. For a
list of traps, see Table 18-4 on page 18-8.
To enable multiple types of traps, you must issue a
separate snmp-server enable traps command for
each trap type.
Step 4
end Return to privileged EXEC mode.


