8
Connections
OR
TV Connections
Battery Connections
Charging the Battery
• Attach the supplied battery pack to the back of the portable DVD player.
• Plug the supplied AC adapter into a standard power outlet, and then connect it to the DC IN 12V jack on
the left side of the player.
• Turn off the player. The battery pack will NOT charge while the portable DVD player is powered on.
• The red “Batt Chrg.” light will glow while the battery pack is charging and will turn green when fully
charged. Allow several hours to charge the battery pack.
• When fully charged the battery will last ~2.5 hours.
Removing the Battery
• Press the PUSH button to remove the battery pack.
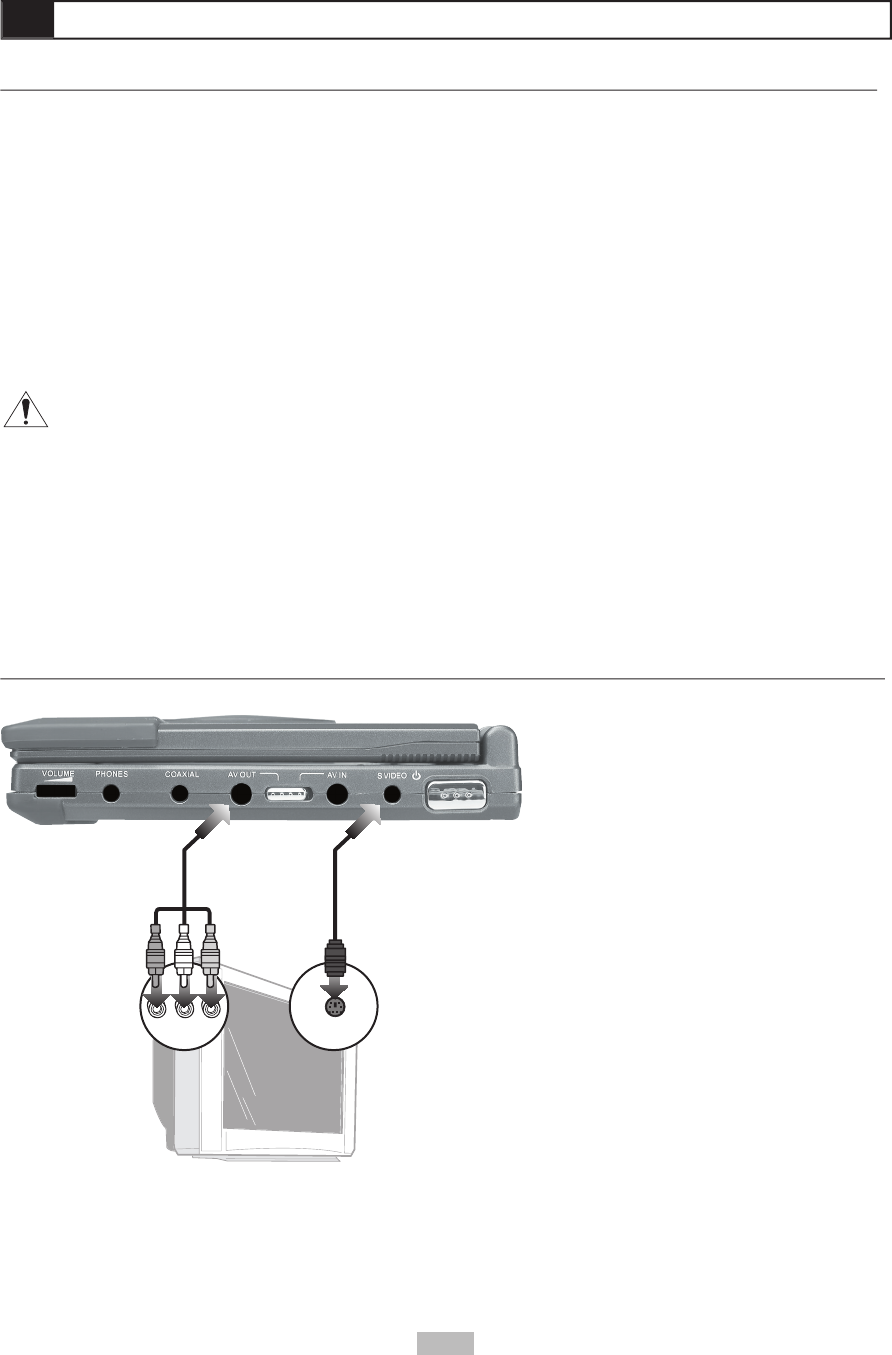
Standard AV Connections
• Connect the supplied audio/video
cable (mini-plug to RCA) from the AV
OUT jack to the Audio/Video Inputs on
our television.
• Slide the AV OUT/AV IN switch to the
AV OUT position.
CAUTION
• Use specifi ed charger only.
• May explode if battery is incorrectly replaced or disposed of in fi re.
• Do not short circuit.
• Danger of explosion if battery is incorrectly replaced. Replace only with the
same or equivalent type.
• Do not place the battery pack under direct sunlight or in excessively hot places
(over 60°C (140°F)) such as the dashboard of cars.
• Only use with the specifi c power adapter by manufacturer.
• The battery pack will not charge while the DVD player is turned on.
S-Video/Progressive Scan Connections
For improved picture quality:
• Connect an S-Video cable with mini-plug
adapter (not included) from the S-VIDEO/
P-SCAN jack to the S-Video input on your
television.
or
• Connect a Component Video cable with
mini-plug adapter (not included) from the
S-VIDEO/P-SCAN jack to the Component
Video input on your television.
• Slide the AV OUT/AV IN switch to the AV
OUT position.
• Press the MODE button to switch between
S-Video and Progressive Scan modes.


