


Understanding of Menu Operations and Controls
60
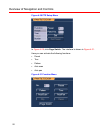
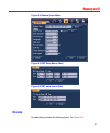
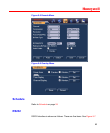
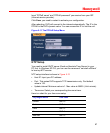
DST: Here you can set DST time and date. Please enable DST function
and then click set button. You can see an interface is shown as in Figure
5-3. Here you can set start time and end time by setting corresponding
week
setup. In Figure 5-3, enable date button, you can see an interface
is sh
own as in Figure 5-4. Here you can set start time and end time by
setting corre
sponding date setup.
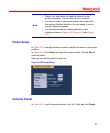
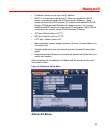
Time format: There are two types: 24-hour mode or 12-hour mode.
Language: System supports various languages: Chinese (simplified),
Chinese (Traditional), English, Italian, Japanese, French, Spanish (All
languages listed here are optional. Slight difference maybe found in
various series.)
HDD full: Here you can select the working mode when the hard disk is
full. There are two options: Stop recording or overwrite.
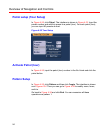
Pack duration: Here is for you to specify the maximum length of each
record file from 1 to 120 minutes. Default value is 60 minutes. The
change will take effect in the new record file.
DVR No: When you are using one remote control to control several
DVRs, you can give a name to each DVR for your management.
Video standard: There are two formats: NTSC and PAL.
Auto logout: Here is for you to set auto logout interval once login user
remains inactive for a specified time. Value ranges from 0 to 60 minutes.
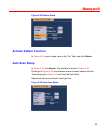
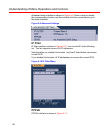
Note
Since system time is very important, do not modify time
casually unless there is a must!
Before your time modification, please stop record
operation first!
After completing all the setups click Save. The system will return to the
previous menu.