


18
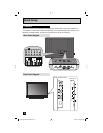
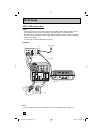
Quick Setup
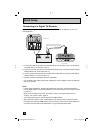
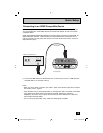
By connecting a Digital TV Receiver, high definition pictures can be displayed on your TV in
their digital form.
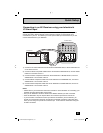
75 Ω
(VHF/UHF)
INPUT 1 INPUT 2
PHOTO
VIEWER
DIGITAL AUDIO
OPTICAL OUT
SERVICE
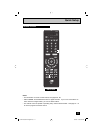
DTV Decoder
HDMI to DVI Cable
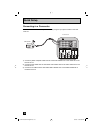
After the connections have been made,
tighten the screw to secure the cables.
TV Rear Panel
LR
AUDIO OUT
DIGITAL OUT
INPUT 3 INPUT 4
S-VIDEO
Y
P
B
P
R
VIDEO
L
R
COMPONENT
AUDIO
Y
P
B
P
R
VIDEO
L
R
COMPONENT
AUDIO
VIDEO
L
R
AUDIO
L
R
AUDIO
TV Rear Panel
INPUT 5
/ INPUT 1
AUDIO
AUDIO
OUT
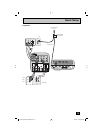
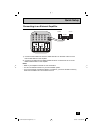
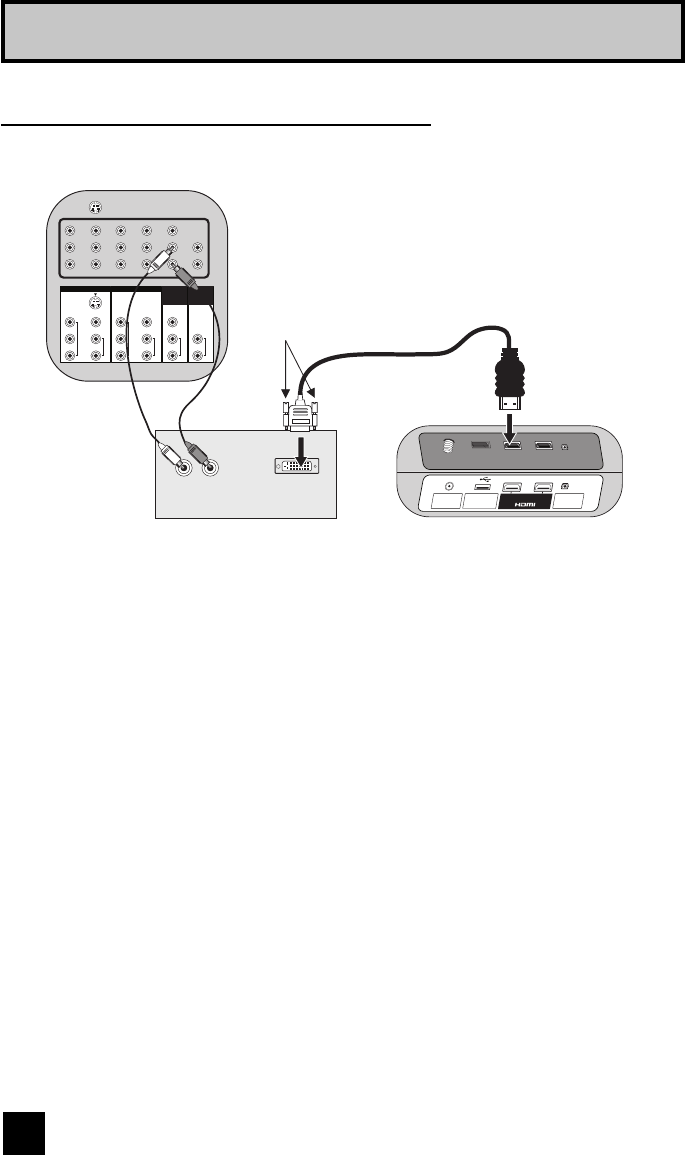
Connecting to a Digital TV Receiver
1) Connect the HDMI to DVI Cable from the DIGITAL OUT on the back of your DTV decoder to
the HDMI INPUT-1 on the back of the TV.
2) Connect a red cable from the DTV decoder RIGHT AUDIO OUT to the RIGHT AUDIO INPUT
HDMI AUDIO IN "R" on the back of the TV.
3) Connect a white cable from the DTV decoder LEFT AUDIO OUT to the LEFT AUDIO INPUT
HDMI AUDIO IN "L" on the back of the TV.
• Personal computer compatibility cannot be guaranteed.
• Use an HDMI to DVI cable (commercially available) in order to digitally connect the television
with a DTV decoder.
Notes:
• If 480p signals (640x480 or 720x480) are displayed on the screen, the horizontal balance
may be slightly shifted. Access the “HDMI Size” in the External Input menu to adjust it. (Refer
to page 45.)
• When you do the above connection, set "Video-1 Audio" in the External Input menu to
"Analog". See "Video-1 Audio", page 45.
• The Analog Audio input can only be used with the HDMI INPUT-1.
• When setting the “Video-1 Audio - Analog/Digital” menu setting on the TV, please note that
this setting only effects the HDMI INPUT-1 jack and that if you use a DVI to HDMI adapter this
connection must be made to the HDMI INPUT-1 along with analog audio cables.
LCT2275-001B-A English.indd 18LCT2275-001B-A English.indd 18 6/14/07 10:33:38 AM6/14/07 10:33:38 AM