


15
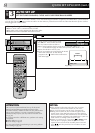
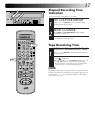
LOAD A CASSETTE
1
Insert a cassette with the record safety tab intact.
● The counter is reset to 0:00:00 and the recorder
power comes on automatically.
CHOOSE A PROGRAMME
2
Press TV PROG +/– or the NUMBER keys to select the
channel you wish to record.
● The TV PROG dial can also be used to select a
channel.
SET TAPE SPEED
3
Press SP/LP ( ). Check the SP/LP indicator on the
front display panel to confirm the selected tape speed.
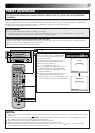
START RECORDING
4
Press and hold RECORD and press PLAY on the remote
control, or press RECORD on the recorder.
● You can not change the preset whilst recording is in
progress. To change the preset, see step 5.
PAUSE/RESUME
RECORDING
5
Press PAUSE. Press PLAY to resume recording.
● During the Record Pause mode, you can change the
preset by pressing the TV PROG +/– buttons or the
NUMBER keys.
STOP RECORDING
6
Press STOP. Then press EJECT to remove the cassette.
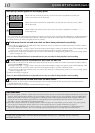
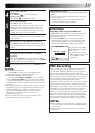
S-VHS/VHS Recording
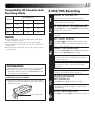
Compatibility Of Cassettes And
Recording Mode
Cassette
Recording Mode
D-VHS S-VHS VHS
D-VHS Yes Yes Yes
S-VHS No Yes Yes
VHS No No Yes
NOTES:
●
The D-VHS (MTP), S-VHS and VHS mode recordings are
possible with this recorder.
●
To record in the D-VHS mode, use a D-VHS cassette.
●
To record in the S-VHS mode, you can use a S-VHS or D-
VHS cassette.
●
To record in the VHS mode, you can use a VHS, S-VHS or
D-VHS cassette.
B.E.S.T. takes place at the beginning of both the
first SP and the first LP recording after inserting the
cassette (੬ pg. 34).
If "DIRECT REC" is set to "ON", the programme
that appears on the TV screen will be recorded
(੬ pg. 11).
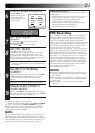
Accidental erasure prevention
● To prevent accidental recording on a recorded cassette,
remove its safety tab. To record on it later, cover the hole
with adhesive tape.
Record safety tab
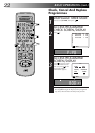
INFORMATION
When using the AV connection (੬ pg. 6), you can switch
between TV mode and AV mode by pressing TV/VCR.
* Depending on the type of TV used, TV/VCR button does
not function as described above.