


66
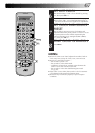
TURN THE RECORDER ON
1
Press .
ACCESS MAIN MENU
SCREEN
2
Press MENU.
ACCESS INITIAL SET
SCREEN
3
Move the highlight bar (pointer) to "INITIAL SET" by
pressing %fi, then press OK or
#
.
ACCESS CLOCK SET
SCREEN
4
Move the highlight bar (pointer) to "CLOCK SET" by
pressing %fi, then press OK or
#
. The Clock Set screen
appears.
SET DATE AND TIME
5
Press %fi to set the time, then press OK or
#
. The "date"
display begins blinking. Repeat the same procedure to
set the date and year.
● When you set the time, press and hold %fi to
change the time by 30 minutes.
● When you set the date, press and hold %fi to
change the date by 15 days.
IMPORTANT
If you performed Auto Set Up (੬ pg. 8), Preset Download
(੬␣ pg. 9) or Auto Channel Set (੬ pg. 58), without ever
having set the clock previously, the recorder's built-in
clock is also set automatically.
Perform the following steps only if —
— Auto Clock Set has not been performed correctly by
Auto Set Up, Preset Download or Auto Channel Set.
or
— the recorder's memory backup has expired.
or
— you want to change Just Clock setting (੬ "Just Clock" in
the left column).
SUBSIDIARY SETTINGS (cont.)
123
456
789
1
2
1
2
3
– –:– –
0
3
4
4
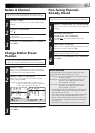
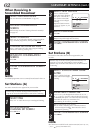
Just Clock
The Just Clock function provides accurate time keeping
through automatic adjustments at regular intervals, by
reading data from a PDC signal.
The Just Clock option can be set "ON" or "OFF" at the
Clock Set screen (the default setting is "ON"). Press OK
until the Just Clock setting begins blinking, then press %fi
to change the setting.
IMPORTANT: If you turn the Just Clock function off, the
accuracy of your recorder’s built-in clock may be im-
paired, which could adversely affect timer recording.
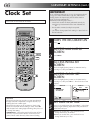
Clock Set
Turn on the TV and select the AV mode.
OK
MENU
INITIAL SET
CLOCK SET
GUIDE PROG SET
JLIP ID NO. SET
[
5
∞
] =
[MENU] : EXIT
CLOCK SET
TIME DATE YEAR
0: 00 01 . 01 99
JUST CLOCK: ON
TV PR. : 1
[
5
∞
] =
[MENU] : EXIT