


36
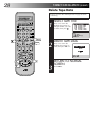
Manual Tracking
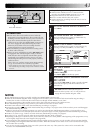
Your video recorder is equipped with automatic tracking control.
For most tapes this will automatically adjust the tracking to suit
the particular tape you are playing. In some circumstances it may
be necessary to make manual tracking adjustments. This is
usually only associated with old or worn tapes or recordings
made on old or worn recorders. If the automatic tracking control
fails to operate correctly you will see noise bars across the picture
as shown on the left below. To correct this you can override the
automatic control and adjust
the tracking manually by
pressing the TV PROG
buttons.
ADVANCED OPERATIONS (cont.)
OVERRIDE AUTOMATIC TRACKING
1
Press on the remote to engage manual tracking.
ADJUST TRACKING MANUALLY
2
Press TV PROG + or – to adjust tracking.
RETURN TO AUTOMATIC TRACKING
3
Press on the remote to re-engage automatic
tracking.
NOTE:
When a new tape is inserted, the recorder returns to the
automatic tracking mode automatically.
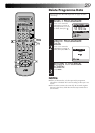
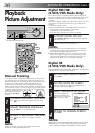
Playback
Picture Adjustment
Digital 3R
(S-VHS/VHS Mode Only)
Digital 3R picture system applies edge correction to the luminance
and chrominance signals to enhance detail.
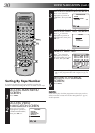
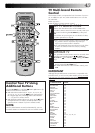
ACCESS MAIN MENU SCREEN
1
Press MENU.
ACCESS MODE SET SCREEN
2
Move the highlight bar (arrow) to "MODE SET" by
pressing %fi, then press OK or
#
.
SELECT DIGITAL 3R SET MODE
3
Move the highlight bar
(arrow) to "DIGITAL 3R"
by pressing %fi, then press
OK or
#
to set to "ON".
RETURN TO NORMAL SCREEN
4
Press MENU.
NOTES:
●
Normally it is recommendable to keep "DIGITAL 3R" set to "ON".
●
Depending on the type of tape being used, picture quality
may sometimes be better with "DIGITAL 3R" set to "OFF".
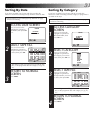
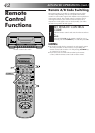
Digital TBC/NR
(S-VHS/VHS Mode Only)
Your video recorder is equipped with the Digital TBC (Time
Base Corrector) that removes jitter from fluctuating video signals
to deliver a stable picture even with old tapes and rental
cassettes.
The on/off of Digital 3-DNR (Noise Reduction) which cuts noise
and enables clear picture reproduction is also linked to this
function.
* The default setting is "ON".
We recommend that you use the Digital TBC feature when...
... playing back a tape recorded on a camcorder.
... playing back a tape repeatedly used.
... using this video recorder as the player for editing.
ACTIVATE DIGITAL TBC/NR
1
Press DIGITAL TBC/NR so that the DIGITAL TBC/NR
indicator lights up.
● To turn off DIGITAL TBC/NR, press DIGITAL TBC/NR
again so that the indicator goes off.
NOTES:
●
If you play back a tape recorded under poor TV reception
condition, there may be cases where the picture becomes
more stable with Digital TBC/NR set to off.
●
When Digital TBC/NR is set to on, if you play back a tape
where certain types of signals are recorded (using a PC or
some character generators), the playback picture may be
distorted. If this is the case, turn off Digital TBC/NR.
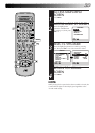
1
2
3
0
TV PROG
OK
MENU
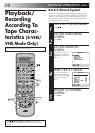
DIGITAL TBC/NR indicator
DIGITAL TBC/NR
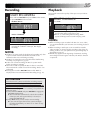
MODE SET
B. E. S. T. ON
PICTURE CONTROL AUTO
AUTO TIMER OFF
O. S. D. ON
DIRECT REC ON
AUTO SP=LP TIMER OFF
DIGITAL 3R ON
NEXT PAGE
[5∞] =
[MENU] : EXIT