


62 EN
INDEX (cont.)
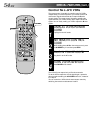
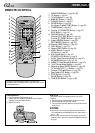
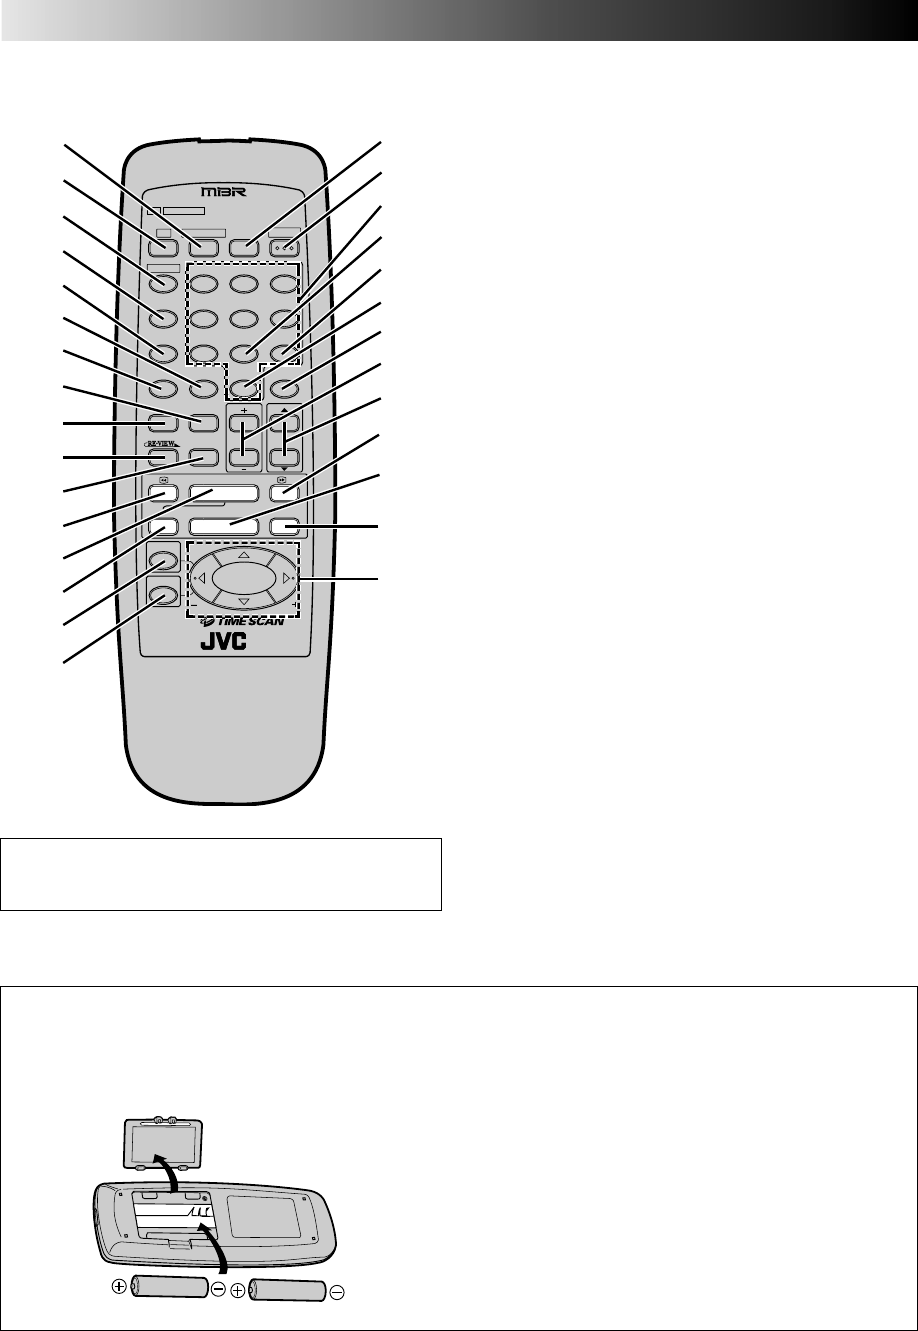
REMOTE CONTROL
1 CABLE/DBS Button (੬ pg. 52, 53)
2 TV Button (੬ pg. 51)
3 TV/VCR Button (੬ pg. 39)
4 MBR SET Button (੬ pg. 51)
5 DISPLAY Button (੬ pg. 31)
6 ENTER Button (੬ pg. 24)
On-Screen Display [OSD] Button (੬ pg. 28)
7 TIMER Button (੬ pg. 43)
8 Counter [C.] MEMORY Button (੬ pg. 31)
ADD Button (੬ pg. 14)
9 CANCEL Button (੬ pg. 46)
Channel [CH] SKIP Button (੬ pg. 14)
Counter [C.] RESET Button (੬ pg. 31)
0 Instant REVIEW Button (੬ pg. 30)
! SKIP SEARCH Button (੬ pg. 37)
@ Rewind [REW] Button (੬ pg. 23)
# PLAY Button (੬ pg. 23)
$ Record [REC] Button (੬ pg. 24)
% MENU Button (੬ pg. 8)
^ OK Button (੬ pg. 8)
& A/B Code Button (੬ pg. 54)
* POWER On/Off Button (੬ pg. 8)
( DAILY Timer Recording Button (੬ pg. 43)
) NUMBER Buttons (੬ pg. 24, 42)
q WEEKLY Timer Recording Button (੬ pg. 43)
w "AUX" Mode Select Button (੬ pg. 48)
e Recording Speed [SP/EP] Button (੬ pg. 24)
r TV Volume [VOL] +/– Button (੬ pg. 51)
t Channel [CH] 5∞ Button (੬ pg. 24)
y Fast-Foward [FF] Button (੬ pg. 23)
u STOP Button (੬ pg. 23)
i PAUSE Button (੬ pg. 25)
o TIME SCAN Button (੬ pg. 8, 36)
A/BTV
CABLE/DBS
TV, CABLE / DBS operation – Press and hold
TV CABLE/DBS button, then press POWER,
CH 5/∞, TV/VCR, 0 – 9, ENTER
TV/VCR
MBR SET
DISPLAY
TIMER
CANCEL
C.MEMORY
SKIP SEARCH
C.RESET/CH.SKIP
ADD
OSD
ENTER SP/EP
TV
VOL
CH
MENU
OK
3
PLAY
REC
4¢
7
STOP
8
PAUSE
1
FF
¡
POWER
1
2
3
456
7
8
DAILY
0
AUX
9
WEEKLY
REW
y
u
i
o
1
2
3
4
5
6
8
7
9
0
@
!
$
#
%
^
&
*
)
e
r
t
(
q
w
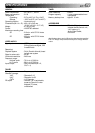
Installing Batteries
1 Open the battery compartment cover.
2 Insert 2 "AA"-size batteries (provided) in the direction
indicated under the battery cover.
3 Replace the cover.
How To Use
The remote control can operate most of your VCR's
functions.
1 Point the remote control toward the sensor window.
2 Press the appropriate operation button.
3 The maximum operating distance of the remote control
is about 8 m.
NOTES:
●
This remote control can also operate various brands of
TVs, Cable Boxes and DBS Receivers. For instructions,
੬
pg. 51 – 53.
●
If the remote control doesn't work properly, remove its
batteries, wait a short time, replace the batteries and then
try again.
The glow-in-the-dark buttons shown in white on the
illustration above are helpful when using the remote control
in darkened rooms.