T V G U I D E P L U S + S E T U P
1
9
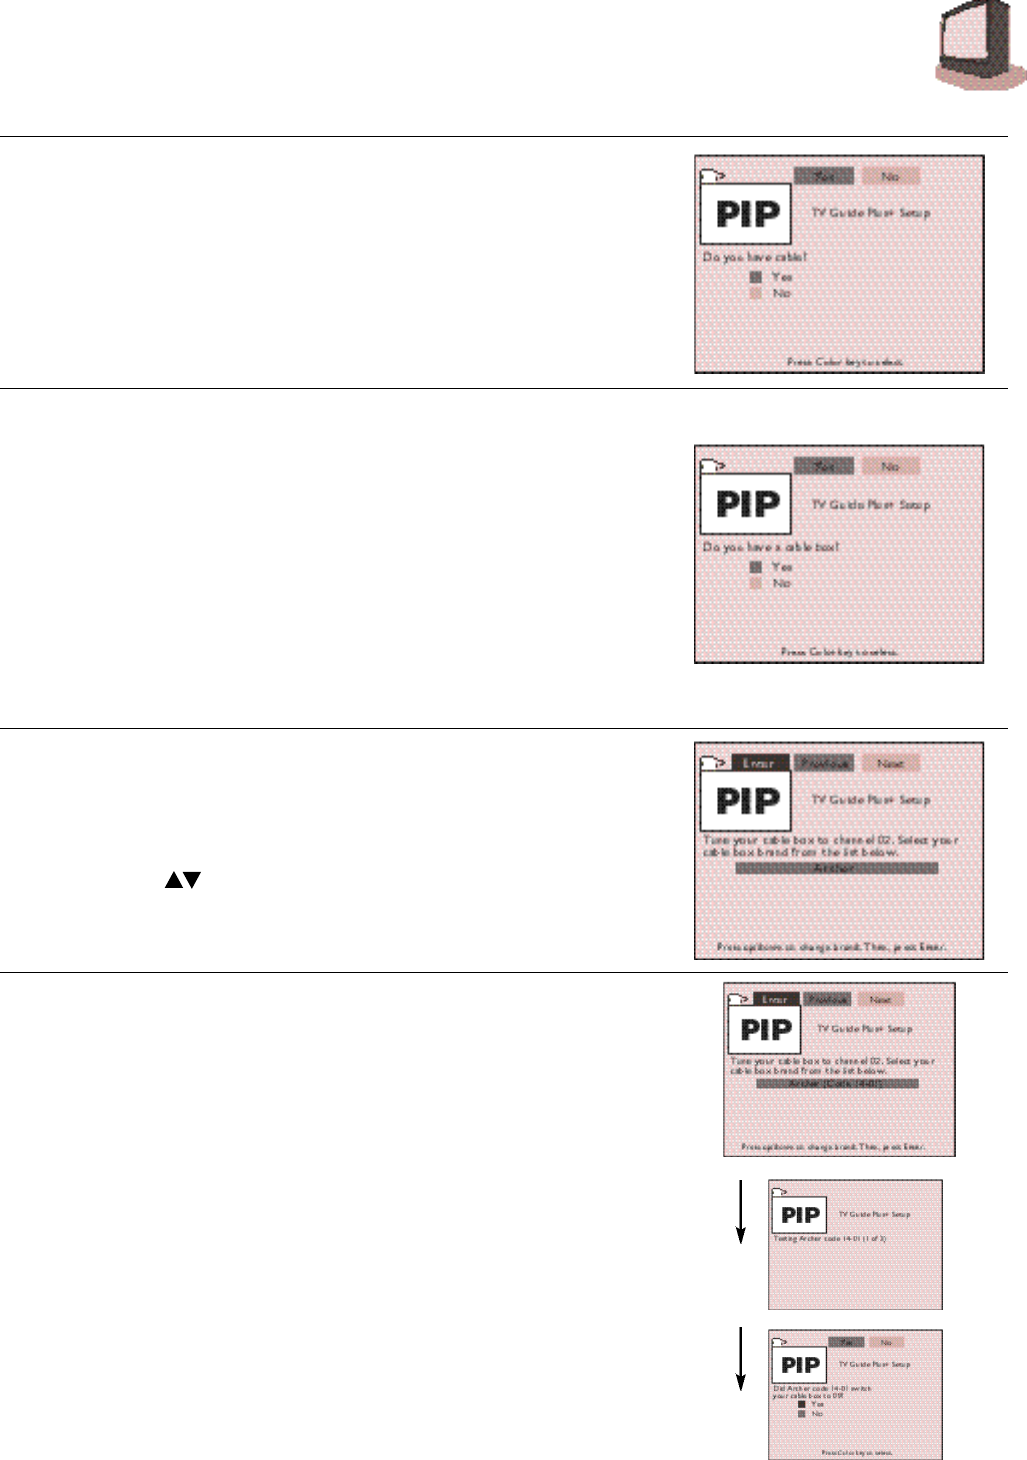
STEP 3
This screen appears once you tell TV Guide Plus+ your postal or zip code
information.
1. Press GREEN if you have cable, YELLOW if you do
not have cable.
(If you do not have cable, press YELLOW to skip to Step 8 on page 21.)
STEP 4
If you answer YES to having cable, a screen asking if you have a cable box
automatically appears.
1. Press GREEN if you have a cable box, YELLOW if you do
not have a cable box.
2. Leave the cable box ON. It should always be left ON.
SPECIAL CONDITIONS:
1. As indicated on page 8 (#2) of this guide, you must connect your cable box RF O u t
to TV RF Input in order for TV Guide Plus+ to download the data. Or, if you connect
as indicated on #3 of page 8, you must connect the video output of your cable box
to video input 1 of the TV in order for TV Guide Plus+ to download the data.
(If you do not have a cable box, press Yellow to skip to Step 8 on page 21.)
STEP 5
A screen telling you to turn your cable box to Channel 02 and to select your
cable box brand from the list appears. You can check for your cable box
brand on page 20.)
1. Press or GREEN or YELLOW to go to your brand.
2. Press the BLUE button once your brand appears.
STEP 6
(A screen telling you that TV Guide Plus+ is testing the codes for your brand will
appear. The cable box will switch to Channel 9 when the proper code is found.)
1. Press the GREEN button if your cable box switches to
Channel 9.
2. If your cable box does not switch to Channel 9, press
YELLOW TV will try another version of your code.
(If TV Guide Plus+ does not recognize your cable box after several tries, a scre e n
stating, “Cable box test failed… Please consult manual and try again” will appear.
You should ch e ck that the IR Mouse is in front of the cable box ’s IR r e c e i v e r
w i n d o w and try ag a i n . )
