46
Edit To Or
From Another
VCR
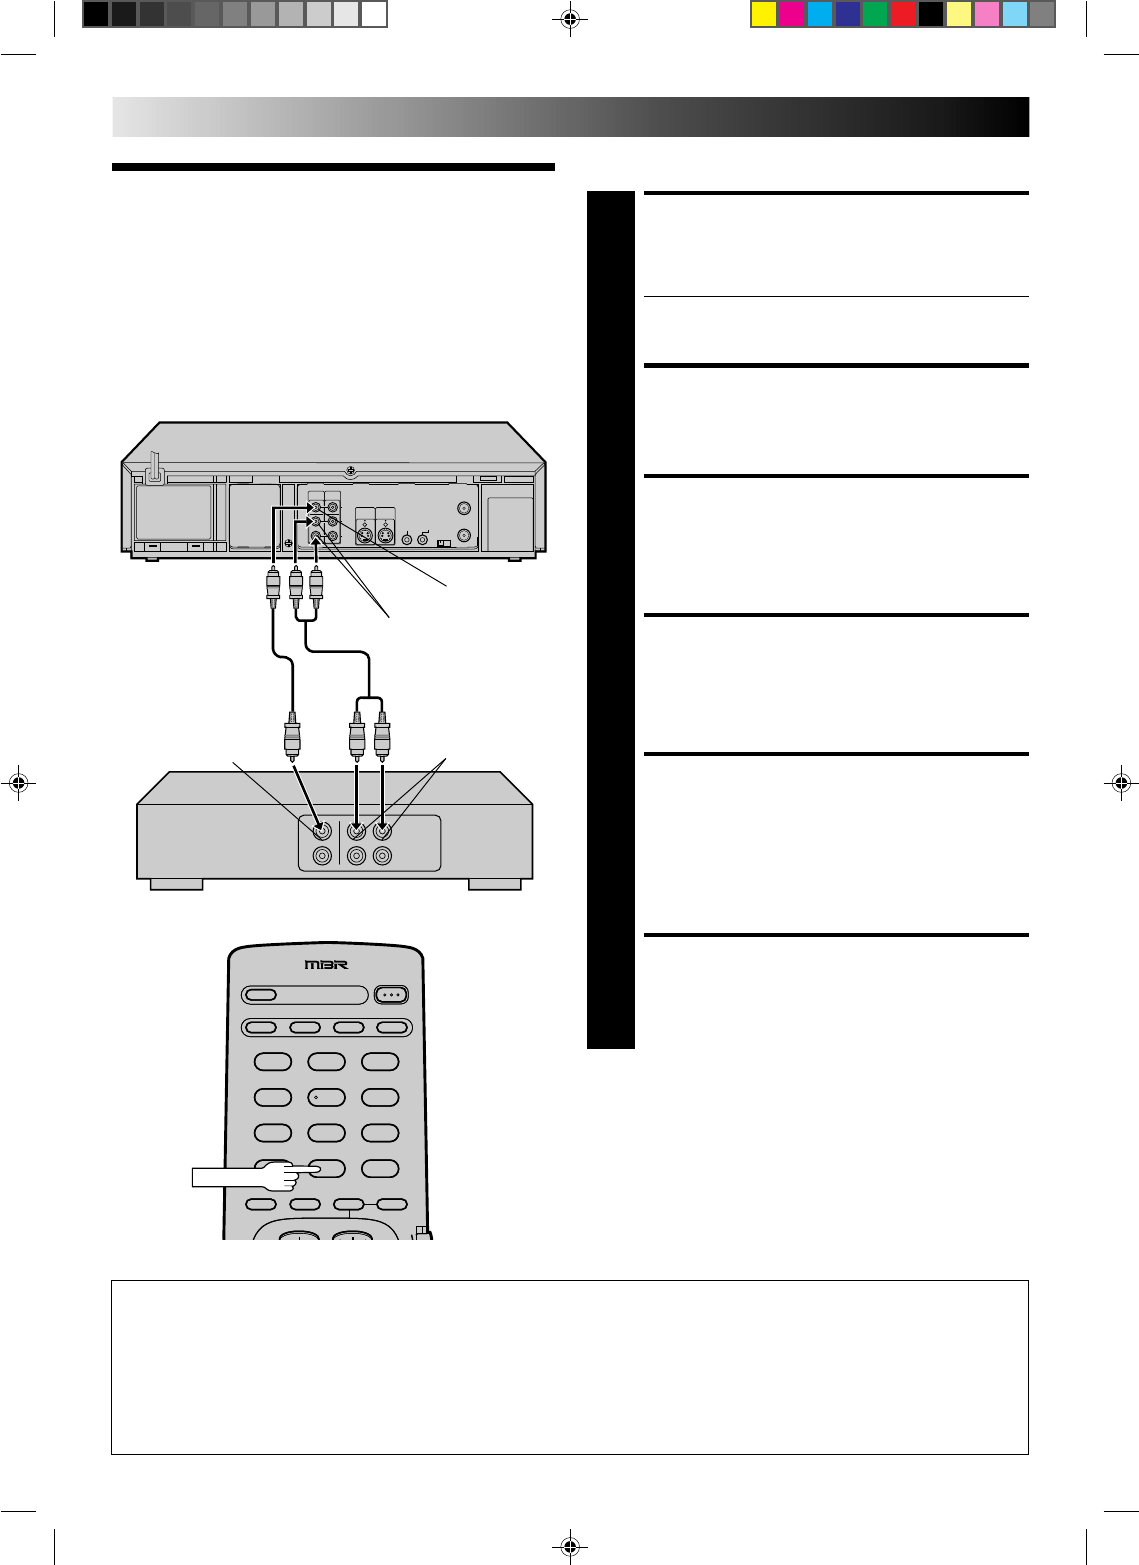
You can use your VCR as the player or the recorder.
MAKE CONNECTIONS
1
Connect an AV cable between the player’s VIDEO OUT
and AUDIO OUT connectors and the recorder’s VIDEO
IN and AUDIO IN connectors.
● When using your VCR as the recorder and a monaural
VCR as the player, connect the player’s AUDIO OUT
connector to the AUDIO IN L connector on the recorder.
LOAD CASSETTES
2
Insert the playback cassette into the player and the
cassette to be recorded on into the recorder.
ENGAGE TAPE DUBBING
MODE
3
Follow steps 4, 5, 9–11 from the "Edit From A
Camcorder" section (੬ pg. 44)
SET RECORDER’S INPUT
MODE
4
Set to AUX. With this VCR, press DIGIT key “0” (AU
appears on the front display panel in place of a channel
number).
START PLAYER
5
Set to its play mode.
NOTE:
If the player is equipped with a superimpose/OSD
disable feature then set "SUPERIMPOSE" to OFF before
pressing PLAY (
੬
pg. 29).
START RECORDER
6
Set to its record mode.
NOTE:
●
Connections made to the front panel VIDEO and AUDIO
inuts automatically override any rear panel VIDEO/AUDIO or
S-VHS input connections. If you wish to edit with another
machine connected to the rear input connectors, make sure
that there is nothing connected to the front connectors.
Player
Your VCR
EDITING (cont.)
VIDEO IN
AUDIO IN
Another VCR
Recorder
123
456
789
0
123
456
789
0
Advantages Of S-VHS VCRs
You can edit from VHS to S-VHS, from S-VHS to VHS, or
from S-VHS to S-VHS.
● From VHS to S-VHS (VIDEO-VIDEO connection): Record
VHS playback signals in the S-VHS mode. Although the
picture quality is inherently limited by that of the original,
the edited tape has better picture quality than those made
by VHS-to-VHS editing.
● From S-VHS to VHS (VIDEO-VIDEO connection): Because
the picture quality of the source material is very high, the
edited tape has better picture quality than those made by
VHS-to-VHS editing.
● From S-VHS to S-VHS (S-VIDEO connection): All signals
will be transferred without degradation.
VIDEO OUT
AUDIO OUT
DIGIT "0"


