58
Installation
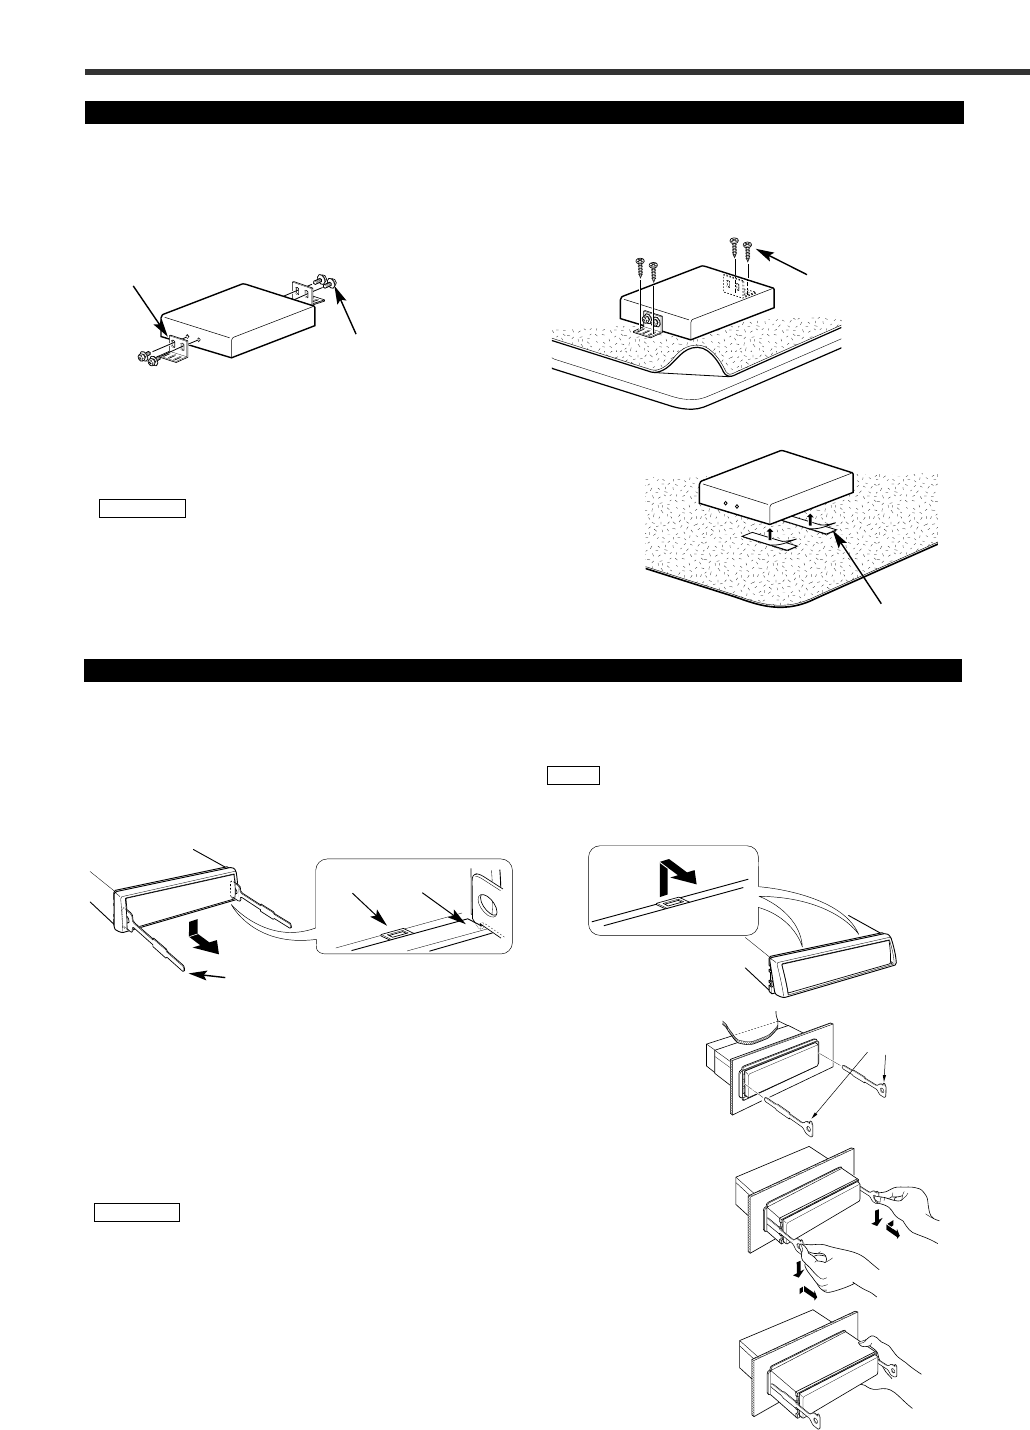
Removing Monitor Unit
Removing the Hard Rubber Frame
■
Catch
Lock
Accessory J
Catch facing up
Engage the catch pins on the removal tool and
remove the two locks on the lower level.
Lower the frame and pull it forward as shown in the
figure.
When the lower level is removed, remove the upper
two locations.
The frame can be removed from the top side in the
same manner.
NOTE
21
Refer to the section “Removing the Hard Rubber Frame” and then remove
the hard rubber frame.
Remove the Hex-head screw with integral washer (M4´6) on the back panel.
Insert the two removal tools deeply into the slots on each side, as shown.
Lower the removal tool toward the bottom, and pull out the unit halfway
while pressing towards the inside.
Be careful to avoid injury from the catch pins on the removal tool.
Pull the unit all the way out with your hands, being careful not to drop it.
5
2 CAUTION
4
3
2
1
Removing the Unit
■
Peel the protective strips off of the velcro strips, attach them to the bottom
of the hideaway unit, and secure to the pile carpet.
Please do not install the unit near the dashboard, the rear tray, or other
important components. Doing so could lead to injury or accident should
the unit come off due to a shock and strike a person or an important
component.
Tapping screws should be used for mounting. (Attachment with velcro
strips, although easy, can come off with a shock.)
2CAUTION
Attach the installation brackets to the sides of the
hideaway unit using the sems bolts (M4 ´ 8 mm).
Use the tapping screw (ø4 ´ 16 mm) to
secure the hideaway unit to the audio board.
2
1
Securing to audio board
■
Securing to pile carpet
■
Sems bolts (M4 ´ 8 mm)
(Accessory M)
(ø4 ´ 16 mm) (Accessory N)
Velcro strips (Accessory L)
Installation for Receiver unit
Installation brackets
(Accessory K)


