


32
206-4234
Custom Master TV Setup (Cont.)
2. Set Installer Menu items.
This step provides specic instruction only on the Installer Menu items
that should be set on a Master TV. Refer to pages 21 to 30 for detailed
information on all Installer Menu items.
a) Use the Installer Remote to access the PTC Installer Menu (see
“Accessing the Installer Menu” on page 21 for further information).
The next step depends on whether the EZ-Manager Wizard appeared
when you turned ON the TV:
• If the wizard did appear, the TV is in a factory default state, and
you can proceed to set Installer Menu items. Go to step (c).
• If the wizard did not appear, go to step (b).
b) Set Installer Menu item 117 FACT DEFAULT to 1 and press OK on
the Installer Remote.
This clears all Installer Menu custom settings, channel lineup, etc. and
restores the factory default settings. The value will change back to 0
after the PTC has been restored to factory default condition. This step
ensures that the TV Channel Memory will be the active channel lineup.
c) Set Installer Menu item 003 BAND/AFC, as appropriate.
• Broadcast: Set to 0. • HRC: Set to 2.
• CATV: Set to 1 (default). • IRC: Set to 3.
(Continued on next page)
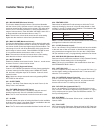
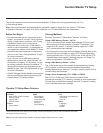
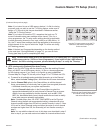
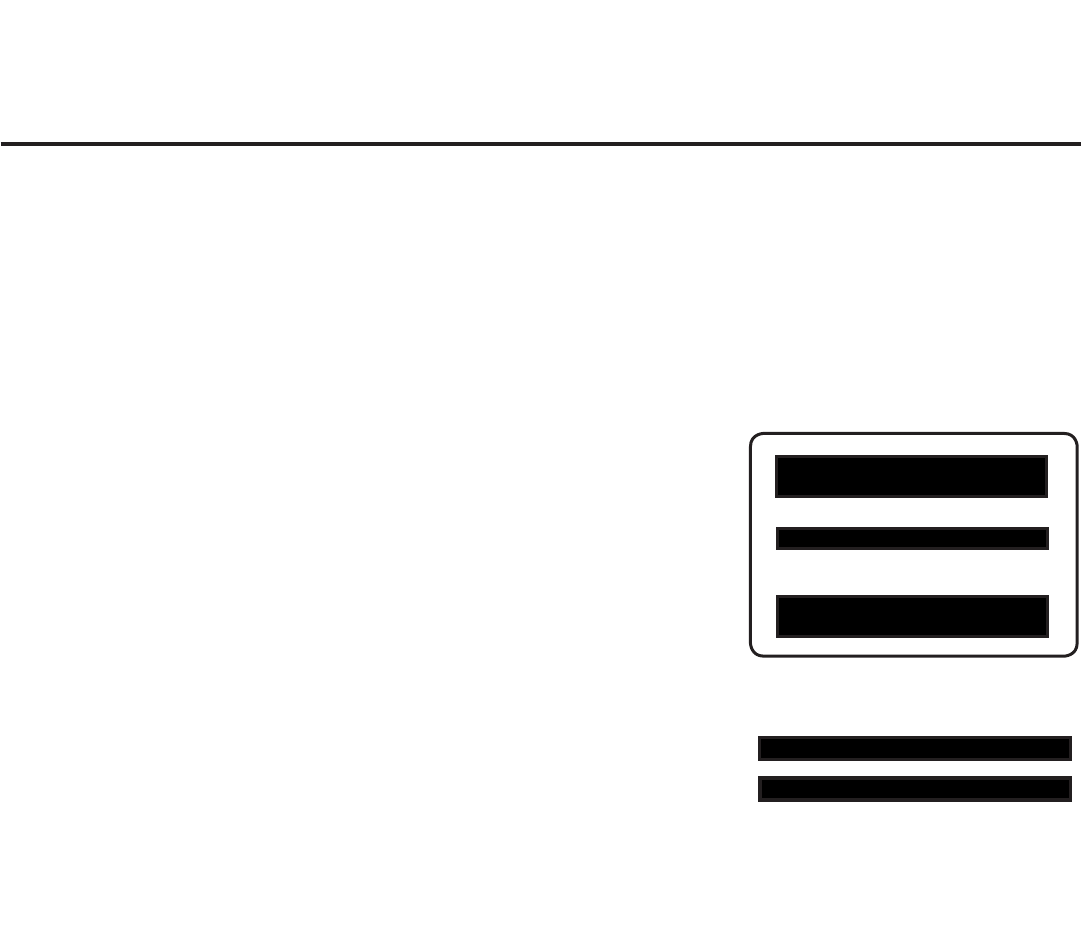
Typical Installer Menu
Adjust the values for these
Installer Menu items, as required.
xxLT777H PTC INSTALLER MENU
CPU-CTV
000 INSTALLER SEQ 000
UPN 000-000-000-000 ASIC D279
PTC V1.01.026 CPU V3.45.00
117 FACT DEFAULT 000
003 BAND/AFC 001
Custom Master TV Setup Procedure
1. Turn ON the TV.
If the EZ-Manager Wizard appears on the screen when you turn ON the TV, use the arrow
keys on the Installer Remote to select Exit from the Welcome screen and press OK. In the
conrmation pop-up window, select OK, and then press OK once more on the Installer
Remote to exit the wizard.
d) Set any other Installer Menu items that affect your TV programming network
to the required conguration. For example, enable/disable Aux inputs, set a
Start Channel, etc.
If you intend to use a USB memory device / .tlx le for cloning purposes, you
may also congure selected settings in the IP Environment Menu (accessible
from the Installer Menu). See also “Cloning Methods” on the previous page
and “IP Environment Setup” on pages 56 to 63 for further information.
e) After you have adjusted all Installer Menu item settings as required, press OK
once on the Installer Remote to save your changes; then, press OK again to
exit the menu.
3. Set up TV features.
On-screen setup menus control the features of the TV. Press MENU SETTINGS
on the Installer Remote to access the TV setup menus, and then set Channel,
Picture, Audio, Time, etc. options to the desired configurations. See “Clonable TV
Setup Menu Features” list on previous page and also notes on the following page.