22
Connecting with a Component Video
(Y Pb Pr) cable
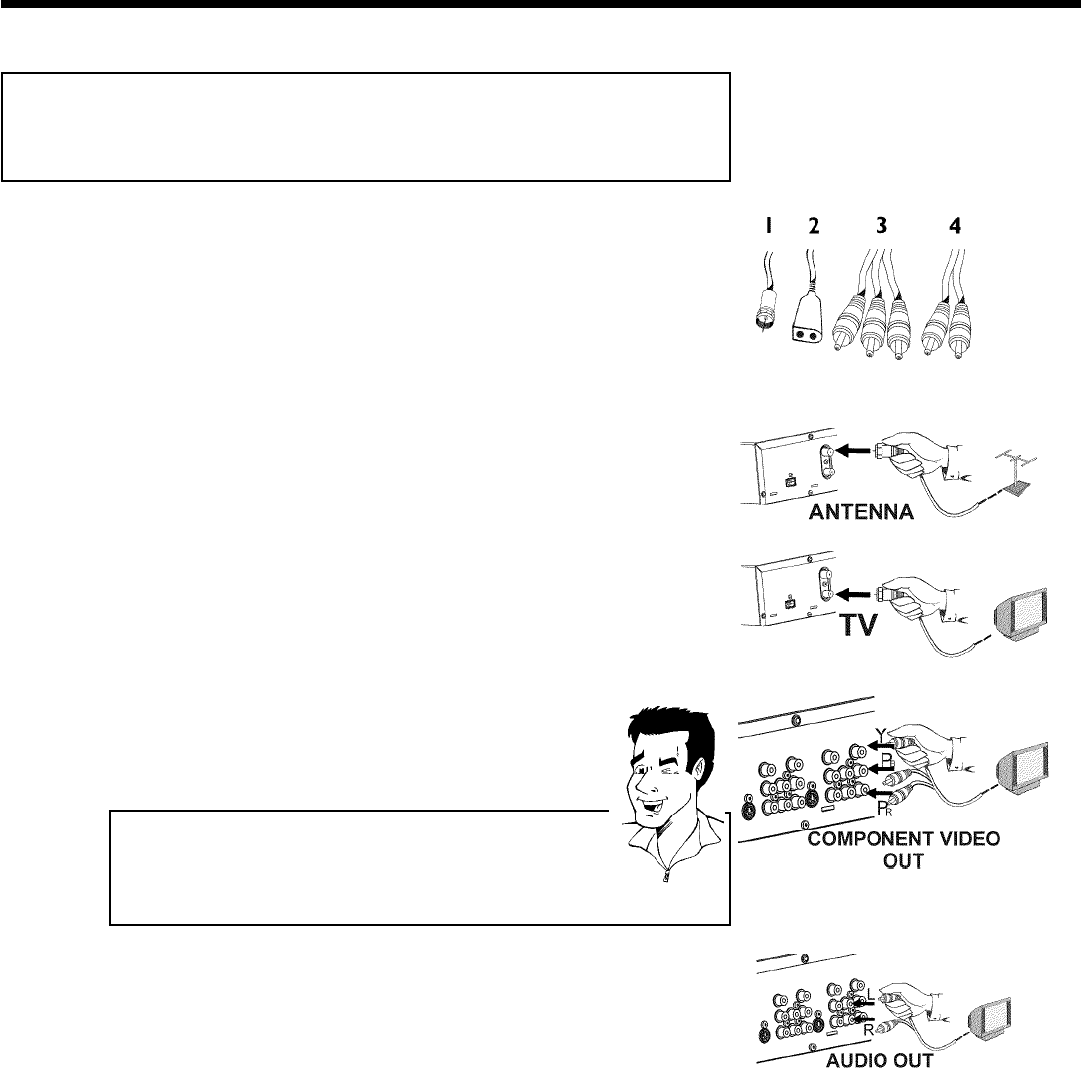
Have the following cables ready:
an antenna cable (1 supplied), a power cable (2 supplied), a Component Video (Y PB PR) cable
(3, red, green, blue jack) or a corresponding video-compatible cinch cable, an audio cable (4
supplied red/white jack).
1
Remove the antenna or cable TV signal from your TV. Connect it
to the ANTENNA jack at the bck of the DVD recorder.
2
Insert one end of the supplied antena cable into the TV plug at
the back of the DVD recorder and the other end into the
antenna input jack at the back of the TV.
3
Use the Component Video (Y PB PR) cable and connect one end
to the red, blue, green OUT COMPONENT VIDEO jacks at the
back of the DVD recorder and the other end to the Component
Video In jacks of the TV.
Please note the color order
The colors of the jacks on the DVD recorder must match those on the
TV (red-red/blue-blue/green-green). If they are not matched properly,
this could cause the color of the picture to be reversed or there could
be no picture at all.
Tip
4
Use the supplied audio cable and plug one end into the OUT
AUDIO LR jack at the back of the DVD Recorder (next to
OUT COMPONENT VIDEO ) and the other into the red/white
Audio In jacks of the TV (usually called Audio in', 'AV in'. Please
see your TV's owner's manual).
5
Switch on the TV.
Set the TV to the Component Video channel
If necessary, see the operating instructions for your TV. Or, go
to channel zero on your TV, then keep changing channels down
until you see the DVD Recorder screens (when the Recorder is
on). This is not channel 3 or 4 as it would be if you used only
the cable/antenna connection.
Connecting the DVD recorder


