HD Receiver’s Menu System
Page 7-13
Code
More than one code may be assigned to your brand of VCR. Try each of the codes by using the
and keys to step through each code. Alternate between this procedure and testing the code.
Test (Record/Stop)
The testing function allows you to verify that the specified code will control your VCR. To run
the test, the VCR control cable must be properly attached (see “Setting Up Your HD Receiver” in
Chapter 2), a recordable tape must be in the VCR, and the VCR must be turned on.
Use the button on the front panel of the HD receiver (instead of the remote control) when testing
the codes, because signals coming from the remote control at the same time as signals coming
from the VCR control cable could give unreliable test results.
Be sure to test both the Record and the Stop commands, which are necessary for successful taping
capability. If either Record or Stop fails to function, try other codes associated with your VCR
brand. If you are unsuccessful in the test process after trying all available codes, recheck your
VCR control cable connections and IR emitter placement.
When a scheduled recording begins or a command to the HD receiver to start a recording, the
user must manually switch to the SD outputs (480i). The HD output (1080i) will turn off. To view
the picture during the recording time, change the input on your TV to the SD input.
Scheduler
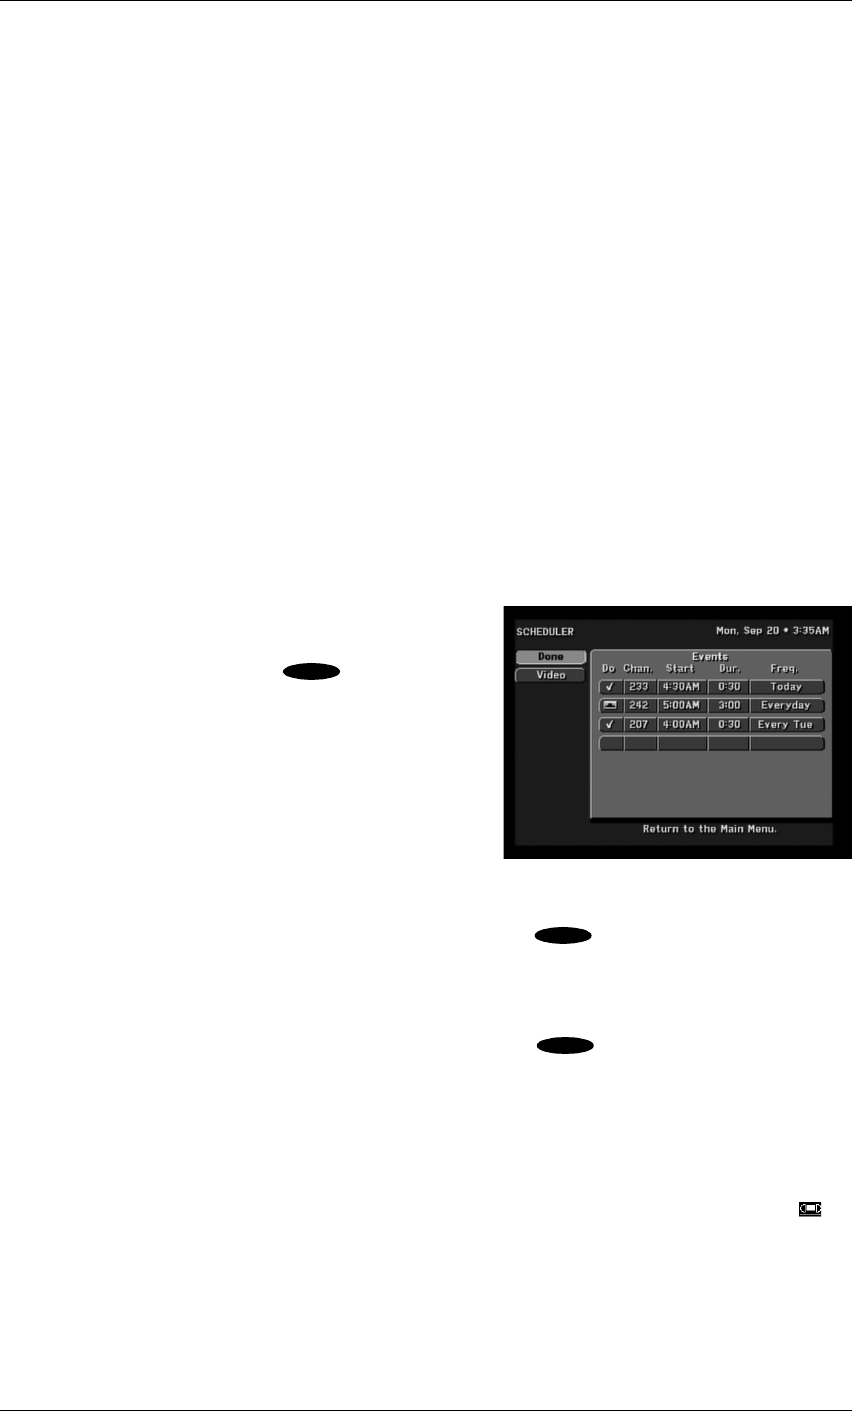
Highlighting the Scheduler button on the MAIN
MENU screen and pressing the key on the
remote control will display the SCHEDULER screen
shown.
On the upper right is displayed the current Day, Date,
and Time.
On the left are the buttons for Done and Video
explained immediately below:
Done
Highlighting the Done button on the screen and pressing the key on the remote control
causes an exit from the SCHEDULER screen and a return to the MAIN MENU screen.
Video
Highlighting the Video button on the screen and pressing the key on the remote control
will return you to the last program you were viewing.
Event Scheduling Options
On the right is the Events panel, which displays up to seven rows of events. The column headings
on this panel are Do, Chan. (Channel), Start, Dur. (Duration), and Freq. (Frequency). The Do
column permits two entries: a Check Mark (
✓) for Viewing only and a Videotape symbol ( )
for Taping. The Chan. (Channel) column permits an entry of a desired channel. The Start column
permits entry of the Start Time, in hours and minutes, of a scheduled event. The Dur. (Duration)
column permits entry of the duration, in hours and minutes, of the event. The Freq. (Frequency)
column displays when or how often the event occurs: Today, Tomorrow, Every Mon (Tue and so
on), Everyday, Mon–Fri, or “/” to specify an exact date.
The SCHEDULER screen
SELECT
SELECT
