


50
51
NetCommand
®
Controlled Recordings
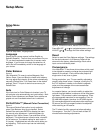
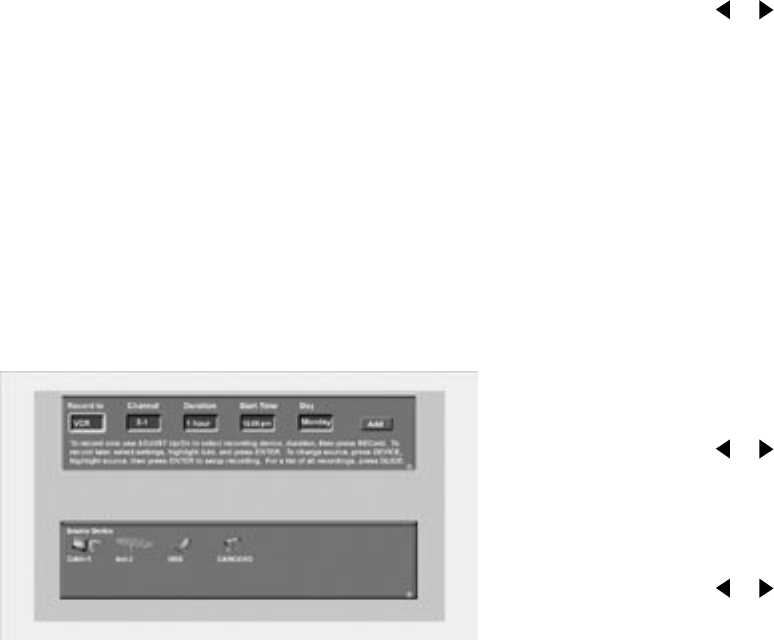
Record To Setup
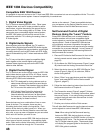
Figure 8
Your TV is able to start and stop recordings
automatically and send the signals from one external
playback device to another external recording device.
It is also able to convert digital channels and IEEE 1394
device signals to analog signals that can be recorded
on NetCommand compatible analog VHS and S-VHS
VCRs. You cannot record from an analog channel or
device or a VHS or S-VHS VCR to a digital recording
device such as a DVCR or A/V Disc.
You can schedule the recording to take place at a
later time and program the recording duration for a
minimum of 30 minutes and a maximum of 6 hours (in
30 minute increments). The default is 1 hour.
When a digital recording is being made, the TV will
direct the signals to the recording device using the
IEEE 1394 cable. When an analog recording is being
made, the TV will direct signals to the recording device.
During a recording, the TV can be powered Off. If the
TV is powered On, it must be tuned to the source that
is being recorded.
Recording Now
Can be used when viewing Antenna 1 or 2, an IEEE
1394 device, or a non-recording traditional device.
To initiate recording now:
1. Press REC (record) on the TV remote.
2. Press DEVICE on the remote control to move to the
Source Device section.
3. Press ADJUST or to select the source device
you will record from.
4. Press ENTER to confirm selection and return to the
“Record to” section.
5. In the “Record to” section, review the destination
device (VCR) and duration. Change if necessary.
6. Press REC a second time to initiate recording.
Time-Delayed Recording
To initiate a time-delayed recording:
1. Press REC (record) on the TV remote.
2. Press DEVICE on the remote control to move to the
Source Device section.
3. Press ADJUST or to select the source device
you will record from.
4. Press ENTER to confirm your Record from selection
and move to the Record to section.
5. Press ADJUST or to select the Record to
device, duration time, start time (press ENTER after
selecting hour, minutes and AM or PM to set the
time) and day. For devices that can select channels,
select the channel.
6. Select Add and press ENTER to add the recording
to the record list. If your selection is successful, a
confirmation message will be displayed. If you pick
overlapping times, day(s), or destination devices,
you will see a message stating there is a conflict.
7. To exit, press HOME after all recordings have been
added.
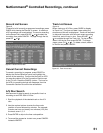
Figure 8. Record to screen
Copy-Protected Material
When attempting to record copy-protected material, the
Record functions of the NetCommand and IEEE 1394
systems may be prevented or stopped. If you have a
recording that is tagged “Record Once”, NetCommand
will change the tag to “Record No More”.